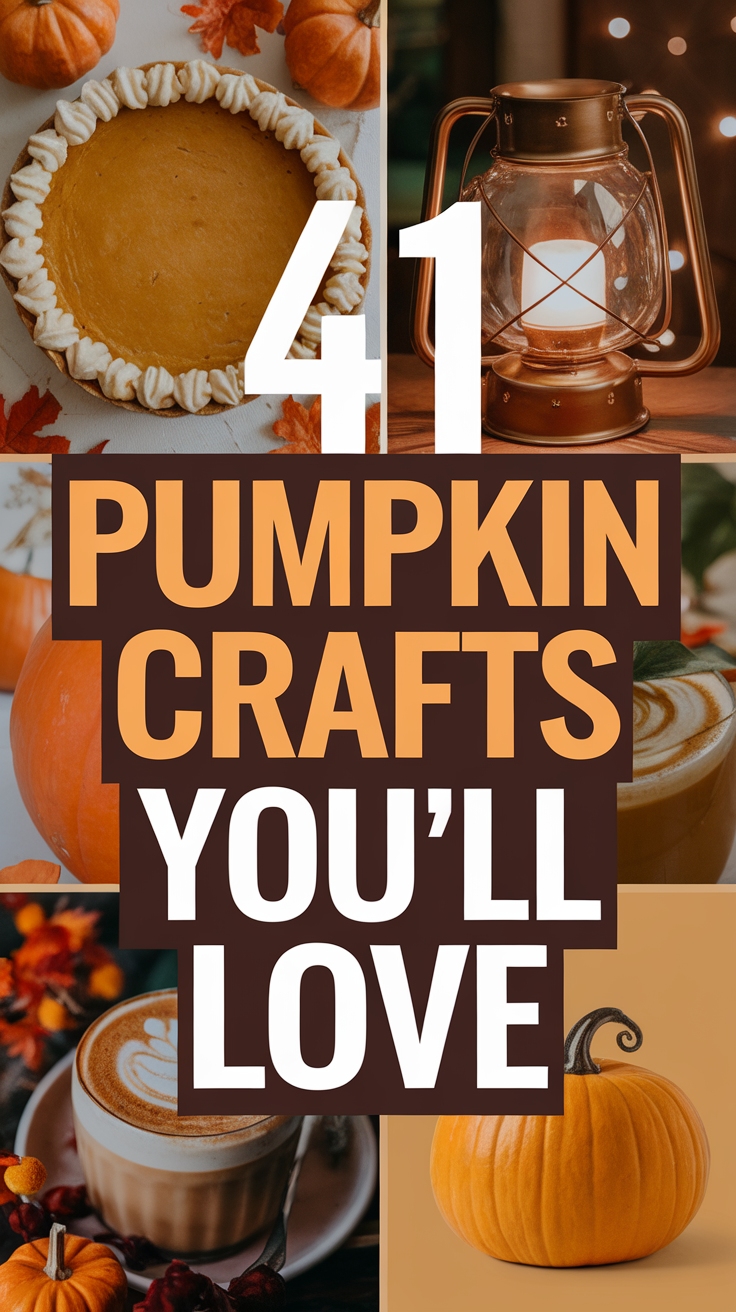
41 Perfect Pumpkin Crafts
Did you know that pumpkin crafts can spark creativity in both kids and adults alike? In this blog post, we’ll explore 41 perfect pumpkin crafts that will help you celebrate the fall season with style and flair. From whimsical handprint crafts to charming decorative pieces, you’ll find a plethora of delightful ideas to inspire your next crafting session!
Shop Our Must-Haves


1. Fun Pumpkin Handprint Craft for Kids
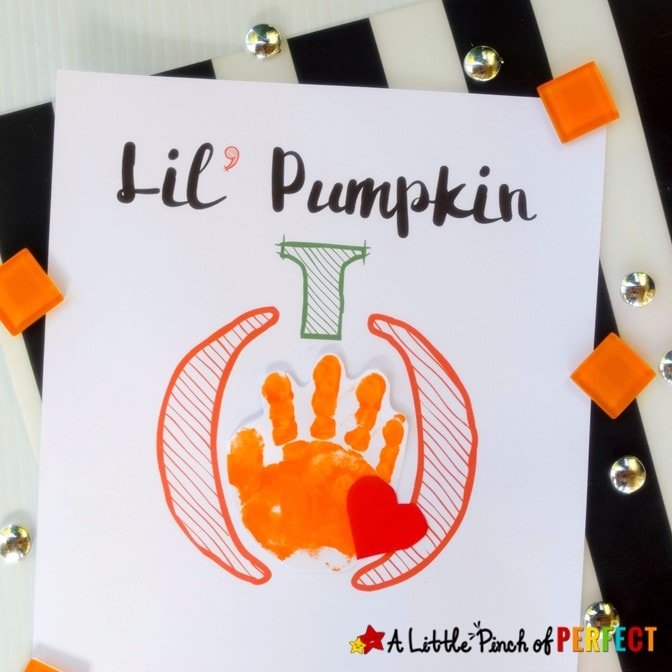
Create a fun pumpkin handprint craft that’s perfect for kids! Start by sketching out a pumpkin shape on a piece of paper. Don’t worry if you can’t draw a perfect pumpkin; a simple oval will do! Place your child’s palm in the center for a colorful handprint.
If you have orange paint, dip their hand and press it onto the pumpkin outline. Once dried, let them decorate with markers or crayons, adding faces, leaves, and even a stem. No paint? Trace their hand and let them color it in however they like. This craft not only encourages creativity but also creates a cherished keepsake.
2. Charming Stacked Pumpkin Planter Ideas
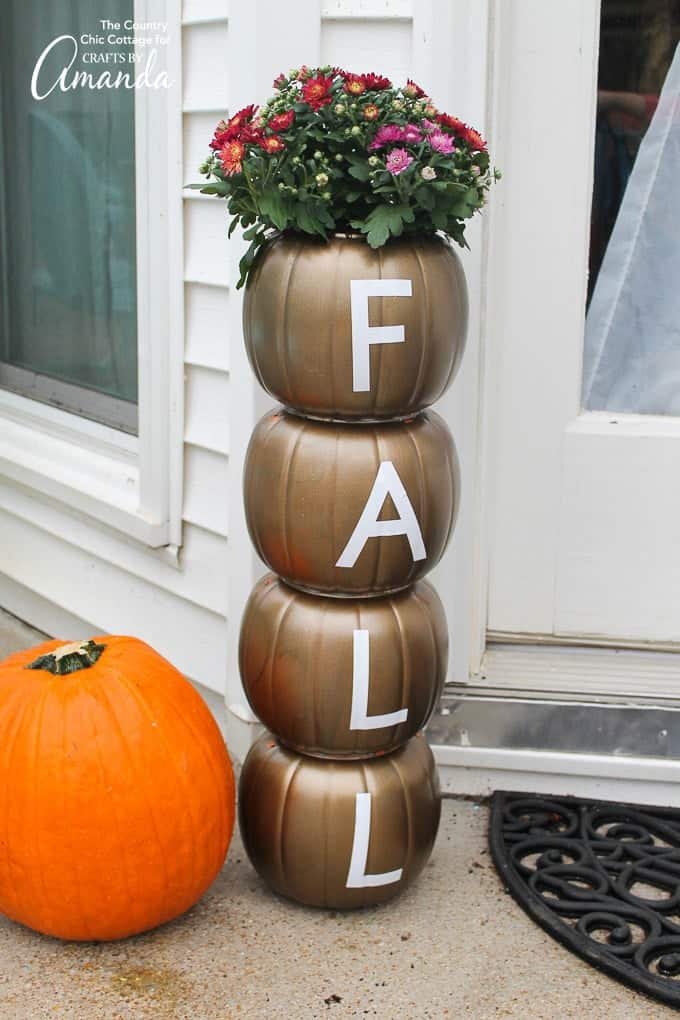
You can create charming stacked pumpkin planters that will elevate your fall decor in no time. Begin by selecting three to five pumpkins of varying sizes and shapes for optimal stackability.
Before you get started, decide on a theme or message such as “Welcome” or “Fall.” This will guide your choice of colors and materials. Use waterproof paint for lettering or stencils, ensuring durability against the elements.
Finally, fill the top pumpkin with seasonal flowers or foliage, and consider using moss or hay to enhance the rustic look. Don’t forget to use a drill to create drainage holes, keeping your plants healthy!
3. Create a Fun Mesh Pumpkin Wreath

You can easily elevate your fall decor by crafting a fun mesh pumpkin wreath. This unique take on traditional wreaths uses vibrant mesh fabric to create eye-catching textures and colors, perfect for livening up your front door.
Start by gathering your materials: orange and green mesh, a wreath frame, scissors, and a hot glue gun. Cut the mesh into strips, then fold and twist them onto the wreath frame to form pumpkin shapes, combining different layers for added depth.
To finish, embellish your wreath with sparkly accents or small artificial pumpkins. This DIY project not only showcases your creativity but also brings a festive touch to your home!
4. Create Kusama-Inspired Pumpkin Art
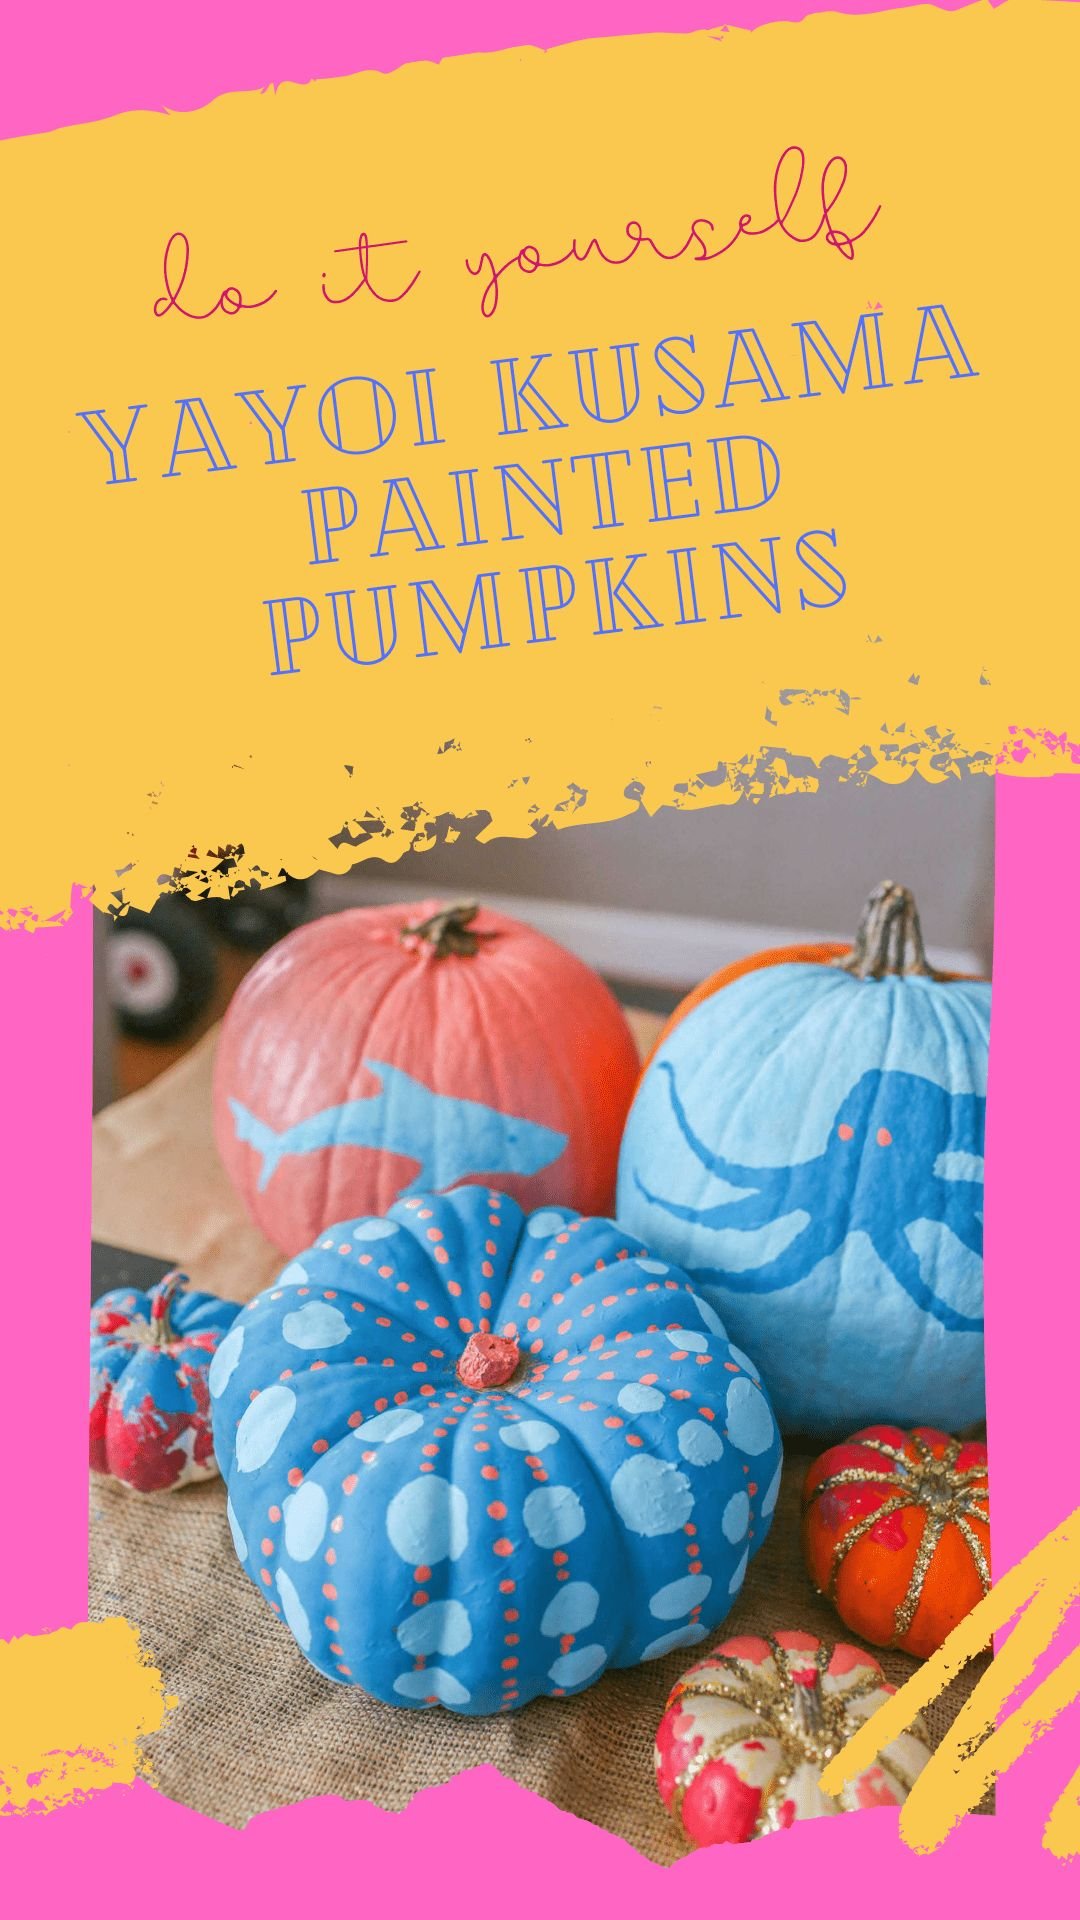
Transform your pumpkins into vibrant masterpieces inspired by Yayoi Kusama! Her signature style, characterized by an explosion of polka dots and bright colors, makes pumpkins the perfect canvas for creativity.
Start by gathering your supplies: acrylic paints, dotting tools, and a bunch of varied-sized pumpkins. Choose a base color for your pumpkin and paint that first, allowing it to dry. Once dry, use contrasting colors to create polka dots or other patterns inspired by Kusama’s iconic works.
Feel free to experiment with different shapes and sizes. You could even incorporate other art styles by customers of your favorite artists. Just remember to have fun and let your imagination run wild!
5. Create Fun Pumpkin Pie Playdough
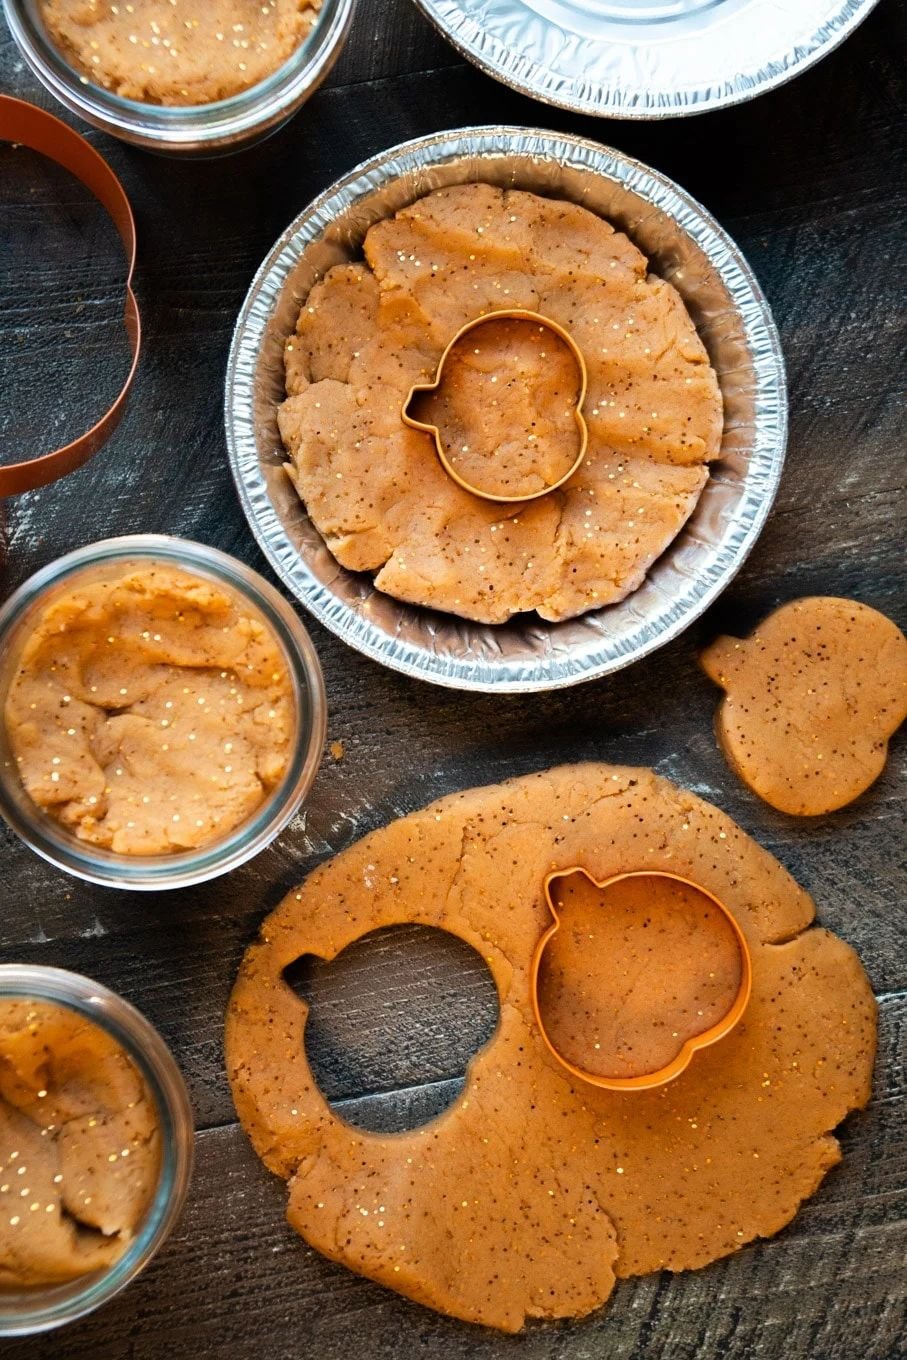
You can create Fun Pumpkin Pie Playdough that not only entertains your kids but also evokes the delightful essence of fall! This non-edible craft is perfect for sensory play.
Here’s how to make it:
- Ingredients: 2 cups flour, 1 cup salt, 2 tablespoons vegetable oil, 2 tablespoons cream of tartar, 2 tablespoons cinnamon, 1 tablespoon nutmeg, 2 cups water.
- Instructions: Mix all dry ingredients in a pot, then add the water and oil. Stir over medium heat until it thickens. Once cool, knead until smooth.
Let your kids mold and shape this aromatic playdough into pumpkin pies, leaves, or fun fall shapes! It’s an excellent way to engage their creativity and keep them busy while you enjoy a cozy afternoon at home.
6. Creative Marbling Techniques for Pumpkins
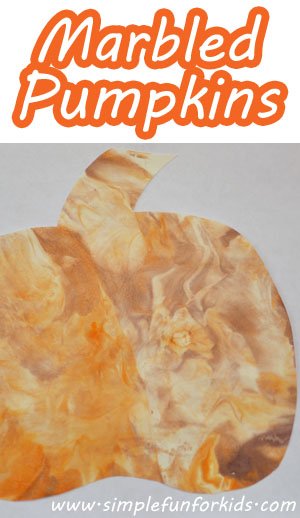
You can create stunning marbled pumpkins using shaving cream and washable tempera paint. This technique isn’t just for artists; it’s also an excellent way to relax and unleash your creativity!
Here’s how to do it:
- Prepare your work area: Use a tray to contain any mess.
- Spread shaving cream: Apply a generous layer on the tray.
- Add paint: Drizzle your favorite colors of washable tempera paint on top of the shaving cream.
- Create the marbled effect: Use a stick or a toothpick to gently swirl the paint without overmixing.
For pumpkin silhouettes, make sure to cut your designs before you start marbling to keep your edges clean. Enjoy this sensory craft—and don’t forget to show off your unique pumpkins!
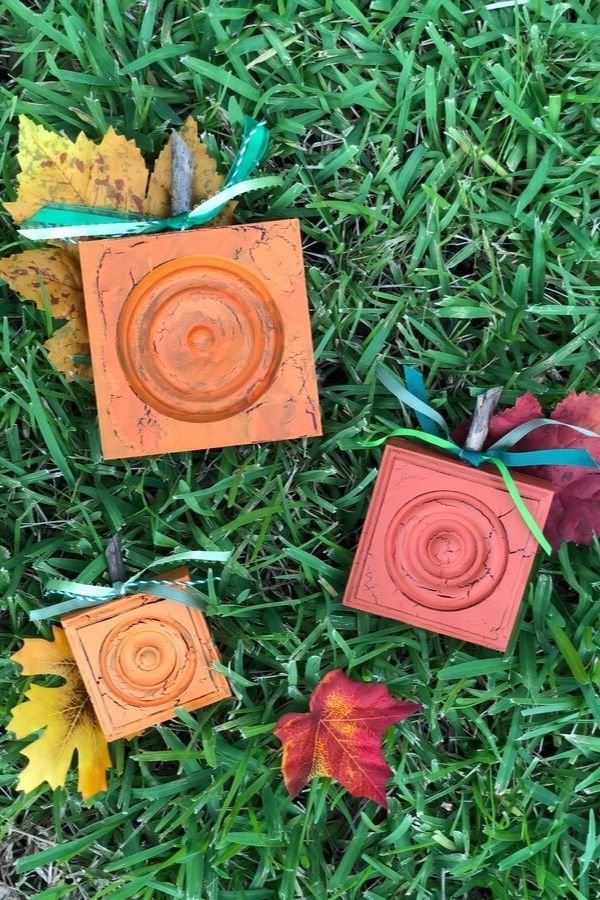
7. Upcycle Canning Rings into Pumpkins
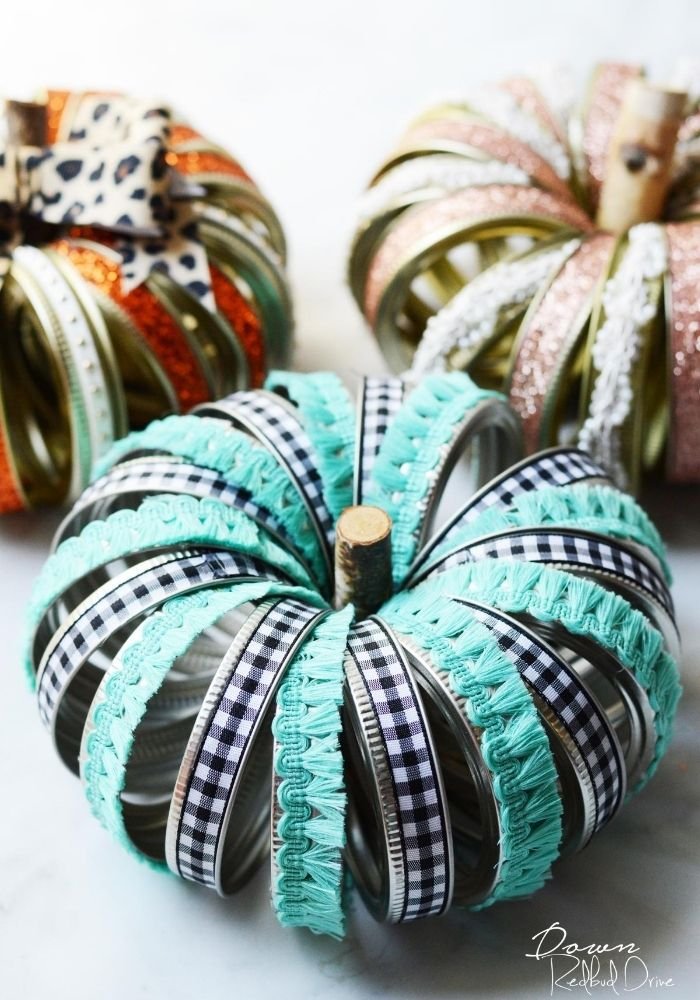
Transform your unused canning rings into delightful pumpkins that add charm to your fall decor. This upcycle project is not only environmentally friendly but also a potential money-maker if you’re looking to sell your crafts!
Gather your supplies: you’ll need canning rings, fabric (in fall colors), twine, and hot glue. Start by wrapping the fabric around the rings, securing the ends with glue. Layer multiple rings to create varying sizes of pumpkins.
Finish by tying a piece of twine around the top to mimic a pumpkin stem. These adorable, handcrafted pumpkins can be lined on your mantle or sold at local craft fairs, making them a fun and profitable project for the season!
8. Adorable Pumpkin Crafts with Popsicle Sticks
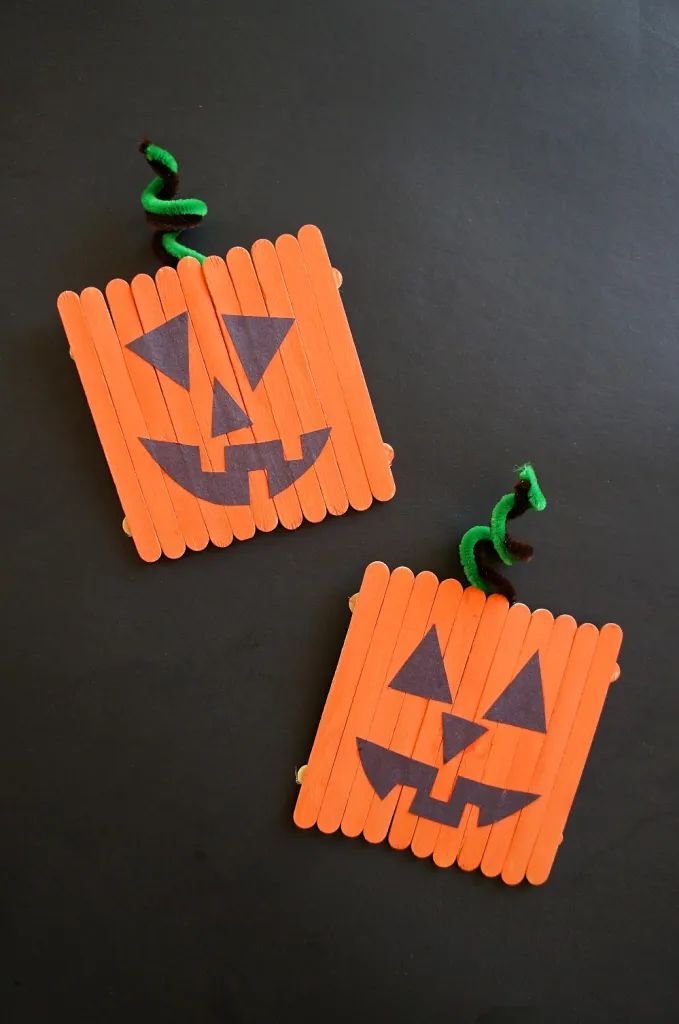
You can create adorable pumpkin crafts using simple popsicle sticks, perfect for adding a seasonal touch to your home décor. These crafts are not only fun but also a fantastic way to get the kids involved.
To make pumpkin decorations, gather orange and green paint, popsicle sticks, and a glue gun. Paint the sticks in vibrant orange and create pumpkin shapes by gluing pieces together. Use green sticks or paper for leaves and vines to give your pumpkins a whimsical touch.
For a practical twist, turn these creations into magnets. Just attach a small magnet on the back of your painted popsicle stick pumpkins, and you can display them on your fridge. This craft is not only visually appealing but also functional!
9. Creative Pumpkin Topiary Craft Ideas
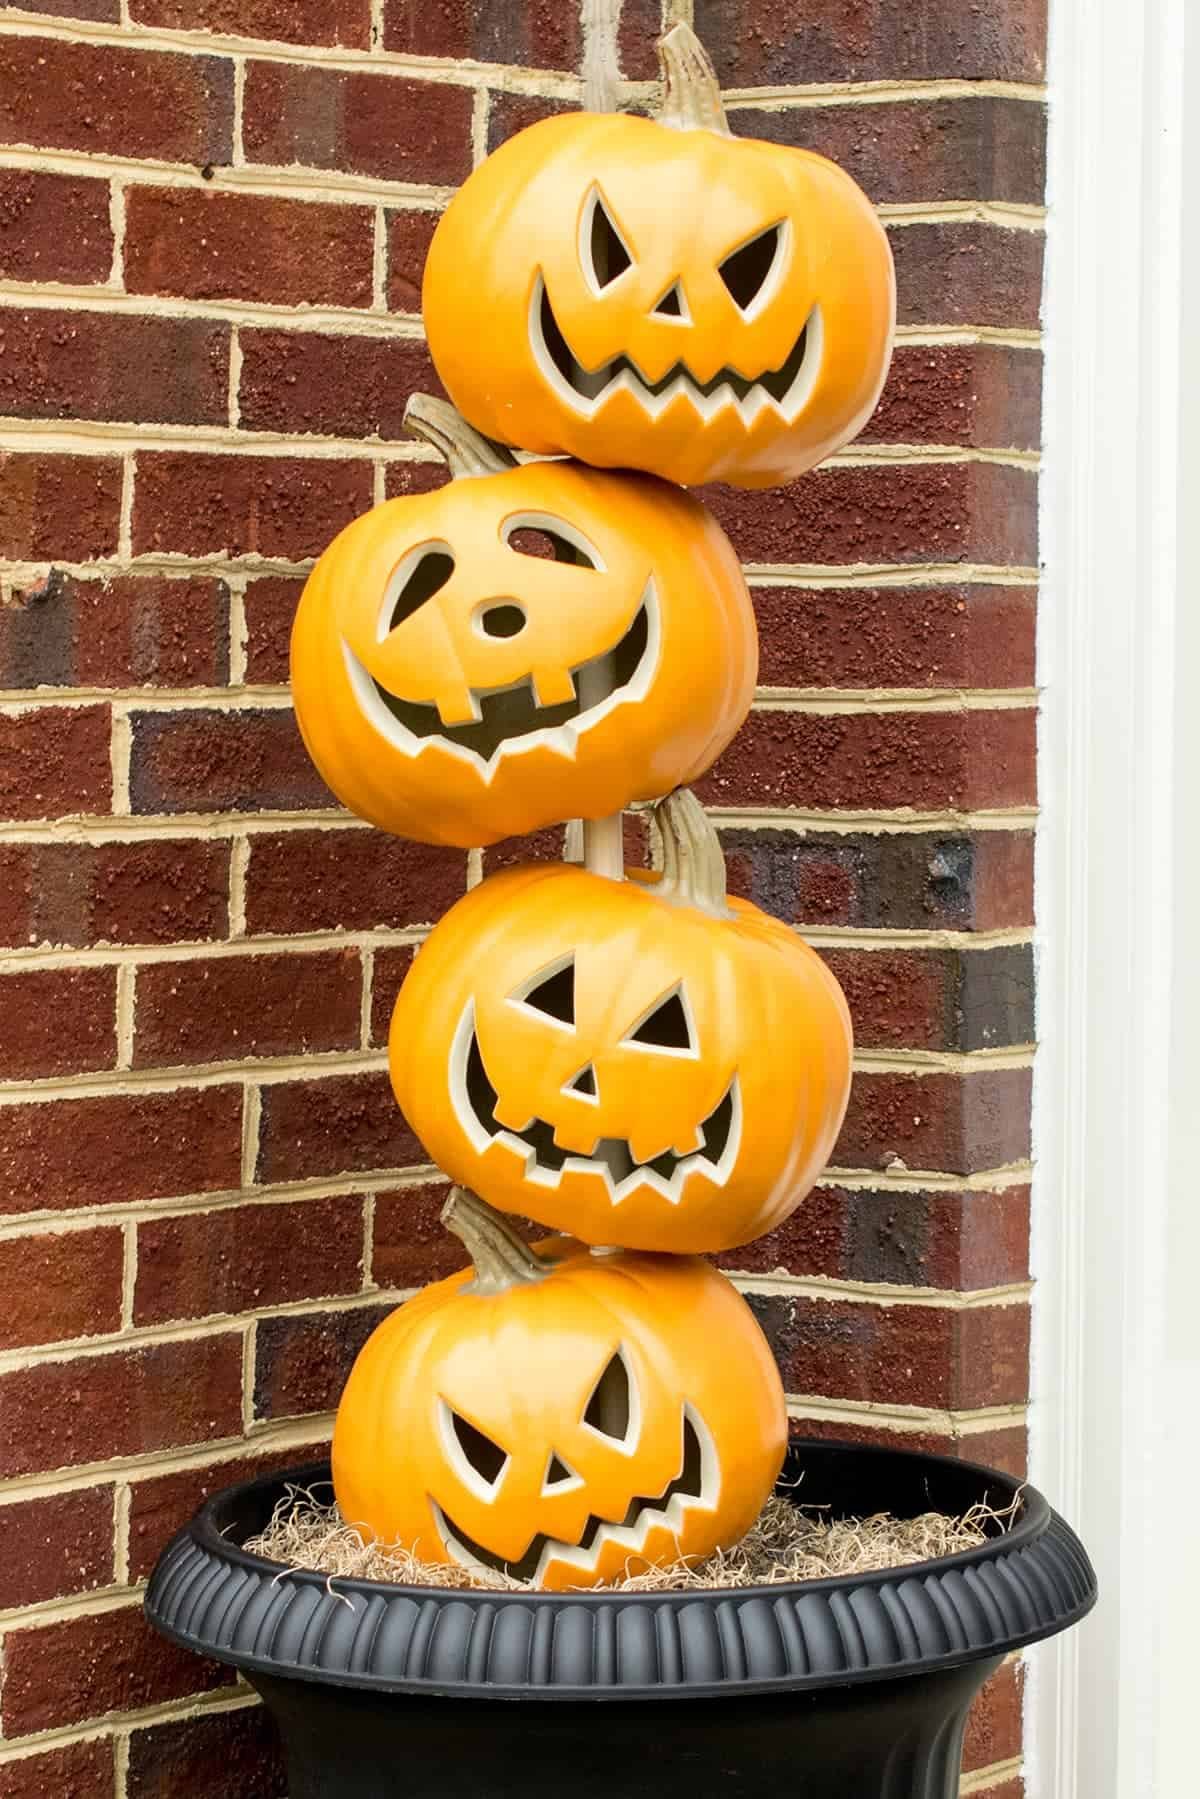
You can create stunning pumpkin topiaries that not only wow your guests but also add unique character to your autumn décor. Begin by selecting varied sizes of pumpkins—this adds visual interest to your display.
First, stack the pumpkins, ensuring the largest is on the bottom for stability. Use a skewer or dowel to secure the pumpkins together. For a touch of whimsy, consider painting fun faces or using stickers on the gourds to suit the occasion, whether spooky or cheerful.
After assembling, allow the topiary to rest for a couple of days in a sheltered area. This ensures that the structure remains stable. Enjoy your creative masterpiece throughout the fall season!
10. Charming Doily Pumpkins for Home Decor
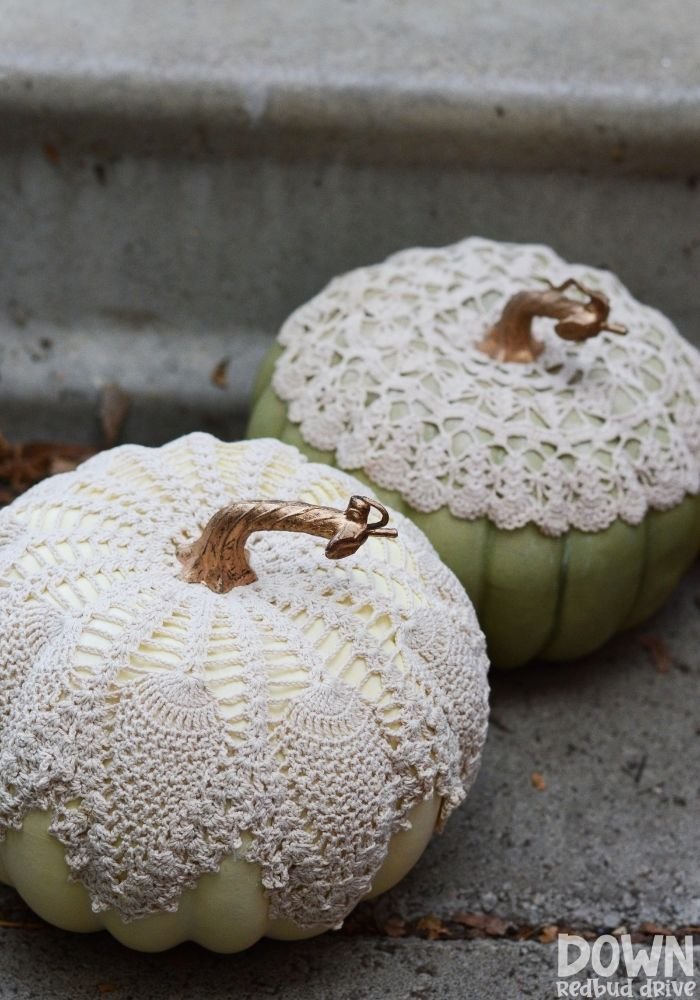
You can easily craft charming doily pumpkins that add a touch of elegance to your home decor. All you need are some foam pumpkins and lace or fabric doilies.
First, choose a color palette that complements your space. You can keep everything white for a classic look, or mix in some vibrant colors for a pop of fun. Simply wrap the doilies around the pumpkins and secure them with glue for a cohesive design.
You can shop for affordable doilies at local craft stores or online. This DIY project not only elevates your seasonal decor but also reflects your personal style. Enjoy the beauty of these quaint additions in your home!
11. Charming Burlap Pumpkin Wreath Tutorial
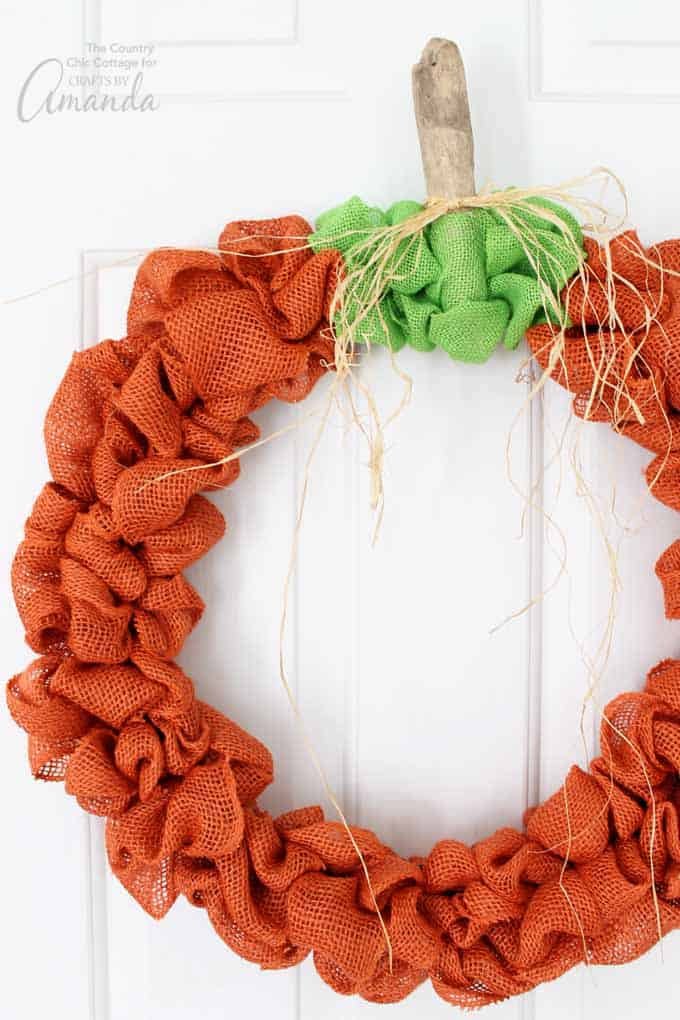
Transform your fall decor by crafting a Charming Burlap Pumpkin Wreath! This DIY project is not only simple but also allows for creativity and personal style.
Materials Needed:
- Burlap (in orange and green)
- A foam or wire wreath frame
- Hot glue gun
- Scissors
- Ribbon (optional for hanging)
Start by cutting burlap into strips. Create a ruching effect by gathering the strips and securing them to your wreath frame with hot glue. Alternate between the orange and green burlap for a pumpkin-inspired look.
Don’t forget to add a loop of ribbon at the top for easy hanging or embellishments like faux leaves for extra charm! Enjoy the process and make it your own!
12. Creative Pumpkin Place Card Ideas
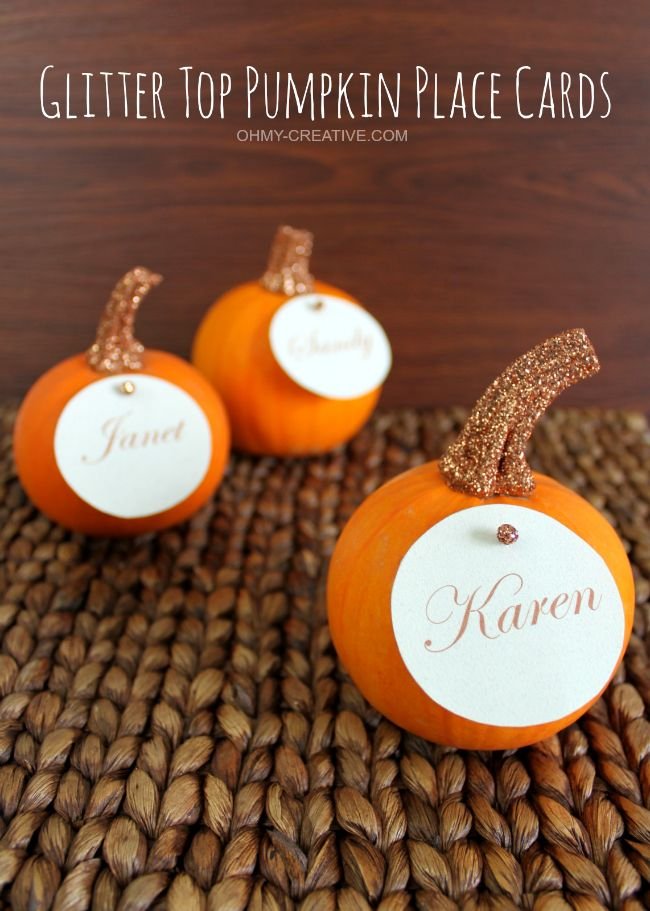
You can easily create charming pumpkin place cards that not only enhance your table setting but also serve as delightful take-home gifts for your guests. Start by choosing small pumpkins, either real or faux, to use as your canvas.
Personalize each pumpkin with a guest’s name written in elegant script or fun colors. For a cohesive look, you can use a thematic color palette that matches your decor. Consider using paint, stickers, or even natural materials like twine or leaves to adorn the pumpkins further.
To add a whimsical touch, you can even attach a small note with a favorite seasonal recipe or a quirky fact about pumpkins. This makes each place card memorable and adds a personal connection to your gathering!
13. Colorful Dollar Store Pumpkin Decoupage
You can transform simple dollar store pumpkins into stunning decor using colorful decoupage techniques. This project not only refreshes a classic craft but also adds a vibrant touch to your fall decorations.
Start by gathering materials like colorful napkins, mod podge, and small pumpkins. Choose napkins that feature fun patterns or bold colors to really make your pumpkins stand out.
Steps to create your masterpiece:
- Tear or cut the napkins into small pieces.
- Apply a layer of mod podge to the pumpkin’s surface.
- Place the napkin pieces and gently smooth them out.
- Finish with another layer of mod podge over the top to seal.
Let your pumpkins dry completely for a uniquely personalized touch to your seasonal decor!
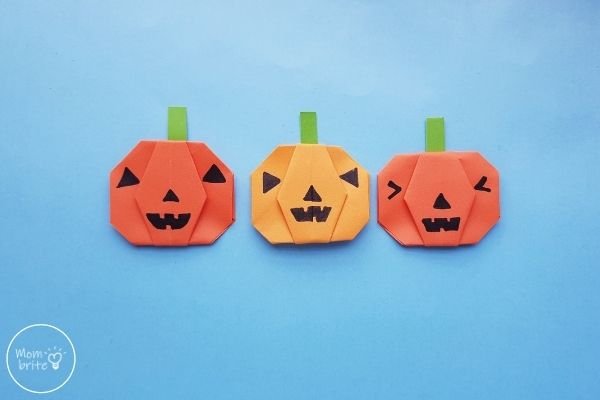
14. Crafting an Easy Jack-O-Lantern Origami
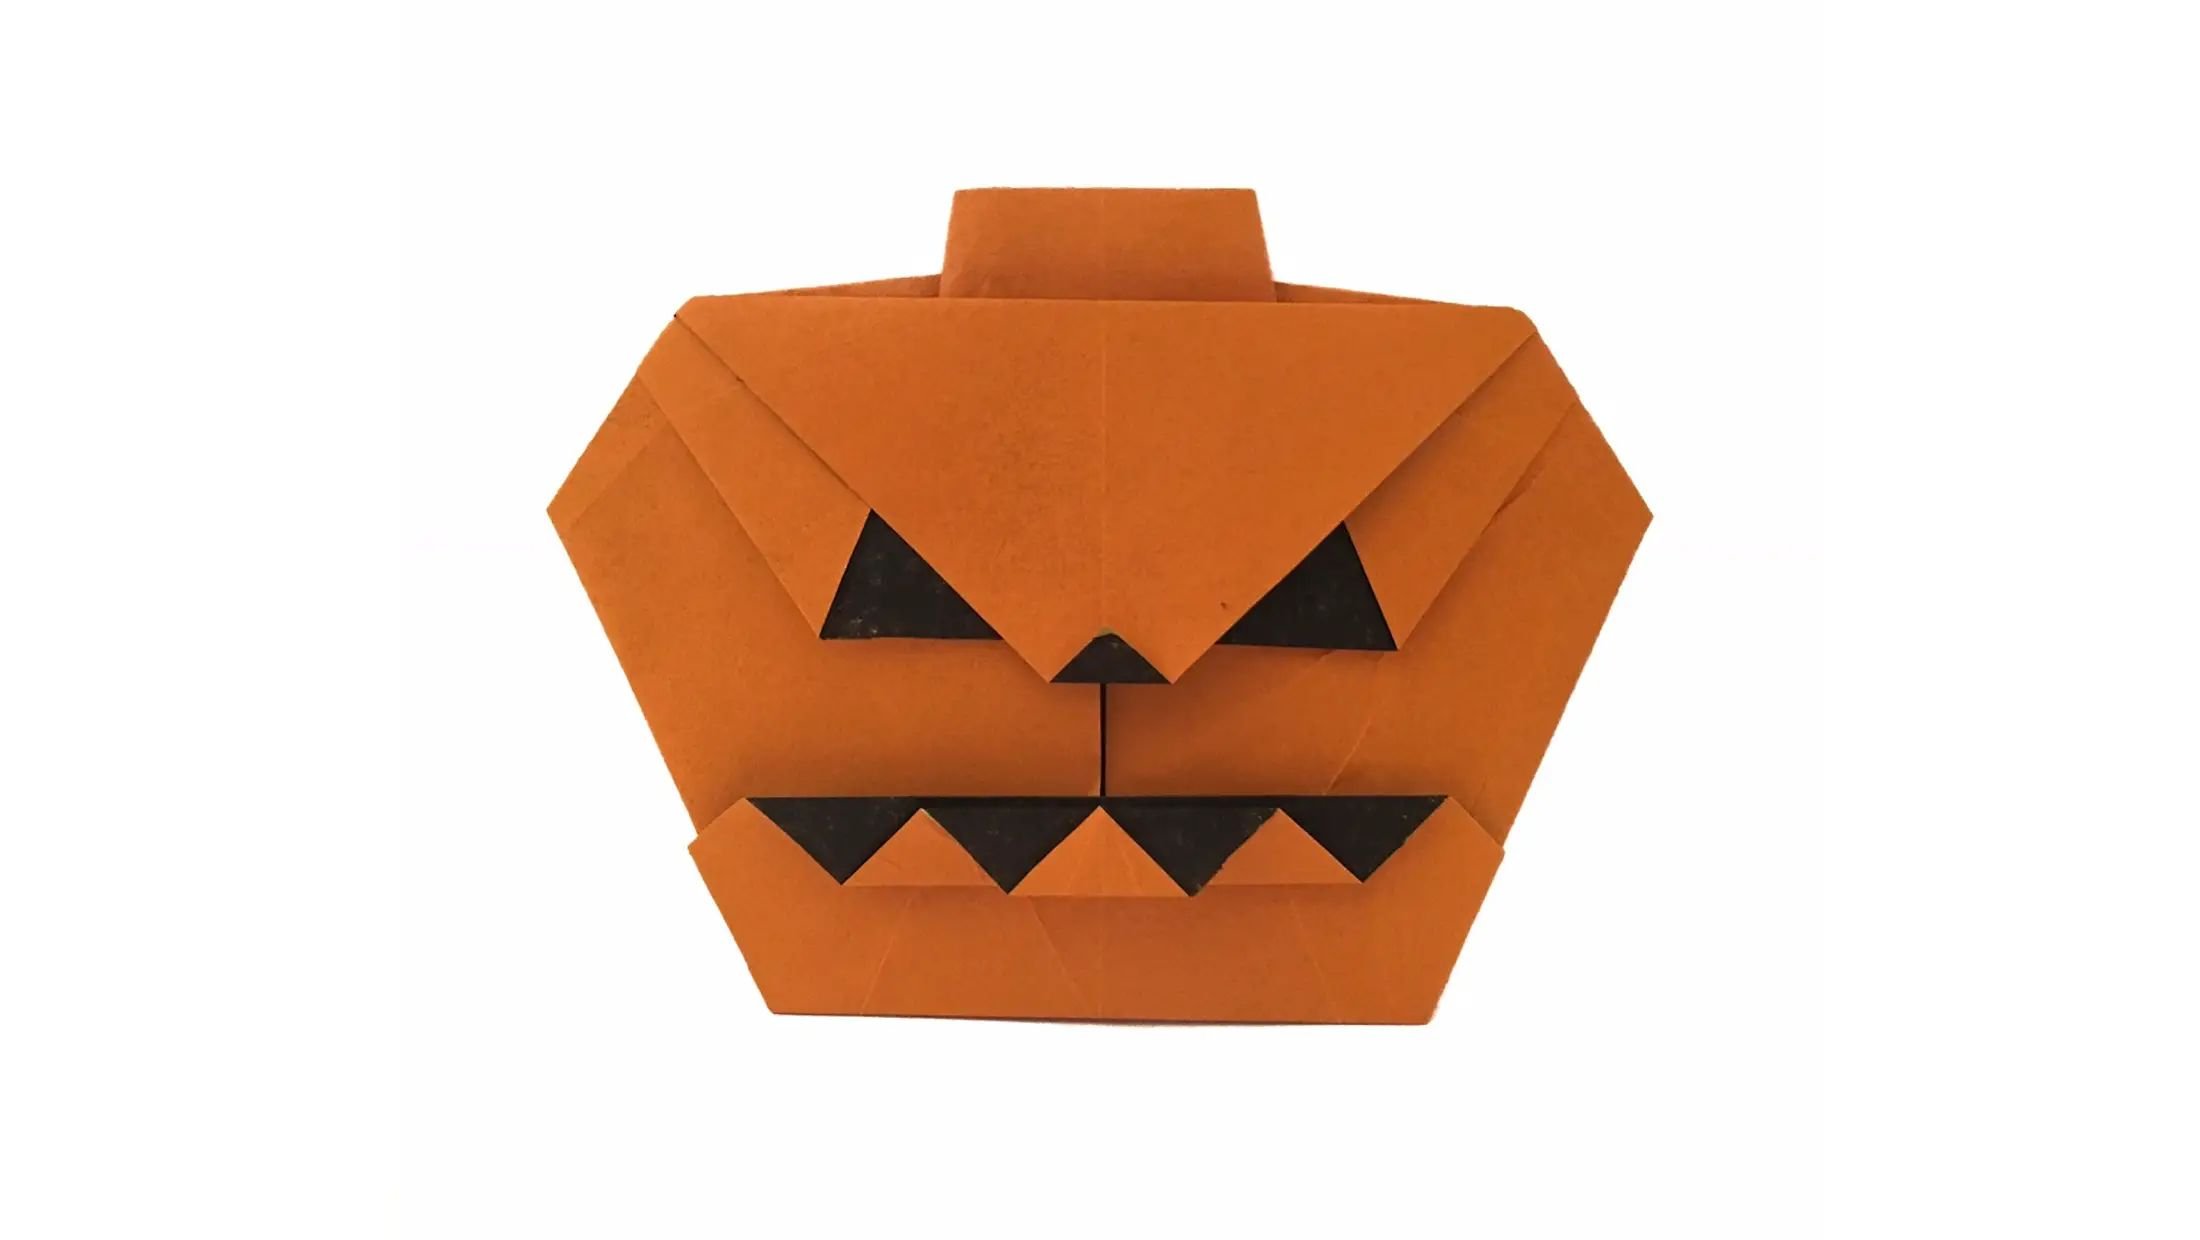
You can create a fun and mess-free Jack-O-Lantern using origami! This craft is perfect for both kids and adults who want to celebrate Halloween without the hassle of carving pumpkins.
Start with an orange square paper (ideally 6×6 inches). Fold the paper in half diagonally to create a triangle. Then, fold the two bottom corners up to meet the top point, forming a smaller triangle.
Next, to create the face, use a black marker to draw a classic Jack-O-Lantern face—two eyes and a mischievous grin. Once you’re satisfied with your design, add a green rectangle at the top for a stem, and you’re finished! This is a simple, quick project that adds a festive touch without the mess of traditional pumpkin carving.
15. Creative Halloween Pumpkin Orange Crafts
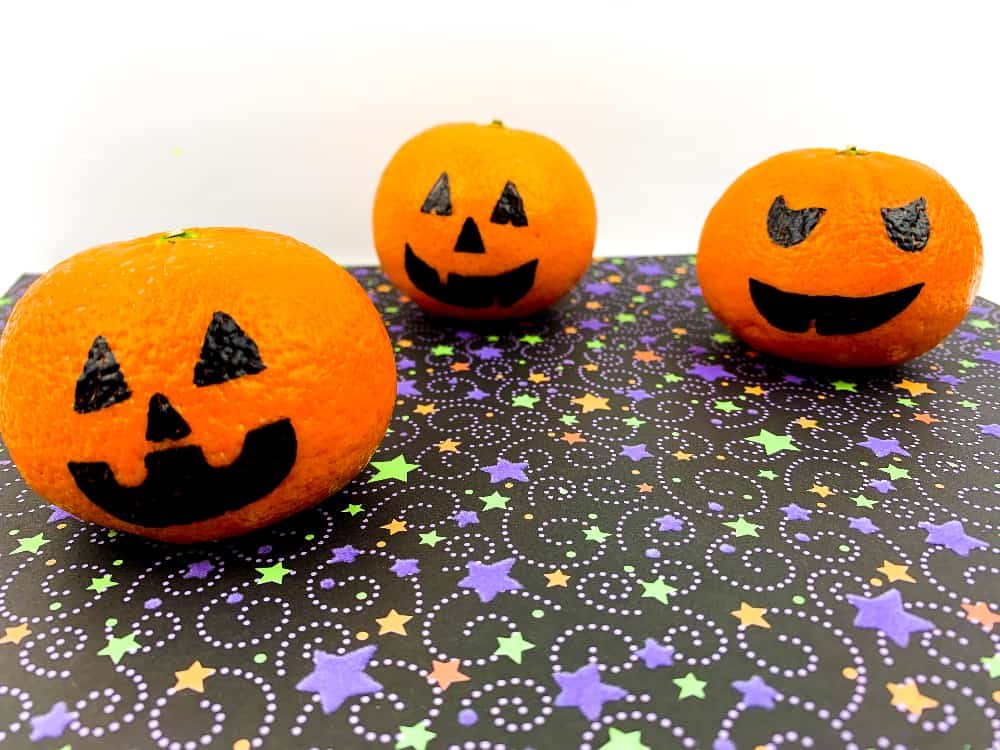
Transform ordinary oranges into playful Halloween decorations with this simple and enjoyable craft! Grab a few clementines or oranges—their thicker skin makes them perfect for decorating.
You can use markers, stickers, or paints to create silly or spooky faces. Try drawing classic jack-o’-lantern grins, ghostly eyes, or fun monsters. The kids will love getting creative, and you can even turn this into a lunchtime surprise!
Want a twist? Experiment with bananas for a playful take. While they won’t have that traditional pumpkin shape, drawing faces on them adds a unique and humorous touch. Get inspired and let your imagination run wild this Halloween!
16. Creative Origami Pumpkin Craft Ideas
You can bring the spirit of autumn to your home with creative origami pumpkin crafts! Use colored paper to create delightful pumpkins that capture the essence of the season.
Start with basic origami techniques. Fold squares of orange paper into manageable pumpkin shapes. For a fun twist, try using patterned paper or different shades of orange for a vibrant autumnal display.
Experiment with sizes! Make a mini pumpkin for a charming tabletop decoration or large ones that can serve as festive centerpieces. To master various styles, pick a few tutorials online that demonstrate different folding methods. This will help you find the technique that suits you best!
17. Creative Bandana-Pumpkin Craft Ideas
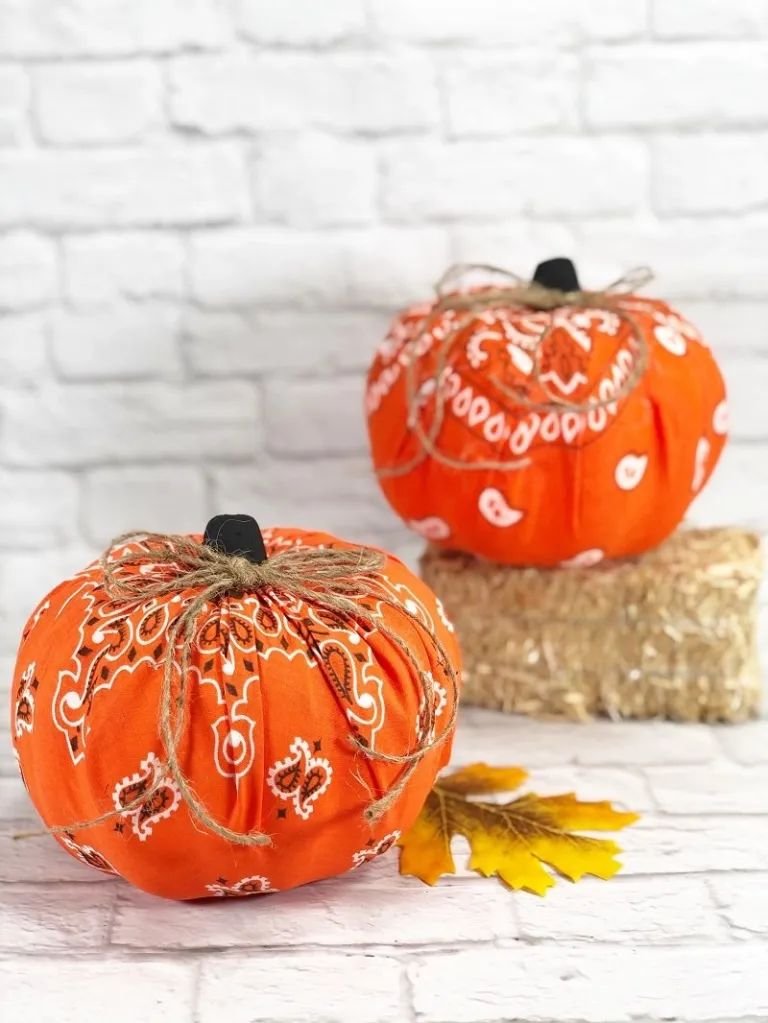
You can transform your old bandanas or scarves into delightful fabric pumpkins that add a unique touch to your fall décor. This craft is not only eco-friendly but also a fun way to use materials that might otherwise gather dust.
Start by gathering your bandanas or scarves in fall colors like orange, brown, and yellow. Cut a square piece, fill it with stuffing or fabric scraps to achieve your desired pumpkin size, and gather the edges to form a rustic pumpkin shape.
For an extra touch, use twine or ribbon to tie around the stem area, and consider adding a cinnamon stick or faux leaf on top for a charming finishing detail. This craft lets you personalize your pumpkins and get creative while making beautiful seasonal décor.
18. Create a Cozy Jack-O-Lantern Plush

Create a Cozy Jack-O-Lantern Plush with ease and creativity! If you’re not into carving pumpkins, this plush version is a perfect alternative. You can find several affordable felting kits online that include everything you need to get started.
Start by selecting a smaller size project to help you finish it quickly. Focus on creating that classic Jack-O-Lantern face with fun facial expressions. Not only will you get a cute decoration, but you can also use it as a festive cushion or gift.
Once your plush is complete, display it on your mantle or near your favorite cozy spot to add some Halloween flair to your home!
19. Creative Dollar Store Pumpkin Ideas
You can unleash your creativity with dollar store pumpkins in amazing ways! Start by grabbing simple foam or plastic pumpkins, then elevate them into unique decorations with a few extra items.
Painting your pumpkins is an easy way to personalize them. Use bold colors or patterns to make them pop. You might consider adding floral accents with fake leaves or flowers to bring a touch of nature indoors.
Get crafty with twine or rope—wrap it around the pumpkin’s stem for a rustic feel. Add embellishments like buttons or glitter glue for an extra touch of charm. Remember, the possibilities are endless, so keep your eyes peeled for any item that could add a fun twist to your pumpkin crafts!
20. Creative Egg Carton Pumpkin Craft Ideas
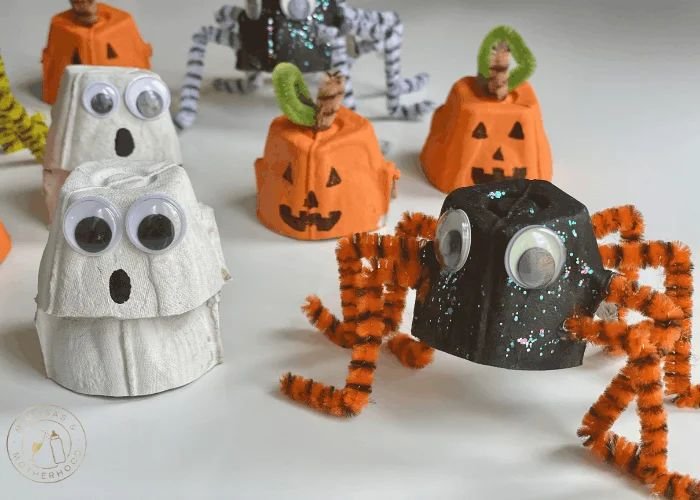
Transforming egg cartons into adorable pumpkin crafts is not only a fun activity but also a great way to recycle! Grab a few supplies and get creative this fall.
Start with a clean, dried egg carton. Cut it into individual cups and paint each one vibrant orange. Use green pipe cleaners or construction paper to create stems and leaves. For a whimsical touch, add googly eyes to give your pumpkins personality!
Consider using various sizes of cartons for a diverse pumpkin patch. Arrange them in a basket or display them on your front porch for a charming autumn decoration. These simple yet creative crafts will surely delight kids and adults alike!
21. Creative Yarn Pumpkin Garland Ideas
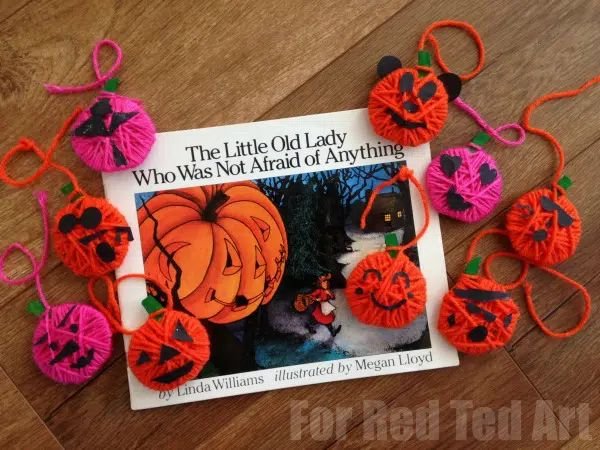
Transform your space with a delightful yarn pumpkin garland that radiates festive charm! This project is perfect for anyone, from kids to adults, wanting to add a personal touch to their decor.
You can choose to create pumpkins in a solid color for a sleek look or mix several vibrant hues to enhance that autumn vibe. Imagine a whimsical array of orange, green, and white hanging across your mantel!
To get started, simply wrap yarn around inflated balloons for a textured pumpkin effect. Once dry, pop the balloons and string them together for a fun garland. You can also hang these adorable yarn pumpkins individually for a unique twist!
22. Easy DIY Concrete Pumpkin Craft Ideas
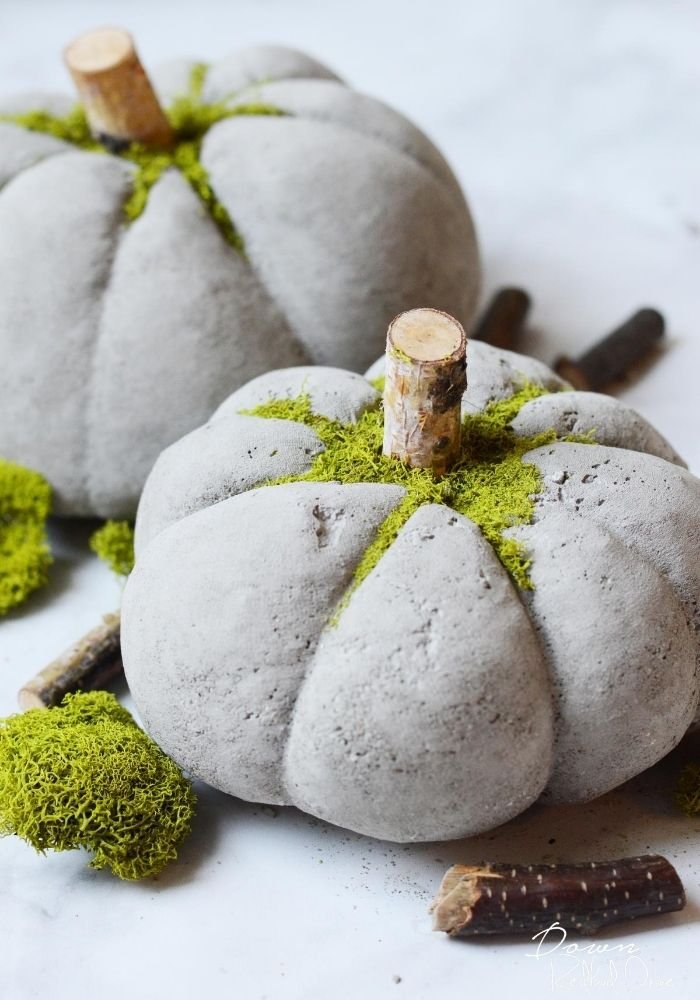
You can create an eye-catching DIY concrete pumpkin with just a few materials. Start with a pumpkin mold, which you can find at craft stores or make from silicone. Mix your concrete according to the package instructions and pour it into the mold.
Once it’s set and dried, bring your pumpkin to life by adding a unique stem! Use items like a wine cork, twigs, or even a piece of fabric. This gives your pumpkin a personalized touch and elevates its rustic charm. Don’t forget to explore different colors and finishes for a custom vibe!
23. Delicious Peanut Butter Bites Recipe
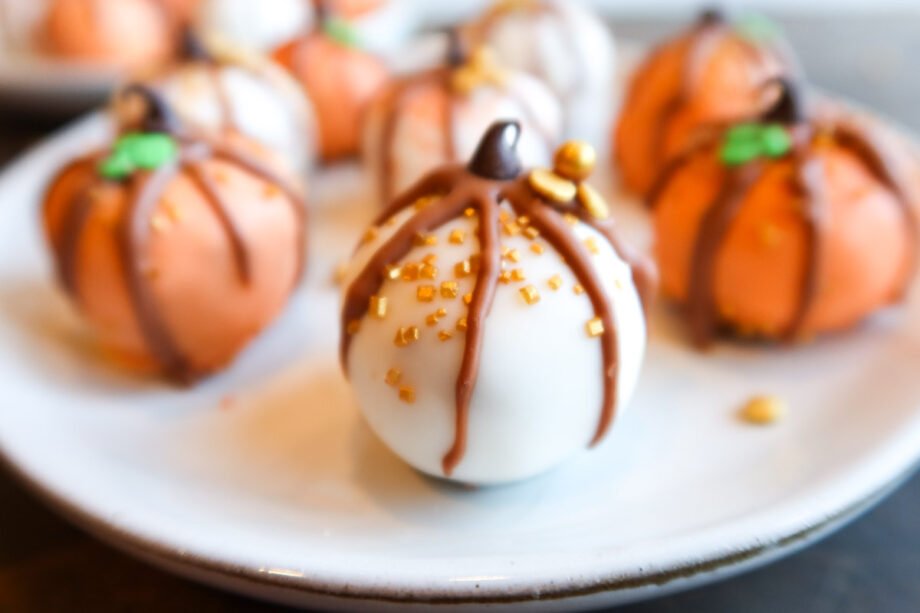
You’ll love this Delicious Peanut Butter Bites Recipe that is perfect for satisfying your sweet tooth any time of the year. These little treats are not only easy to make but also pack a delightful punch of flavor.
To whip up these bites, simply mix together 1 cup of peanut butter, 1 cup of oats, and 1/4 cup of honey in a bowl. If you’re avoiding sugar, you can substitute honey with maple syrup or agave for a healthier twist. Once combined, roll the mixture into small balls and chill them in the refrigerator for about 30 minutes.
Feel free to get creative with your bites by adding chocolate chips, coconut flakes, or even a sprinkle of chia seeds for extra nutrition. If peanut butter isn’t your thing, go for alternatives like almond butter or sunflower seed butter to cater to dietary restrictions. Enjoy these as a snack post-workout or a quick energy boost on-the-go!
24. Charming Wood Beaded Pumpkin Decor
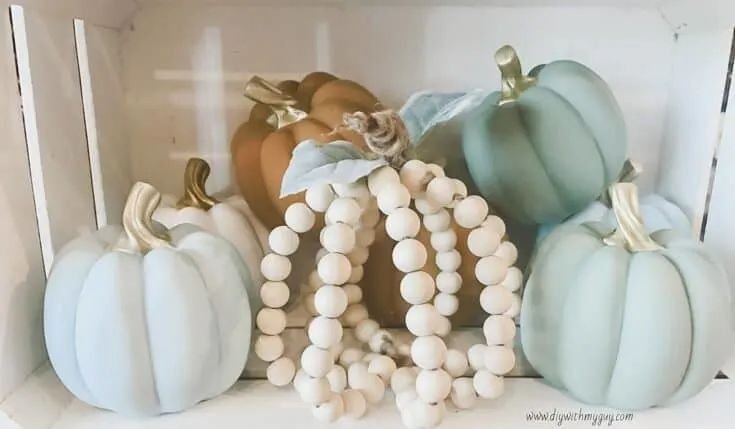
Transform your autumn decor with charming wood beaded pumpkin embellishments. This craft elevates the traditional pumpkin and adds a unique texture to your space.
Start by gathering various sizes of wooden beads in colors that complement your home. Opt for a neutral palette for a subtle look or vibrant hues for a festive vibe. String the beads onto a sturdy wire or twine in the shape of a pumpkin, allowing plenty of room for creativity.
To make your pumpkin stand out, consider adding a wooden stem or greenery at the top. This DIY decor piece not only enhances your fall aesthetic, but it also brings a touch of farmhouse charm that can be enjoyed throughout the season!
25. Versatile Pumpkin Crafts with Wood Slices

You can easily create versatile pumpkin crafts using wood slices to decorate your home this fall.
Start with a variety of wood slices in different sizes. These can serve as the base for unique pumpkins that you can stack or arrange in a display. For an elegant touch, paint them in shades of orange, green, or even white, and add simple accents like twine or faux leaves.
Consider enhancing the natural look by leaving the bark intact. A light touch of wood stain can unify the colors while still allowing the natural texture to shine through. You could even glue small twigs on top for stems, bringing a rustic flair to your fall decor.
26. Adorable Tiny Message Pumpkin Craft Ideas
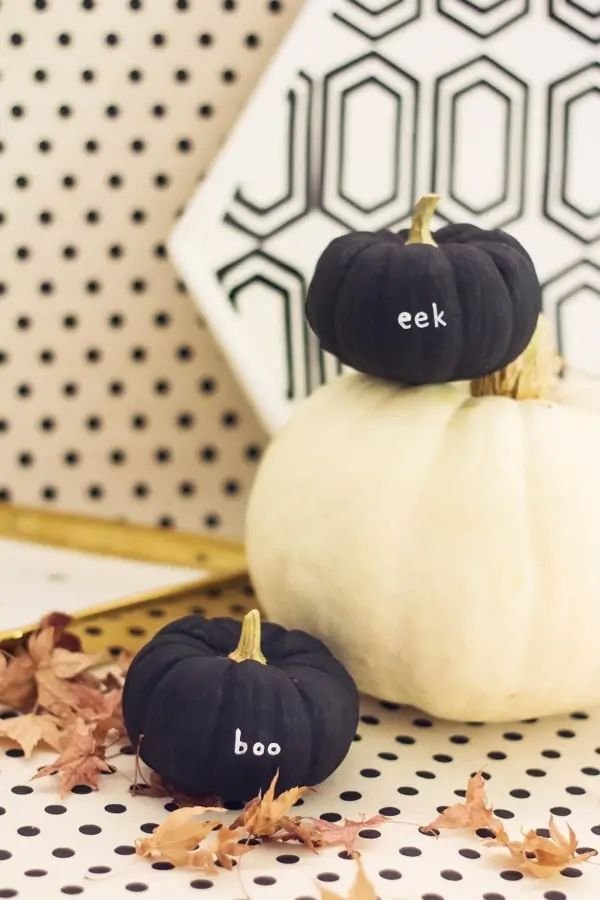
Create charming tiny message pumpkins with minimal effort that bring a delightful twist to your fall decor. Start by selecting small pumpkins in your favorite colors, as each will serve as a perfect canvas for your messages.
Use a skinny paint pen in a contrasting color to your pumpkin to ensure your messages pop. You can try various fonts to personalize them, or use stencils and stickers if you prefer a clean look. Phrases like “Harvest Blessings” or “Fall Fun” work beautifully and add a festive touch.
Don’t hesitate to experiment and practice your lettering first before committing to the pumpkins. Display your message pumpkins on your front porch, dining table, or use them as centerpieces for your autumn gatherings.
27. Engaging Pumpkin Counting Flap Book
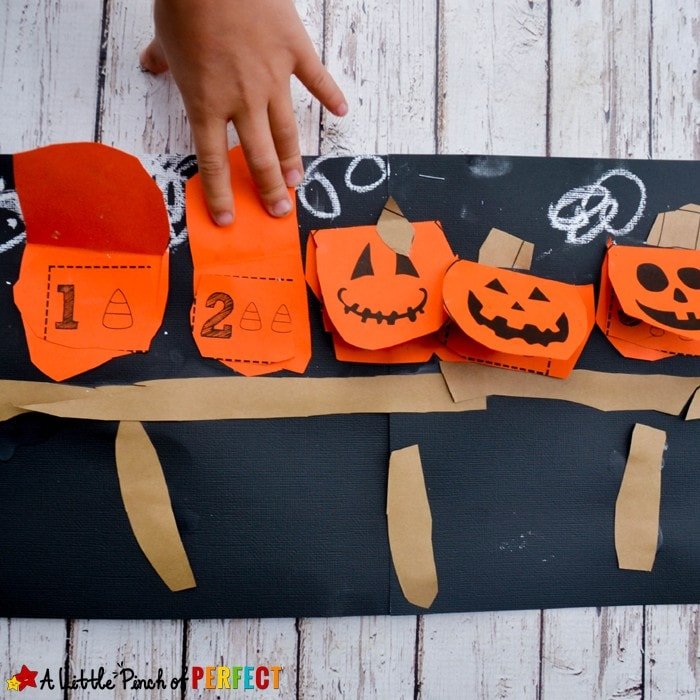
You can create an Engaging Pumpkin Counting Flap Book that combines learning with crafting fun! Start by gathering colorful paper, scissors, and markers. With your child, cut out a series of pumpkin shapes and attach them to a folded piece of paper to create flaps.
On each flap, write a number and draw corresponding pumpkins underneath. As you lift each flap, count the pumpkins together. This not only reinforces number recognition but also enhances fine motor skills.
To make it even more interactive, incorporate a song like “Five Little Pumpkins.” This will make counting a joyous experience while linking reading with arts and crafts!
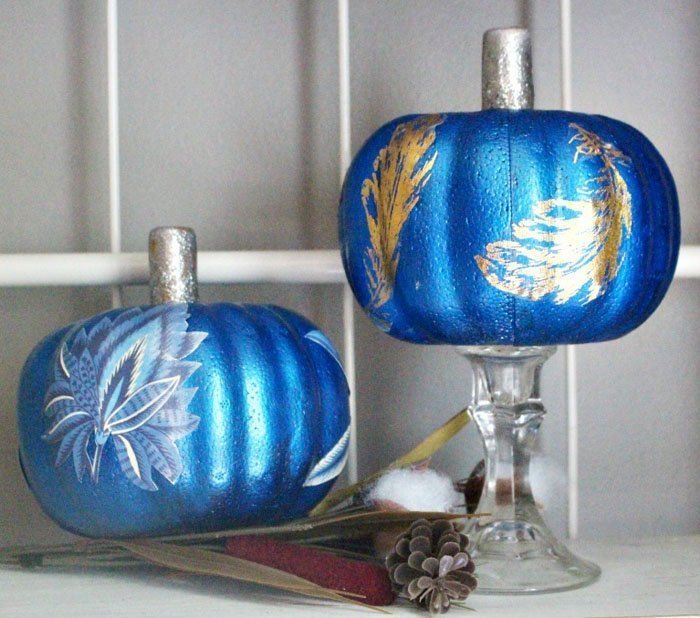
28. Creative Ways to Paint Pumpkins
You can transform your pumpkins into stunning pieces of art with a few creative painting techniques. Grab any kind of pumpkin—whether it’s real, faux, big, or small—and let’s get started!
Try using metallic paint to bring a glamorous touch to your pumpkins. This shiny finish will reflect light beautifully and become a standout piece of your fall decor. Experiment with different colors like gold, silver, or copper to match your existing decor.
For a playful twist, consider using stencils. Spray or paint over the stencil to create intricate designs, whether it’s spooky motifs for Halloween or floral patterns for a chic autumn look. You could also use sponges to dab on colors, giving your pumpkin a textured, abstract feel. Enjoy the process and let your creativity shine!
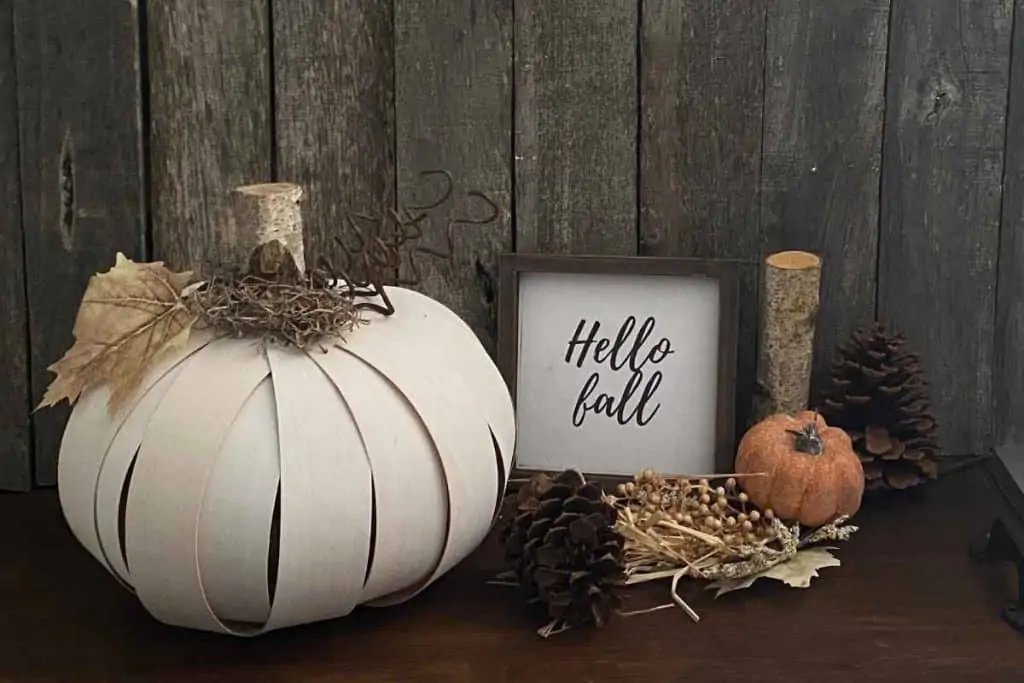
29. Creative Scrap Paper Pumpkin Ideas
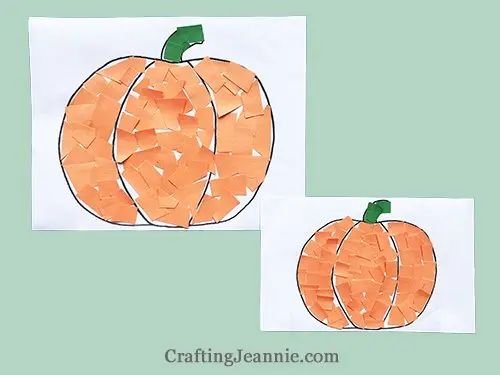
You can create adorable scrap paper pumpkins using just about any leftover materials you have at home. Ripped, glued, or layered, these pumpkins can be a fun autumn project that boosts creativity.
- Gather materials: Look around for construction paper, tissue paper, old magazines, or even fabric scraps.
- Ripping sections: Let your kids rip pieces into different shapes and sizes. This enhances their fine motor skills while keeping them engaged.
- Assemble your pumpkins: Create a pumpkin silhouette by overlaying the ripped paper on a cut-out. Go for playful textures by mixing materials.
Experimenting with colors and textures can turn a simple pumpkin into a beautiful seasonal decoration!
30. Creative Upcycled Tin Can Pumpkins
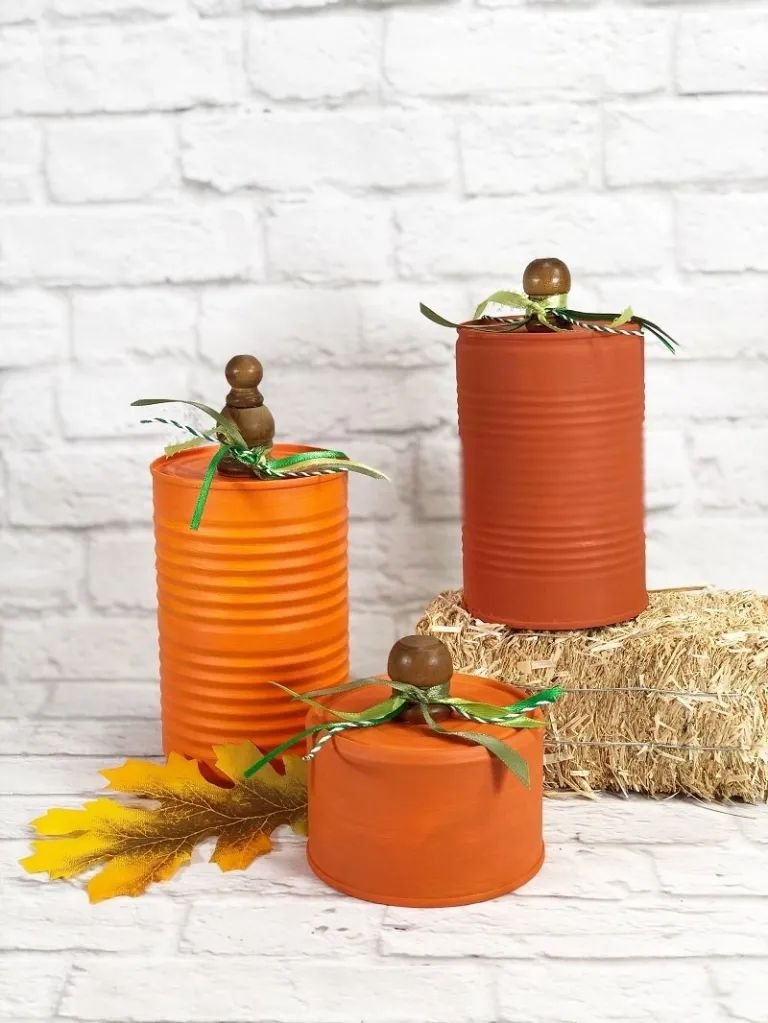
You can transform ordinary tin cans into adorable pumpkins that add charm to your autumn decor. Start by collecting various sized cans and removing the labels. For extra creativity, consider using cans of different shapes to create a diverse pumpkin patch.
To craft, simply paint the cans in vibrant orange shades. Add details with green paper leaves and curled paper vines for extra flair. You can even use glue to attach faux stems like twigs, giving your pumpkins more texture. This project doesn’t just save money; it also emphasizes sustainability, making your home feel cozy with a personal touch.
31. Charming Wood Veneer Pumpkin Crafts
You can easily create charming wood veneer pumpkins that add a lovely touch to your fall decor. This craft allows you to play with colors, so you can choose to go with a single hue for a sleek modern look or mix and match multiple shades for a more vibrant display.
Start by cutting wooden veneer sheets into pumpkin shapes. You might want to use a craft knife for precise edges. After cutting, layer your pumpkins with different colors for a textural effect. Secure the pieces together using wood glue or double-sided tape.
To finish, add natural elements like twine or dried floral accents for a rustic feel. Place your pumpkins on a mantel or as part of a festive table centerpiece to enjoy their warm aesthetic all season long.
32. Creative Pumpkin Suncatcher Craft for Kids
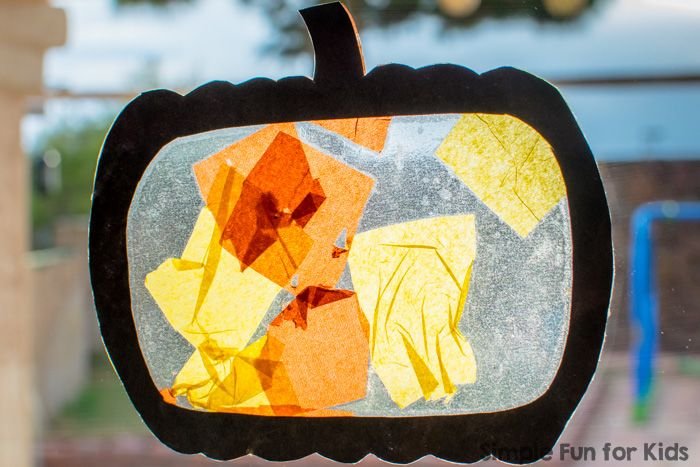
Get ready for some creative fun! A pumpkin suncatcher is the perfect craft to engage kids while adding a splash of color to your home. Start by gathering transparent contact paper, a variety of tissue paper pieces in orange, yellow, and green, and a pumpkin-shaped template.
Once you have everything ready, let the kids choose their favorite colors for the pumpkin. They’ll love arranging the tissue paper between two pieces of contact paper to create their unique design. Once together, hang it in a sunny window. The light will shine through, creating a beautiful, colorful display that will excite both children and adults alike!
33. Chic Herringbone Pumpkin Craft Tutorial
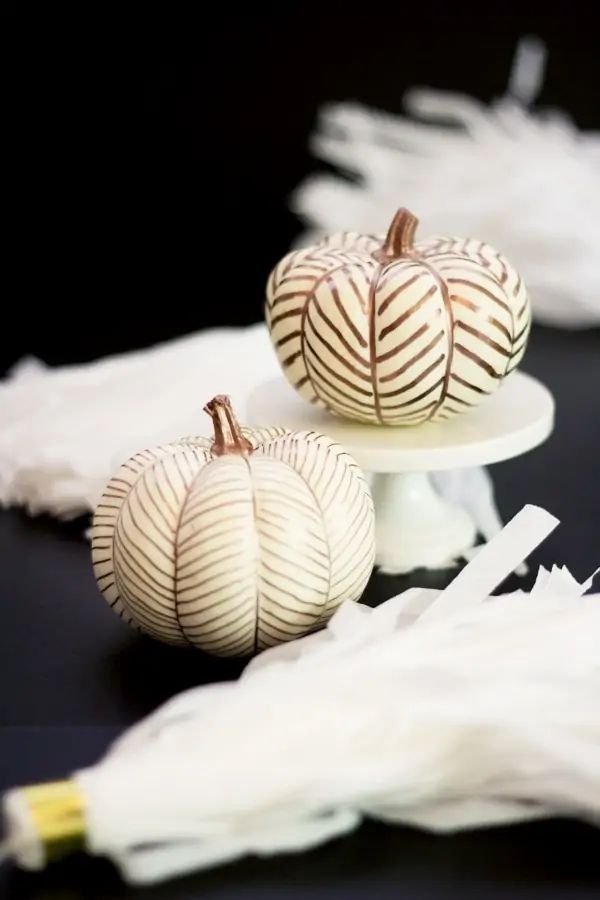
To create your Chic Herringbone Pumpkin, gather some supplies, including a plain pumpkin, a quick-drying pen or marker, and a ruler. Start by drawing evenly spaced diagonal lines across the pumpkin, forming a herringbone pattern. The key is to keep your lines neat and consistent for that polished look.
As you work, put on your favorite fall movie to keep the atmosphere cozy. This craft can take a bit of time, but the end result will be worth it! Once the pattern is complete, consider adding a touch of metallic paint to the edges for a hint of glam. Let your pumpkin sit out and light up your living space!
34. Beginner-Friendly Watercolor Pumpkin Techniques
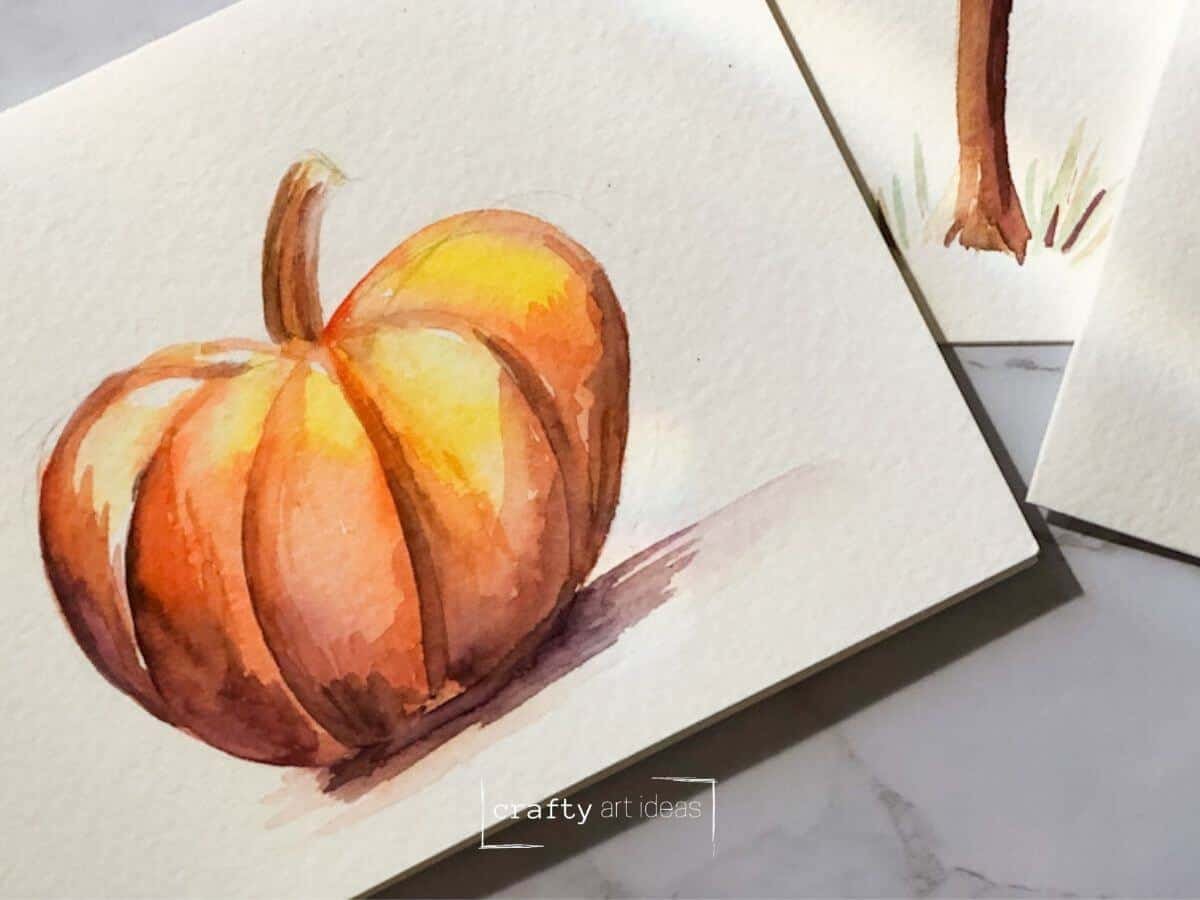
You can easily explore watercolor pumpkin techniques that are perfect for beginners. Grab your watercolor set and some sturdy watercolor paper to get started.
Try wet-on-wet techniques by dampening your paper first, then adding colors to create soft, blended effects. This method is fantastic for capturing the subtle transitions found in pumpkin shades.
For a more controlled approach, practice layering. Start with a light wash for the pumpkin base and gradually add darker shades to build depth. Don’t forget to use a small brush for adding detailed lines and texture, like those delicate pumpkin ridges!
35. Creative Tape Technique for Pumpkin Decorating
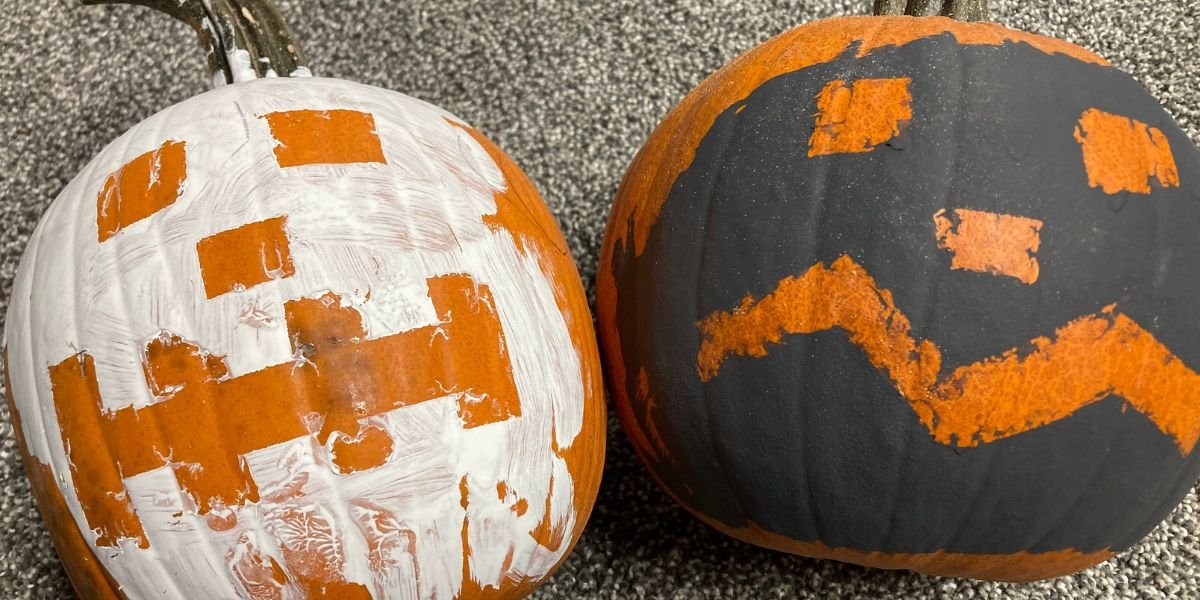
You can create stunning pumpkins without the mess by using a creative tape technique! Start by gathering some masking tape or painter’s tape. Sketch out your desired design on the pumpkin’s surface—this could be anything from simple shapes to spooky faces.
Once you have your design, carefully apply the tape to form the outlines. Next, grab some acrylic paint in fun fall colors and paint over the entire pumpkin, ensuring that the tape areas are well covered. After allowing it to dry completely, gently peel off the tape to reveal your unique design.
This easy method is perfect for kids or anyone who wants to skip the pumpkin guts while still crafting a festive decoration!
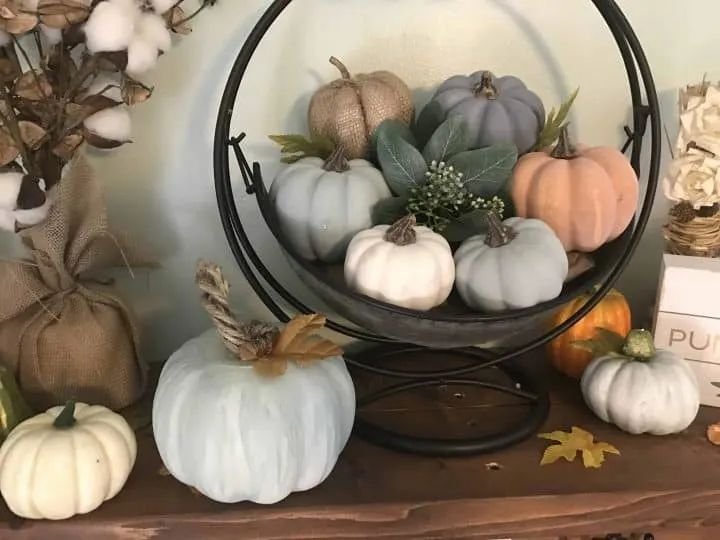
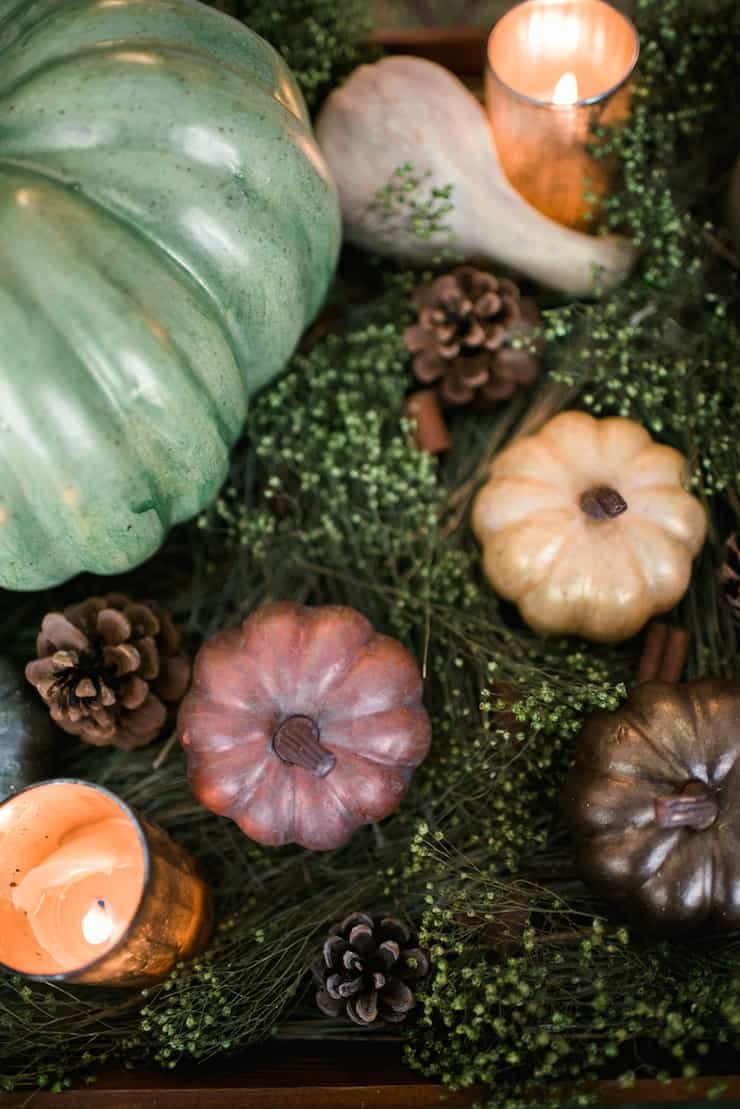
36. Creative Ideas for Pumpkin Centerpieces

You can elevate your fall decor with creative pumpkin centerpieces that fit your style. Choose your pumpkins based on their size and color to create a harmonious look.
-
Minimalist Approach: Opt for white or pastel pumpkins arranged in a simple bowl or on a wooden tray. Add a few sprigs of eucalyptus for an elegant touch.
-
Themed Centerpieces: If you love a specific theme, go for a spooky Halloween vibe. Paint your pumpkins black and add metallic accents, like gold or silver, to make them pop.
-
Layering Texture: Combine pumpkins of different shapes and materials—think painted gourds, velvet skirts, or even floral arrangements spilling over a hollowed-out pumpkin for a dramatic effect.
Experimenting with various styles can turn your table into a stunning centerpiece that captures the essence of the season!
37. Creative Paper Pumpkin Truck Craft Idea
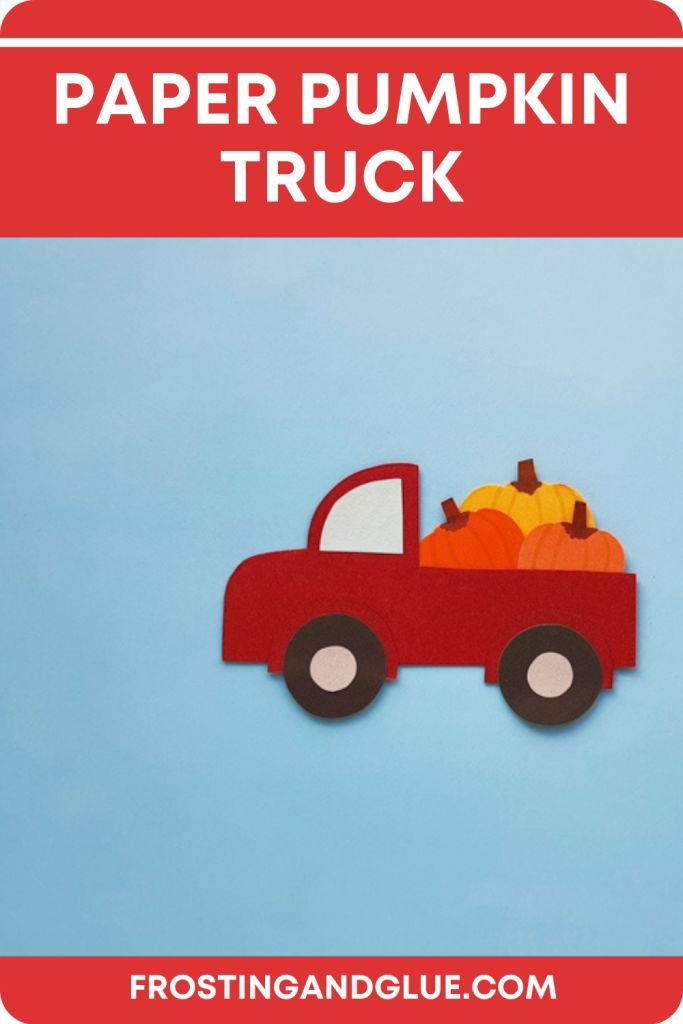
You can create a charming paper pumpkin truck craft that’s perfect for all ages! Start by gathering supplies like colored paper, scissors, and glue.
Begin by cutting out various shapes: rectangles for the truck’s body, circles for the pumpkins, and squares for the wheels. This exercise not only hones shape recognition skills but also encourages creativity.
Once the pieces are ready, assemble them into a truck shape. Next, grab crayons, markers, or paints to decorate your creation! Let your imagination run wild—add bright colors or fun designs to make it uniquely yours. This delightful craft offers hands-on learning while celebrating the fall season!
38. Transform Denim into Fun Pumpkins
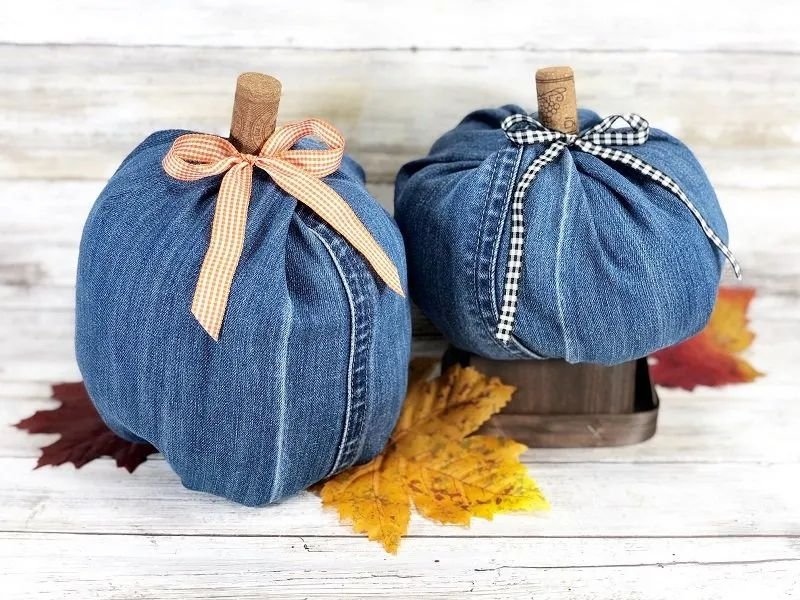
Transforming denim into fun pumpkins is an exciting way to upcycle old jeans. Grab a pair of worn-out jeans and follow these simple steps to create unique decor.
First, cut your denim into circles or squares, depending on the shape you want for your pumpkins. Layer several pieces together to achieve a fuller look. Next, use a needle and thread or a sewing machine to gather the edges and form the pumpkin shape.
For added creativity, try painting or stenciling fun patterns on the jeans beforehand. You can even mix in different fabric scraps to create a patchwork effect. Finish off your pumpkins by adding stems made from sticks or fabric for an extra touch!
39. Charming Crochet Pumpkin Craft Ideas

You can create charming crochet pumpkins that will add warmth and texture to your fall decor. Start by selecting the yarn colors you love—earthy tones like orange, brown, and yellow work great!
For added personalization, consider different shapes and sizes. A small crocheted pumpkin can serve as a cute table centerpiece, while larger ones make bold statements on your porch.
Don’t forget to fill them with a scent sachet. This will not only charm your guests but also offer a delightful seasonal aroma. Whether for yourself or as a gift, these cozy creations are sure to brighten up any autumn setting!
40. Fun Playdough Pumpkin Faces Activity
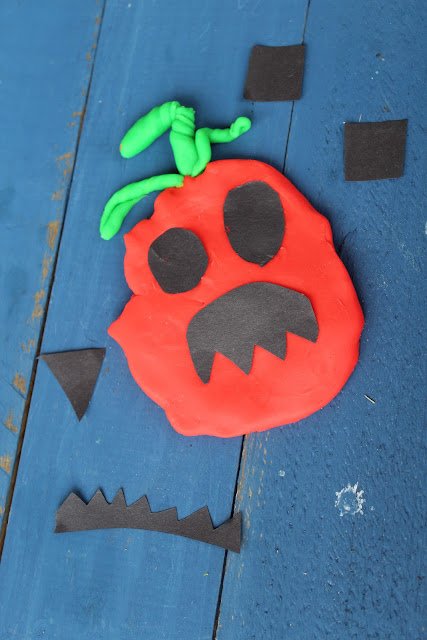
You can transform an ordinary playdough session into a fun pumpkin faces activity that your little ones will adore! Start by making or using orange playdough for the pumpkin base. If you wish to get creative, you can also mix in some spices (like cinnamon) to mimic that classic pumpkin scent.
Provide various tools such as cookie cutters, plastic knives, and small stamps for adding unique facial features. Encourage kids to shape their pumpkins and give them silly or spooky faces using googly eyes, buttons, or even dried pasta.
Once the faces are done, set them aside to dry. You can then display these adorable creations as playful decorations around the house! This activity not only sparks creativity but also enhances fine motor skills.
41. Upcycled Wooden Pumpkins for Fall Decor
Transforming old wood into upcycled wooden pumpkins is a delightful DIY project perfect for enhancing your fall decor. You can use reclaimed wood, pallet scraps, or even leftover furniture pieces to create these charming pumpkins.
Here’s how to get started:
- Cut your wood into pumpkin shapes—varying sizes adds visual interest.
- Sand the edges to create a smooth finish, preventing splinters.
- Use acrylic paints or wood stains to bring your pumpkins to life, opting for vibrant oranges, rustic browns, and deep greens.
Once they’re painted, add a touch of whimsy with twine, burlap, or artificial leaves for a rustic effect. Display your creations on your porch or mantle for a warm autumn vibe!