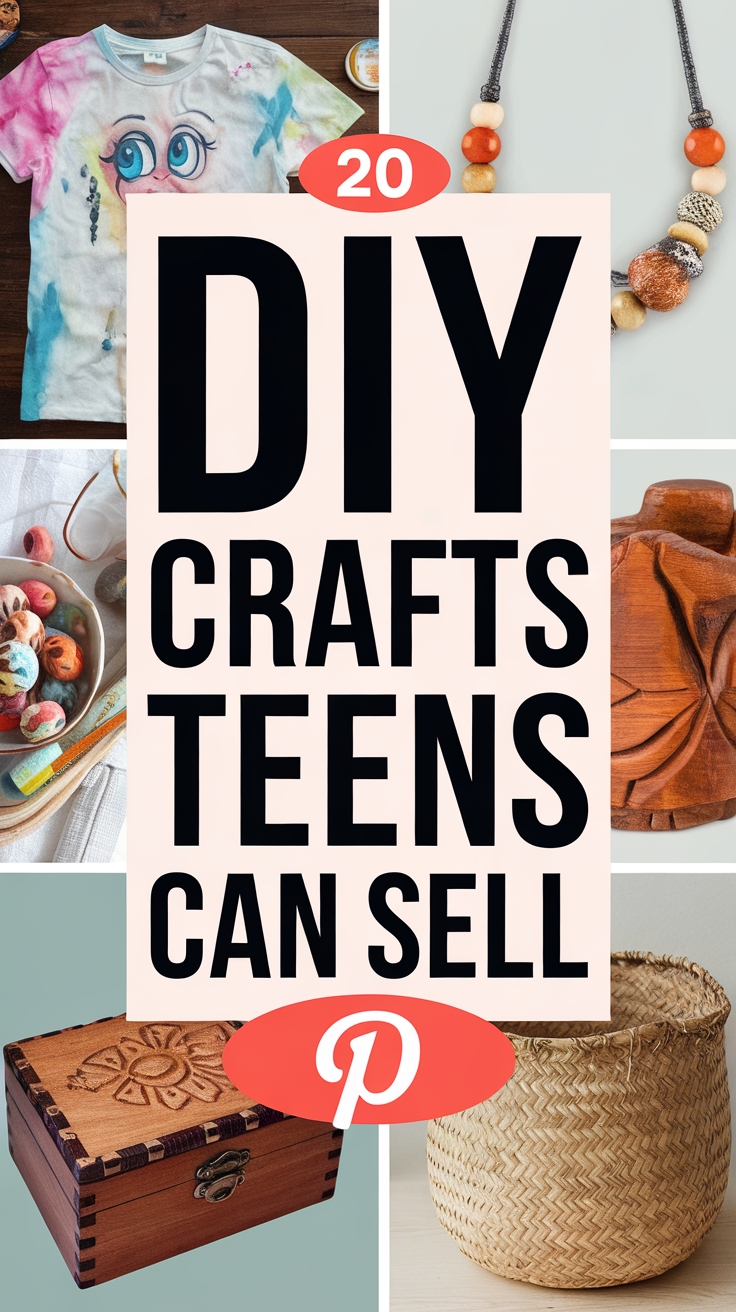
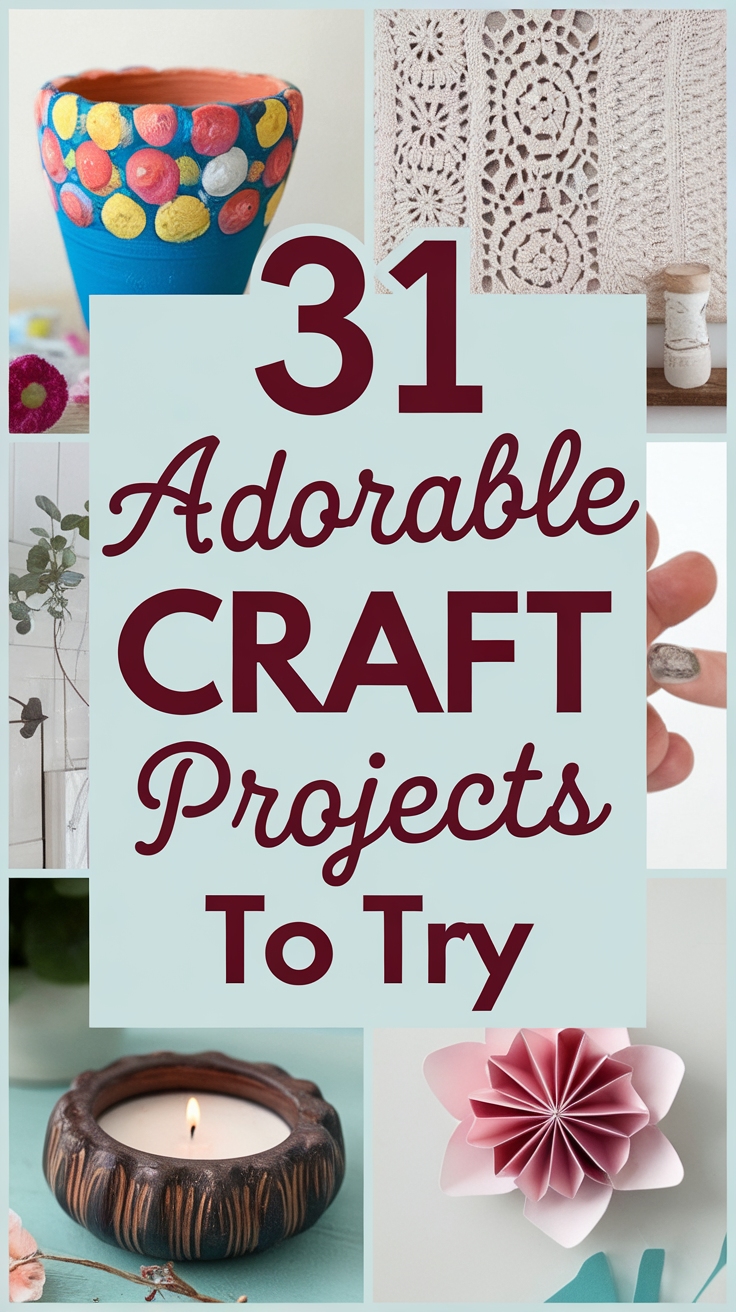
31 Cute Craft Ideas
Did you know that engaging in crafting can significantly boost your creativity and reduce stress? In this blog, we’ll explore 31 cute craft ideas that are perfect for crafters of all skill levels—whether you’re looking for a fun activity to do with the kids or a relaxing DIY project for yourself. From a sandpaper t-shirt to a charming unicorn tree, get ready to unleash your creativity and discover new ways to enjoy crafting!
Shop Our Must-Haves


1. Create Textured T-Shirts with Sandpaper
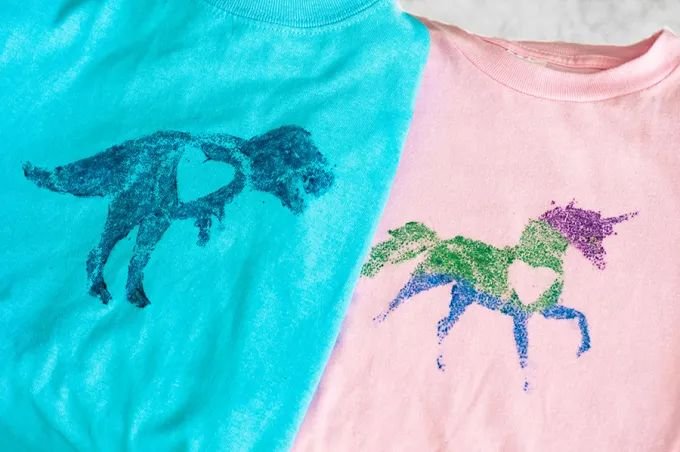
You can easily create textured T-shirts that stand out by using sandpaper. Here’s a simple method to bring some creativity into your wardrobe!
First, select your desired silhouette, whether it’s an animal, a shape, or a phrase. Cut this out carefully from a sturdy material. Next, apply a generous layer of fabric paint onto the cut-out.
Now, take a piece of sandpaper—try different grains like rough, smooth, or even a combination. Press the sandpaper firmly onto the shirt where you want the texture to appear. The result? A unique, tactile design that adds a stunning flair to your T-shirt!
2. Adorable Turtle Plant Pot Craft
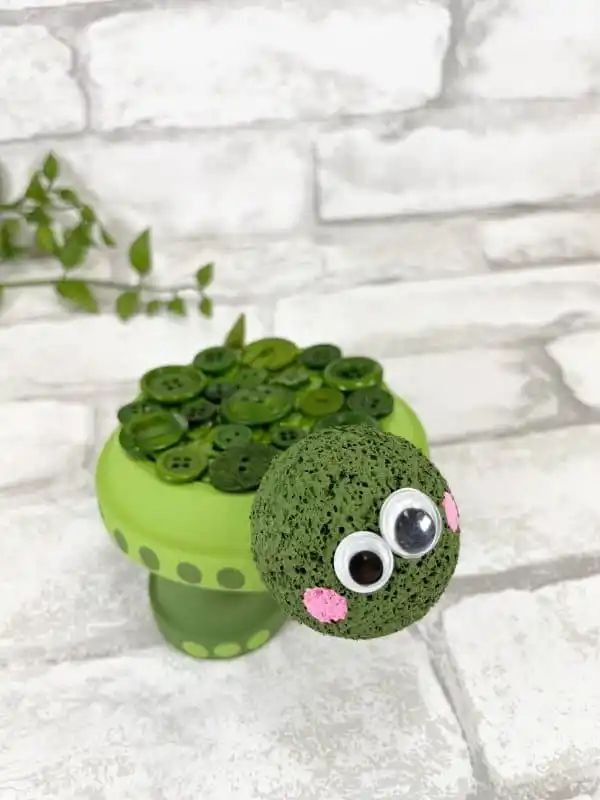
Transform your ordinary plant pots into cherubic turtle companions with this simple craft! Start with a basic terracotta pot, and paint it in a bright, cheerful green. Add a smiling face, simple feet, and a shell pattern using non-toxic acrylic paints.
To make it even more adorable, you can glue on googly eyes for some extra charm. Plant a small succulent or herb inside, creating a delightful little ecosystem. This turtle pot is not only a charming decor piece but also encourages kids to take an interest in gardening by nurturing lovely little plants!
3. Charming Cross Stitch Mason Jar Craft
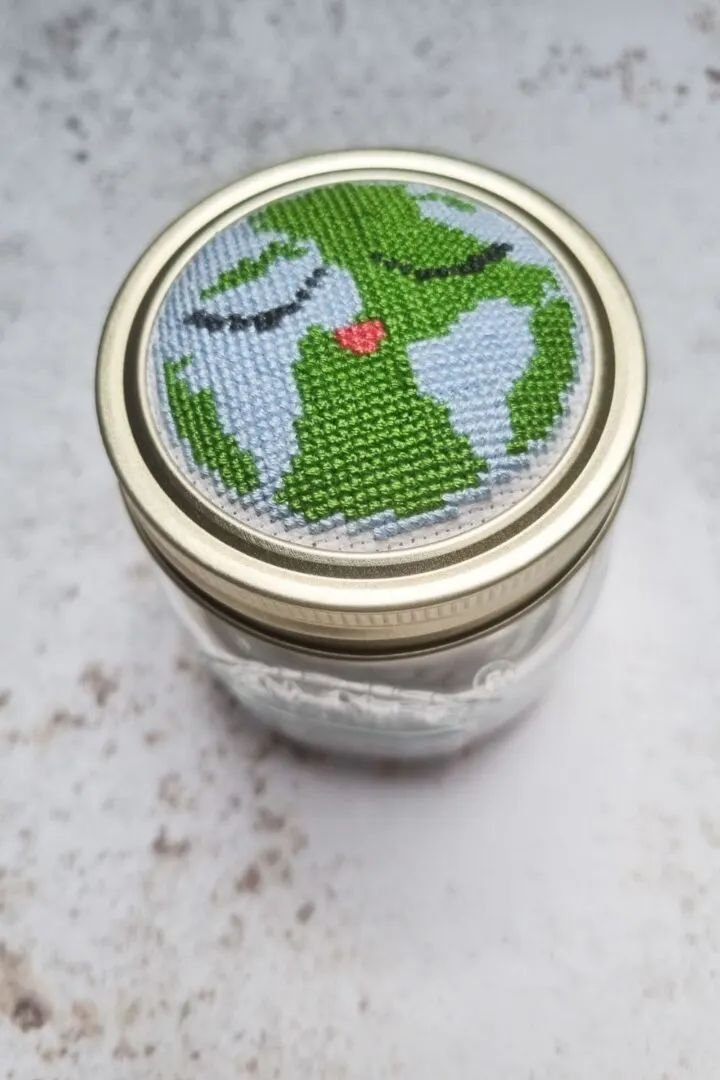
Transforming mason jar lids into charming cross-stitch pieces is a delightful way to add personality to your home decor. Start by choosing your lid sizes and gather themes like seasonal designs, fun shapes, or characters that resonate with you.
To begin, outline your chosen patterns on the fabric, then stitch them up using vibrant threads. Display your finished jars on a shelf or tabletop. Mixing various sizes and themes creates an eye-catching collection that’s sure to spark conversations. Embrace your creativity!
4. Easy DIY Pedestal Bowl Instructions
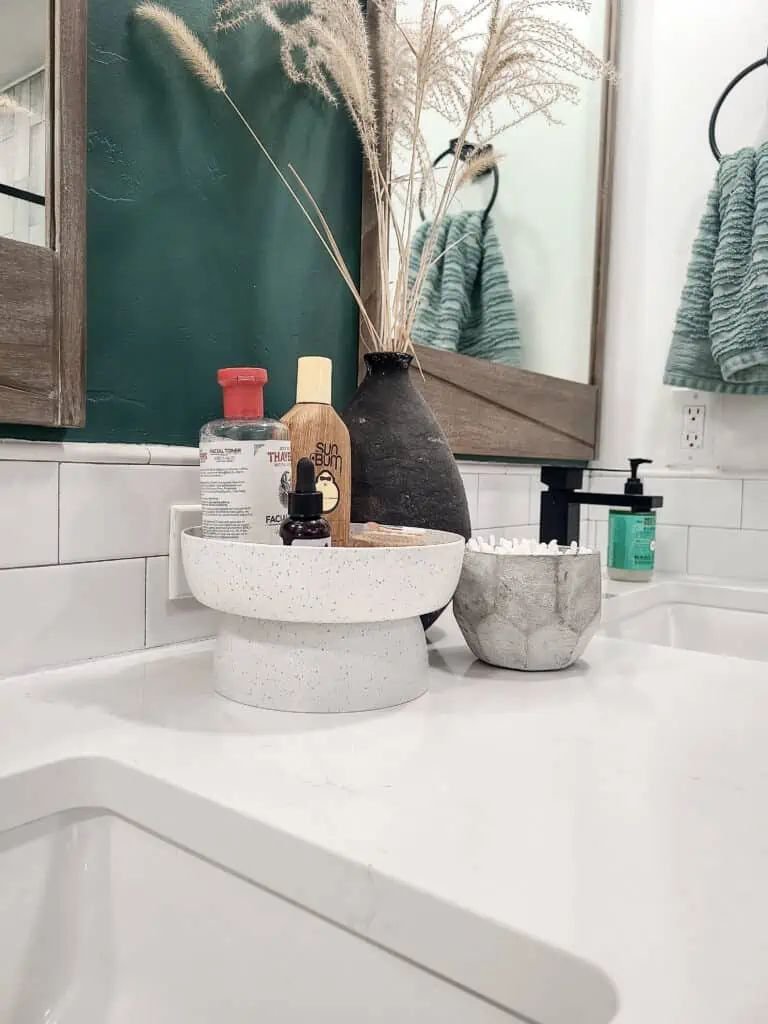
Ready to create your own stylish pedestal bowl? It’s simple and requires minimal materials. Grab a couple of bowls—one larger for the base and a smaller one for the top.
What you need:
- A large bowl
- A smaller bowl
- Hot glue gun or strong adhesive
- Optional: paint or decorative elements
Start by applying a generous amount of hot glue to the base of the smaller bowl. Carefully center it on the larger bowl, making sure it’s aligned. Hold it in place for a few minutes to ensure it sticks.
Let your masterpiece sit for 24 hours to cure fully. Feel free to paint or decorate it afterward to match your decor. Enjoy your chic new bowl!
5. Brighten Decor with Straw Flower Crafts
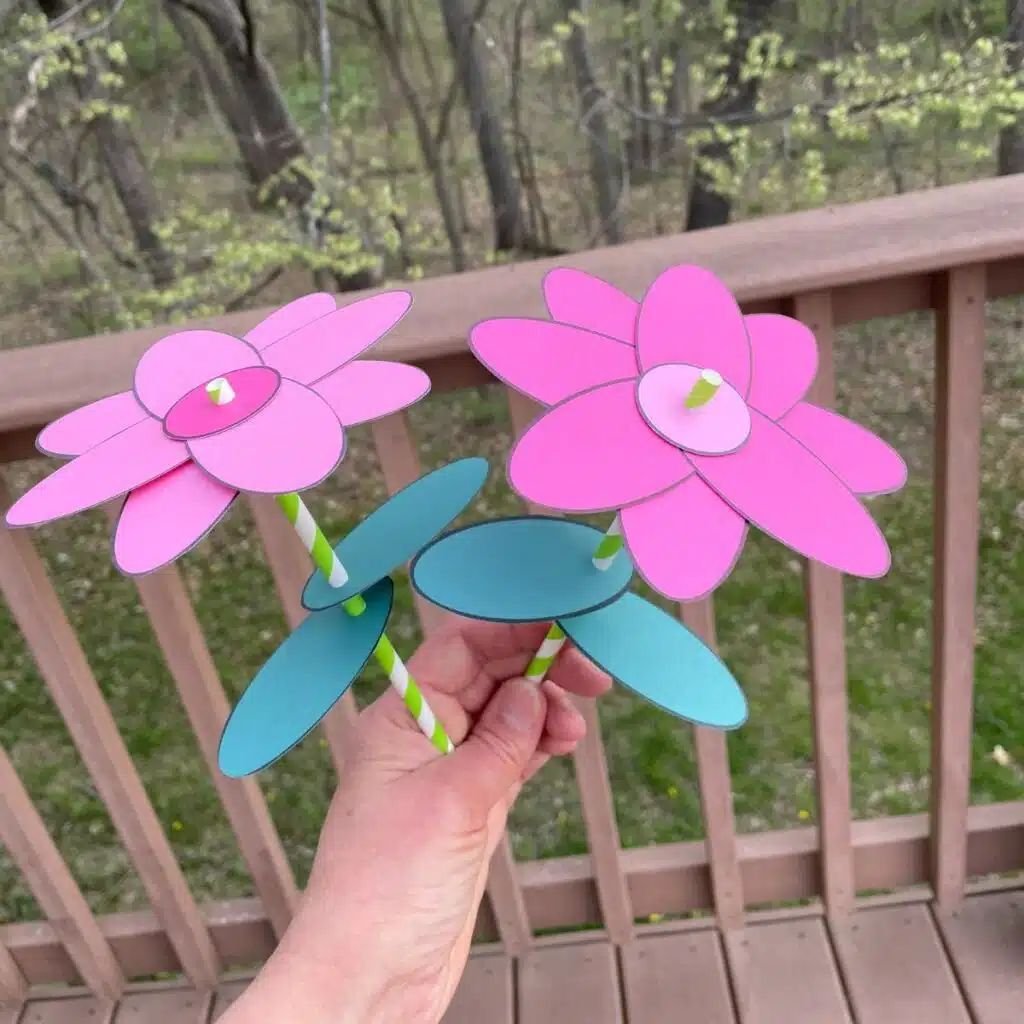
You can brighten your home decor with vibrant straw flower crafts! These charming blooms are versatile for any season and can easily be personalized. Choose colors that reflect the current time of year—think soft pastels for spring or rich hues for autumn.
To elevate your straw flower arrangements, consider adding unique embellishments. A dash of glitter can bring a fun sparkle, while gemstones enhance the elegance of your bouquet. You can even mix in dried herbs or leaves for an earthy touch. Let your creativity flow and transform a simple craft into a statement piece!
6. Fun Dinosaur Craft for Kids
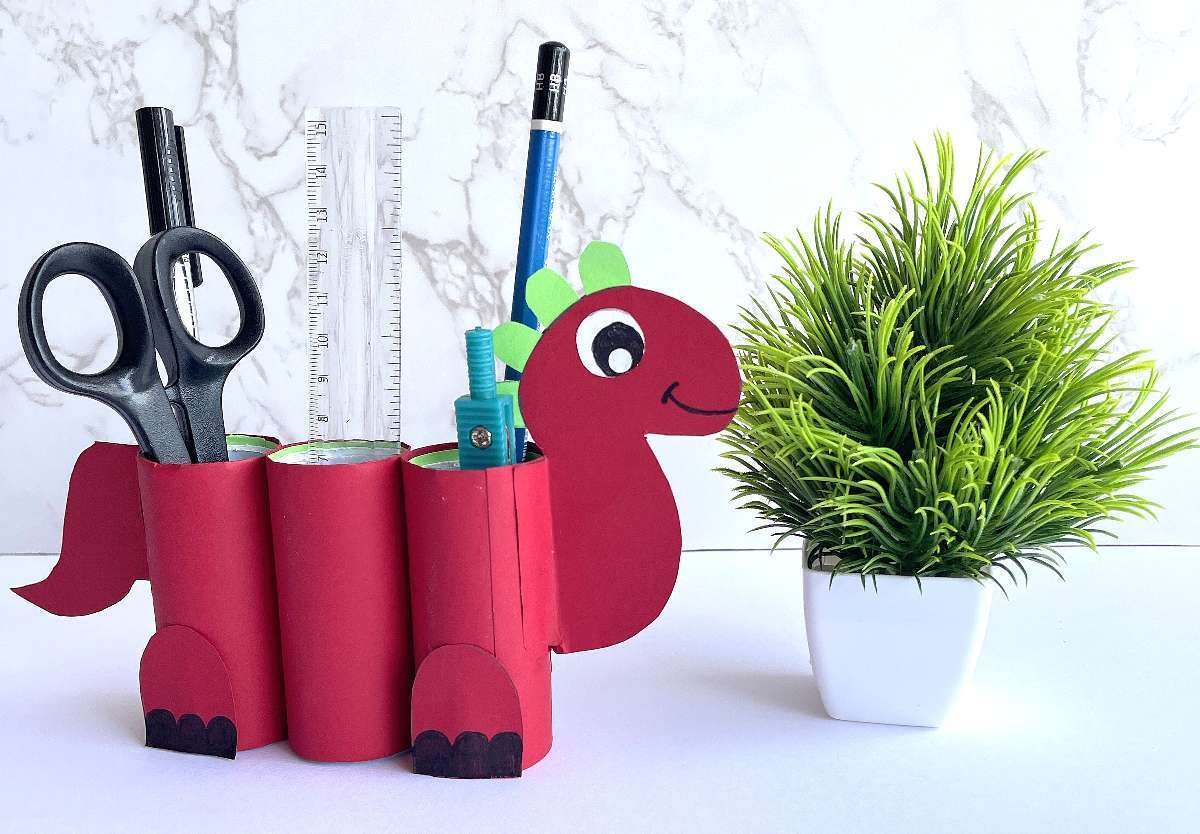
You can create an adorable dinosaur craft using simple materials you likely already have at home. Grab some toilet paper rolls, construction paper, glue, and your favorite art supplies to get started.
Start by covering the toilet paper rolls with vibrant construction paper. Allow your kids to unleash their creativity by painting or decorating the rolls. Once dry, cut out various dinosaur features like spikes, tails, and eyes from additional paper.
Finally, glue on these features to transform your rolls into unique dinosaurs. You can even add a fun twist by turning them into holders for markers or scissors; it makes for a cute and functional desk accessory!
7. Creative Fish Crafts for All Ages
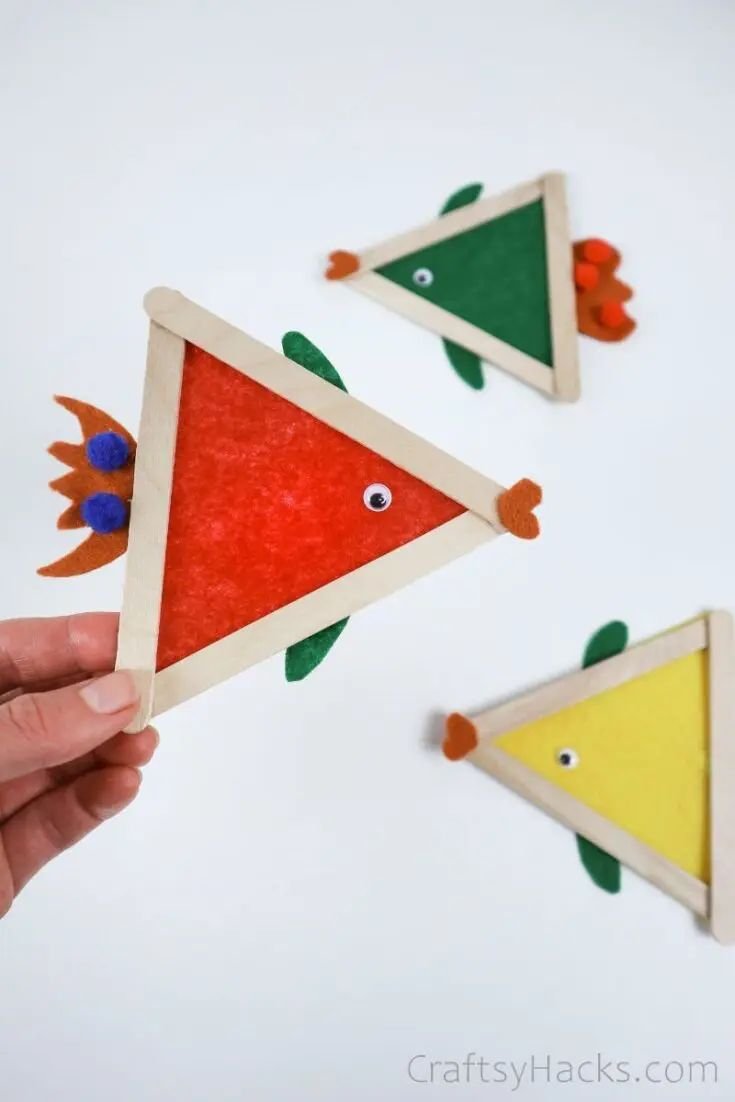
You can jump into the world of fish crafts that everyone can enjoy! Here’s a fun idea: use popsicle sticks to create vibrant fish. Simply paint the sticks in your favorite colors, then add googly eyes and other embellishments like glitter or sequins for sparkle.
Another twist is to use various patterned paper—think stripes or polka dots—to give each fish a unique personality. Once finished, pop on some adhesive magnets, and you have colorful refrigerator decor that will brighten up any kitchen!
8. Creative DIY Bookmark Ideas for Everyone
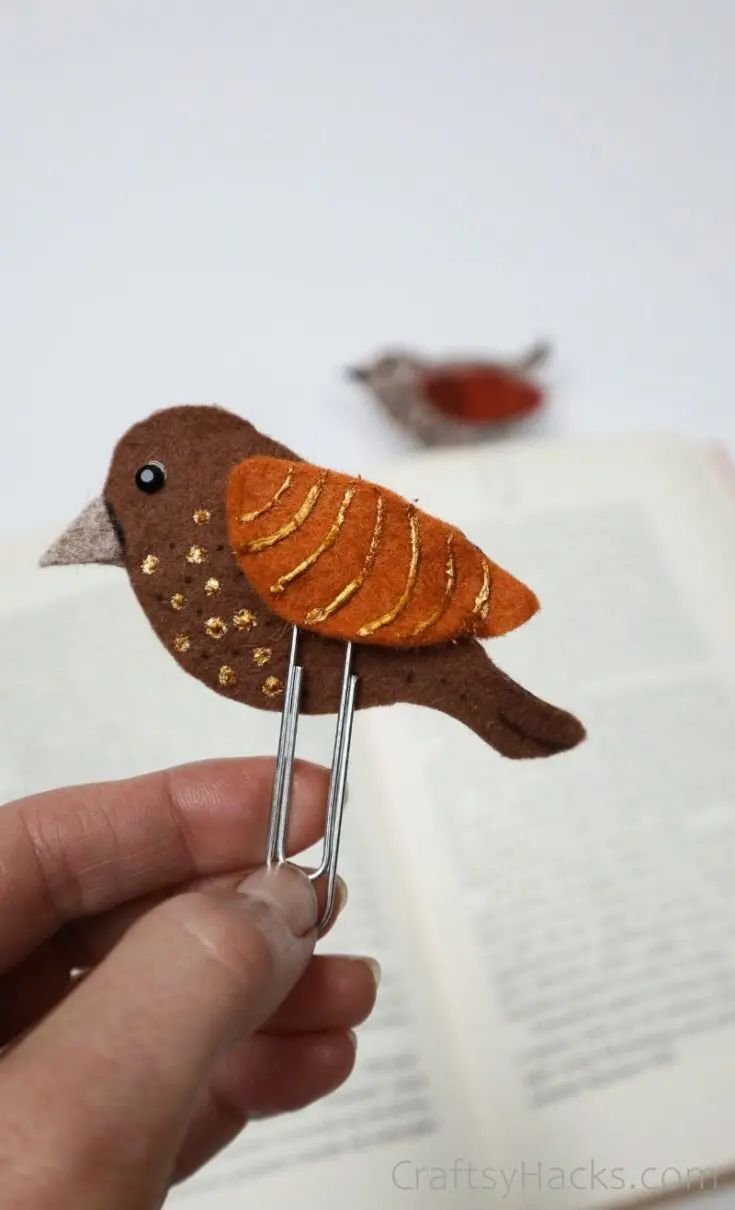
You can dive into the world of creative DIY bookmarks that resonate with your personal style! Whether you’re drawn to animals, nature, or quirky shapes, the possibilities are endless.
- Upcycled Materials: Use old greeting cards or magazines to cut out fun shapes. Add washi tape for a decorative finish.
- Fabric Bookmarks: Sew scraps of fabric together for a soft and colorful bookmark. You can embellish it with buttons or patches.
- Nature-Inspired: Collect leaves or pressed flowers and glue them onto cardstock. This adds a natural touch to your reading experience.
Each bookmark can be a unique expression of creativity that you can make with family and friends, turning reading into a visually delightful journey!
9. Personalized Fingerprint Glass Magnets Craft
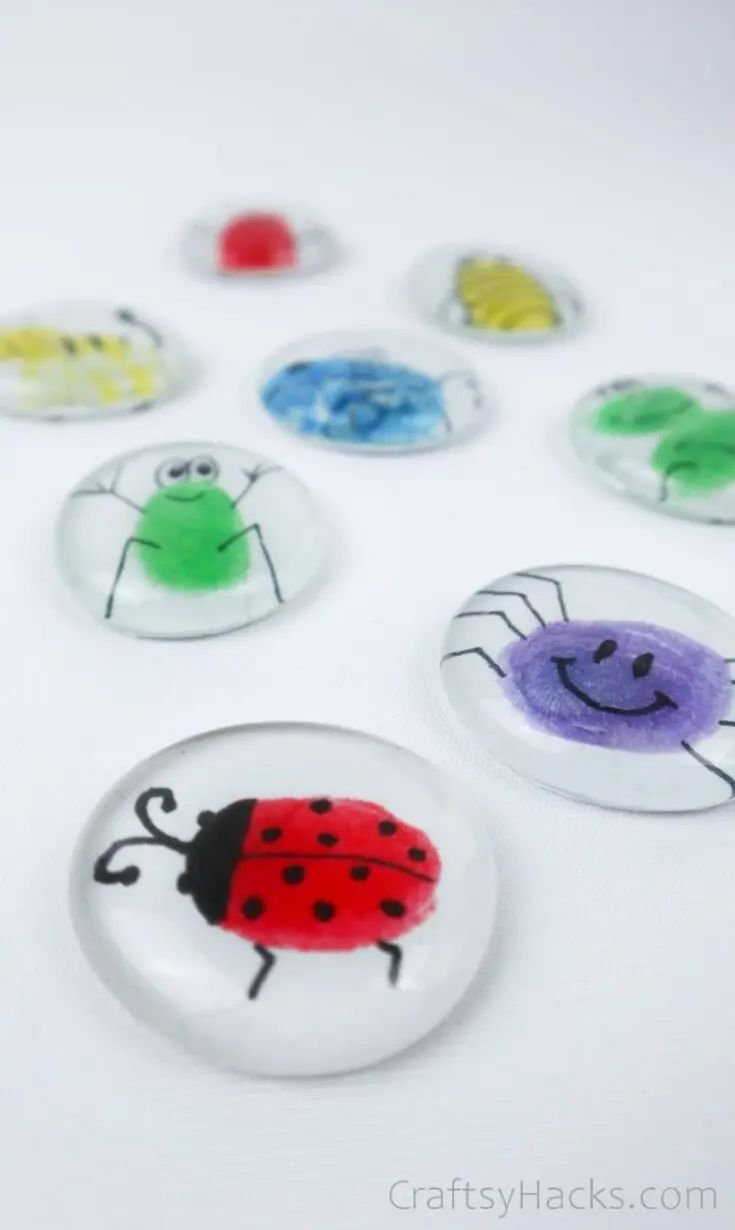
Create personalized fingerprint glass magnets that not only brighten up your fridge but also make for heartfelt gifts. This simple craft involves using glass circles along with your kids’ unique fingerprints to create memorable designs.
Here’s what you’ll need:
- Glass circles (available at craft stores)
- Non-adhesive magnets
- Acrylic paint (for colorful fingerprints)
- Clear glue to secure the magnets
Start by having your little ones dip their fingers in the non-toxic paint and press them onto the glass. Once dry, attach the magnets on the back with clear glue. You can also mix in shapes or seasonal themes, creating a personalized touch that reflects their creativity. These unique magnets are perfect for displaying their art on the fridge!
10. Effortless Pin Storage with Magnetic Saucer
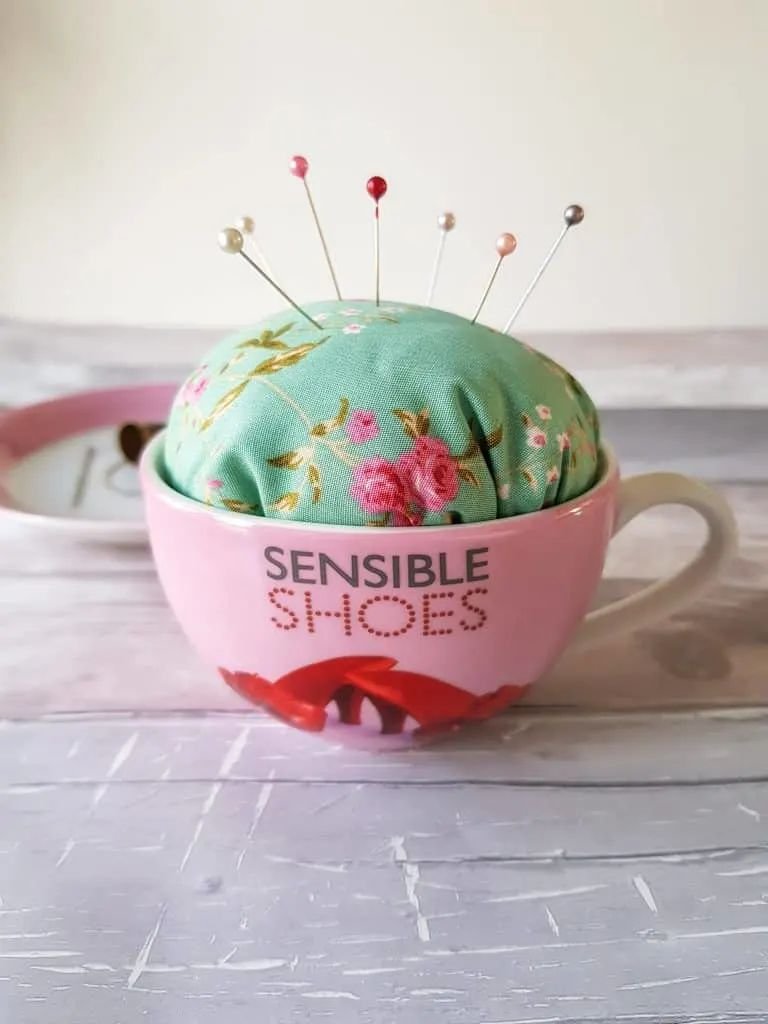
You’ll love the effortless pin storage that a magnetic saucer brings to your crafting routine. This simple yet clever tool keeps your pins organized and easily accessible, eliminating the frustration of hunting for them.
To create your own magnetic saucer, all you need is a shallow dish and a strong magnet. Secure the magnet to the center of the dish using hot glue. Now, you can effortlessly toss your straight pins onto the saucer, where they will stick to the magnet and stay in place.
This craft is not just functional; it adds a touch of charm to your sewing space. Plus, you’ll always know where to find your pins, saving you valuable time on your projects!
11. Colorful Flip Flop Door Hanger Craft
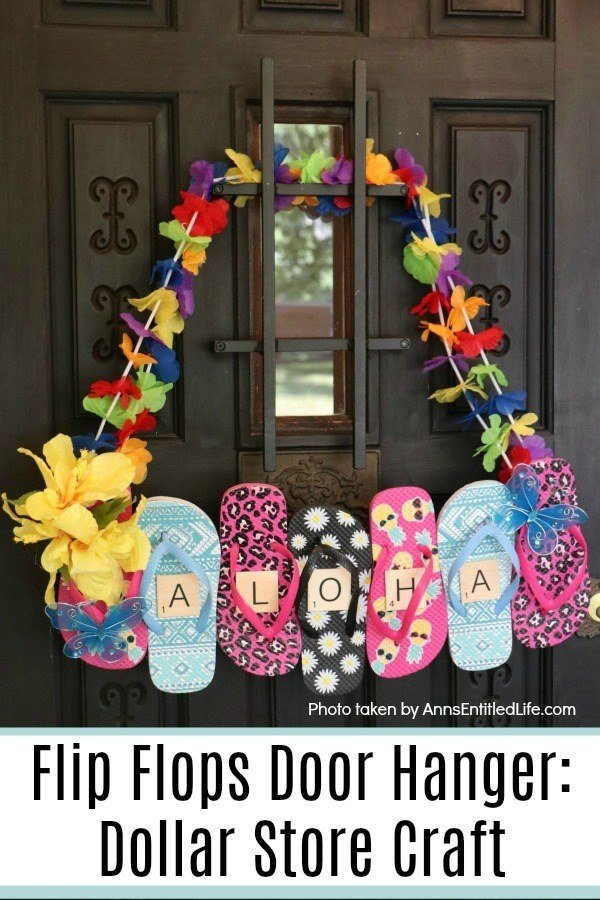
You might be wondering what to do with all those leftover flip-flops from last summer. Instead of tossing them, turn them into a colorful door hanger that’s perfect for adding a splash of fun to your home’s decor!
To create this delightful craft, gather a few pairs of old flip-flops—choose vibrant colors for maximum effect. Simply glue them together in a layout that suits your style. You can even add embellishments like flowers or ribbons to enhance the look. Hang it on your door for a cheerful welcome!
This craft is an excellent project for kids and teens alike. It not only encourages creativity but also helps declutter your space. Plus, it’s an ideal addition to any coastal home or summer-themed setting!
12. Easy Steps to Draw Butterflies
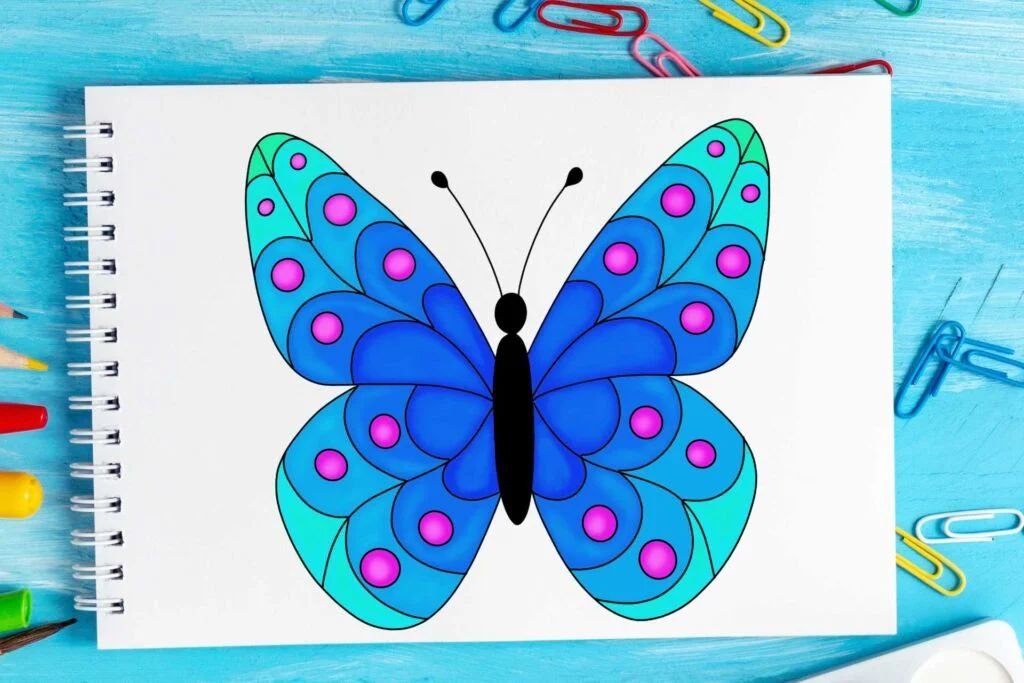
You can easily draw adorable butterflies with just a few simple steps! Start by sketching a basic oval shape for the body and larger, rounded wings on either side. Aim for symmetry to make your butterfly visually appealing.
Once you have the initial shapes, refine the wings by adding curves and flares to create a more dynamic look. Don’t forget to emphasize the details! Use simple lines and shapes for the wing patterns to add personality to your butterfly.
If you’re helping kids, you can print a butterfly outline and place it under tracing paper. This way, they can easily follow along, improving their drawing skills while having fun.
13. Creative Ladybug Craft Ideas for Kids
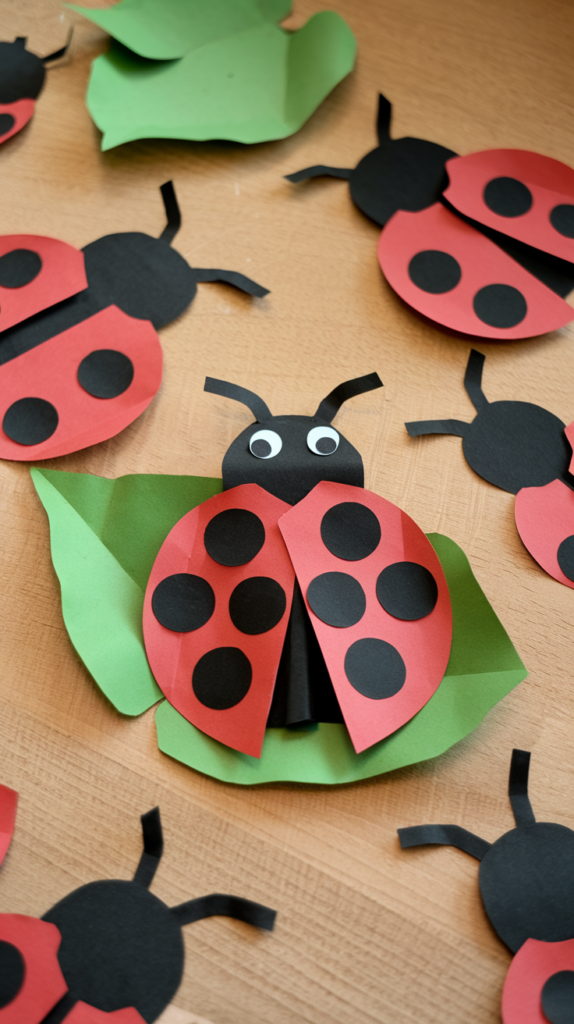
You can spark your kids’ creativity with adorable ladybug crafts that are both simple and fun! Using materials you probably already have at home makes this an easy project.
Create ladybugs from toilet paper rolls or paper towel rolls. Simply cut the rolls into smaller sections, then let your kids paint them in vibrant colors. Red with black spots is classic, but encourage them to experiment with other colors for unique ladybugs!
To add a personal touch, use craft paper for wings and attach them with glue. You can also use googly eyes or draw on faces to bring these critters to life. Don’t forget to display their creations proudly around the house!
14. Create Your Own Fun Stress Ball
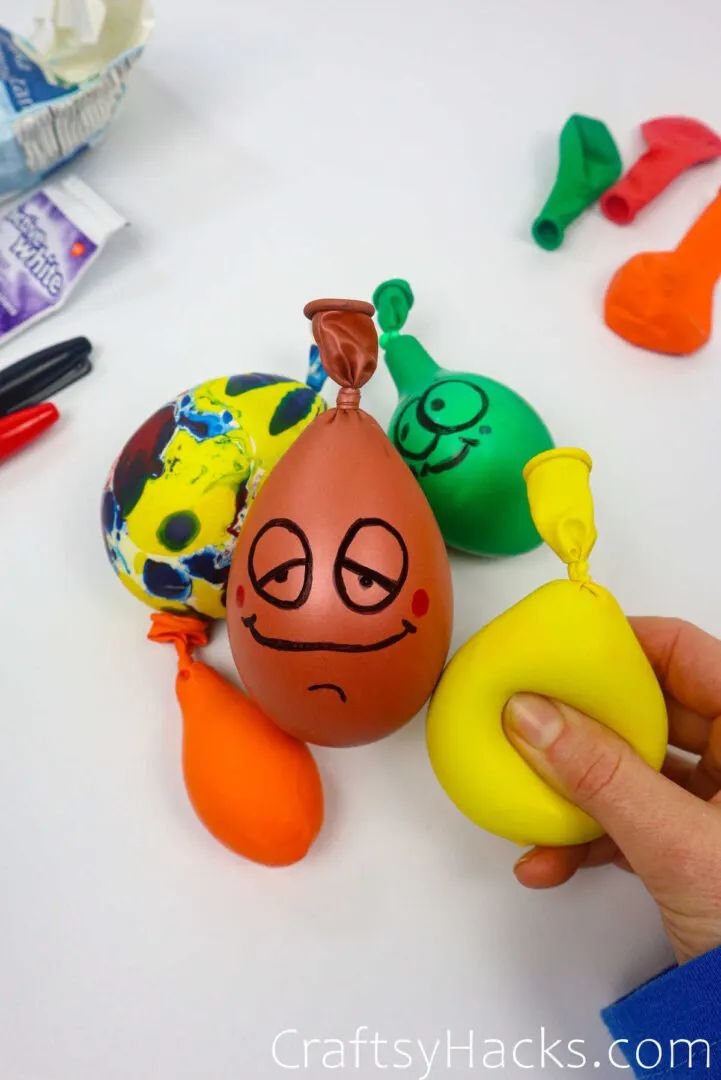
You can easily create your own fun stress ball using simple materials you probably already have at home. Start with a balloon; choose your favorite color to add some flair. Fill it with materials such as sand, rice, or even quinoa for a unique texture.
Be careful not to overfill it! Leaving some space allows the stress ball to squish and expand effectively when you squeeze it. Once filled, tie a knot at the end to keep the contents secure.
Get creative by decorating the outside with markers or stickers. It’s a perfect activity to relieve stress and a great craft to enjoy, especially on a rainy day!
15. Customizable Craft Tool Storage Solutions
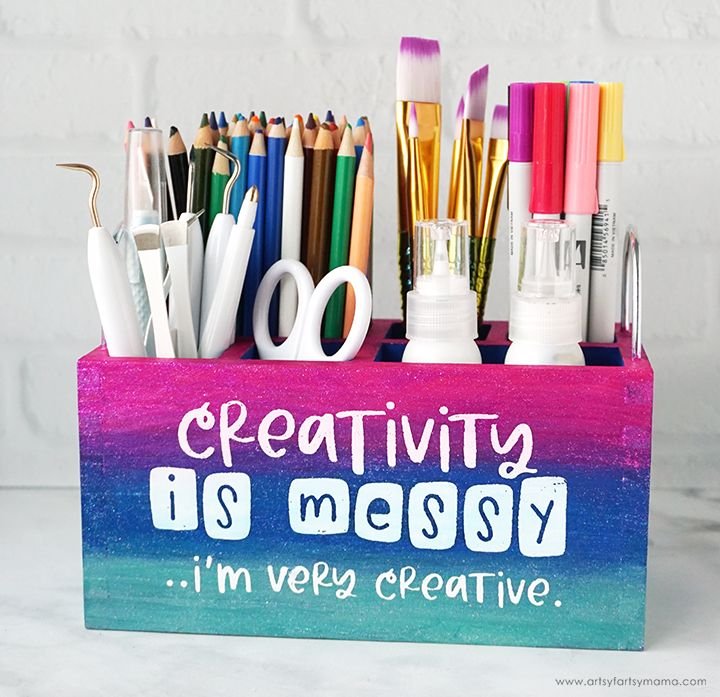
You can transform your craft space with customizable craft tool storage solutions that fit your unique style. Start with a simple open organizer, such as a wooden box or a plastic caddy.
To personalize it further, create dividers using cardboard or lightweight material. This allows you to arrange the space to match the tools you have, whether it’s markers, scissors, or washi tape.
Consider adding labels to sections with your favorite colors to keep everything organized and visually appealing. This not only enhances functionality but also adds a fun, artistic touch to your craft area!
16. Fun Toilet Paper Roll Macaw Craft

Transform those empty toilet paper rolls into vibrant macaws! This craft is perfect for a fun-filled afternoon and a great way to recycle.
First, gather your materials. You’ll need toilet paper rolls, paint or markers, craft scissors, and googly eyes. You can even add feathers for a more whimsical touch.
Start by painting your rolls in bright colors like blue, yellow, or green. Once dry, cut out wings and tails from colored paper, and attach them. Finish by gluing on googly eyes to bring your macaw to life! It’s a simple yet delightful project that sparks creativity and imagination.
17. Creative Stone Monster Crafting Guide
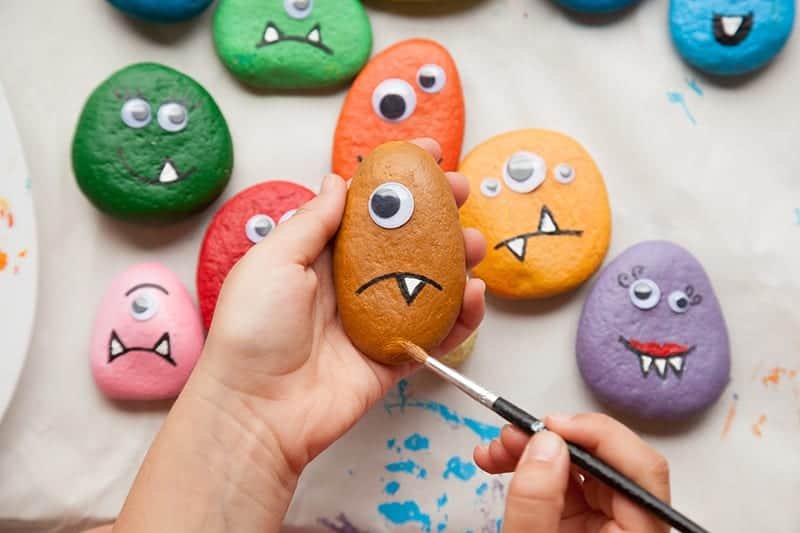
Gather your children and head outdoors for a nature adventure! Collect various stones or rocks of different sizes. You’ll want a good mix of shapes to create unique monster personalities.
Once you’ve gathered your treasures, it’s time to get creative. Set up a crafting station with some acrylic paints, brushes, and googly eyes. After painting your stones, let them dry for 24 hours, either in the sun or in a safe indoor spot. This step is crucial to avoid smudging.
Encourage your little ones to unleash their imaginations! They can create friendly monsters, spooky creatures, or even colorful aliens. You can even use stones as decoration in your garden or around the house, showcasing their artistic flair!
18. Fun Paper Dinosaur Craft for Kids
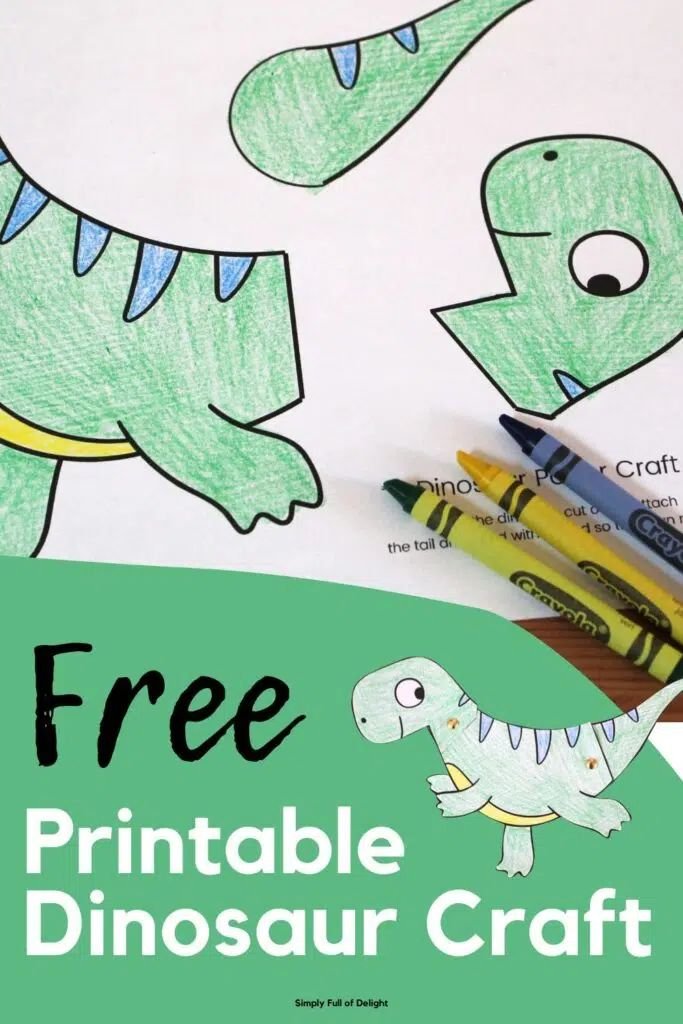
You can create an exciting paper dinosaur craft that your kids will love! Start by downloading a printable dinosaur template from the internet — there are tons of free resources available.
After printing, let your little ones cut out the shapes. This not only makes them practice their cutting skills, but it’s also incredibly fun! Once they’ve finished cutting, encourage them to decorate the dinosaurs using markers, stickers, or paint for extra flair.
Finally, use the dinosaurs in a creative art project. They can be part of a dinosaur habitat scene or even a fun puppet show! Get ready for loads of imaginative play!
19. Creative Felt Apple Pencil Toppers
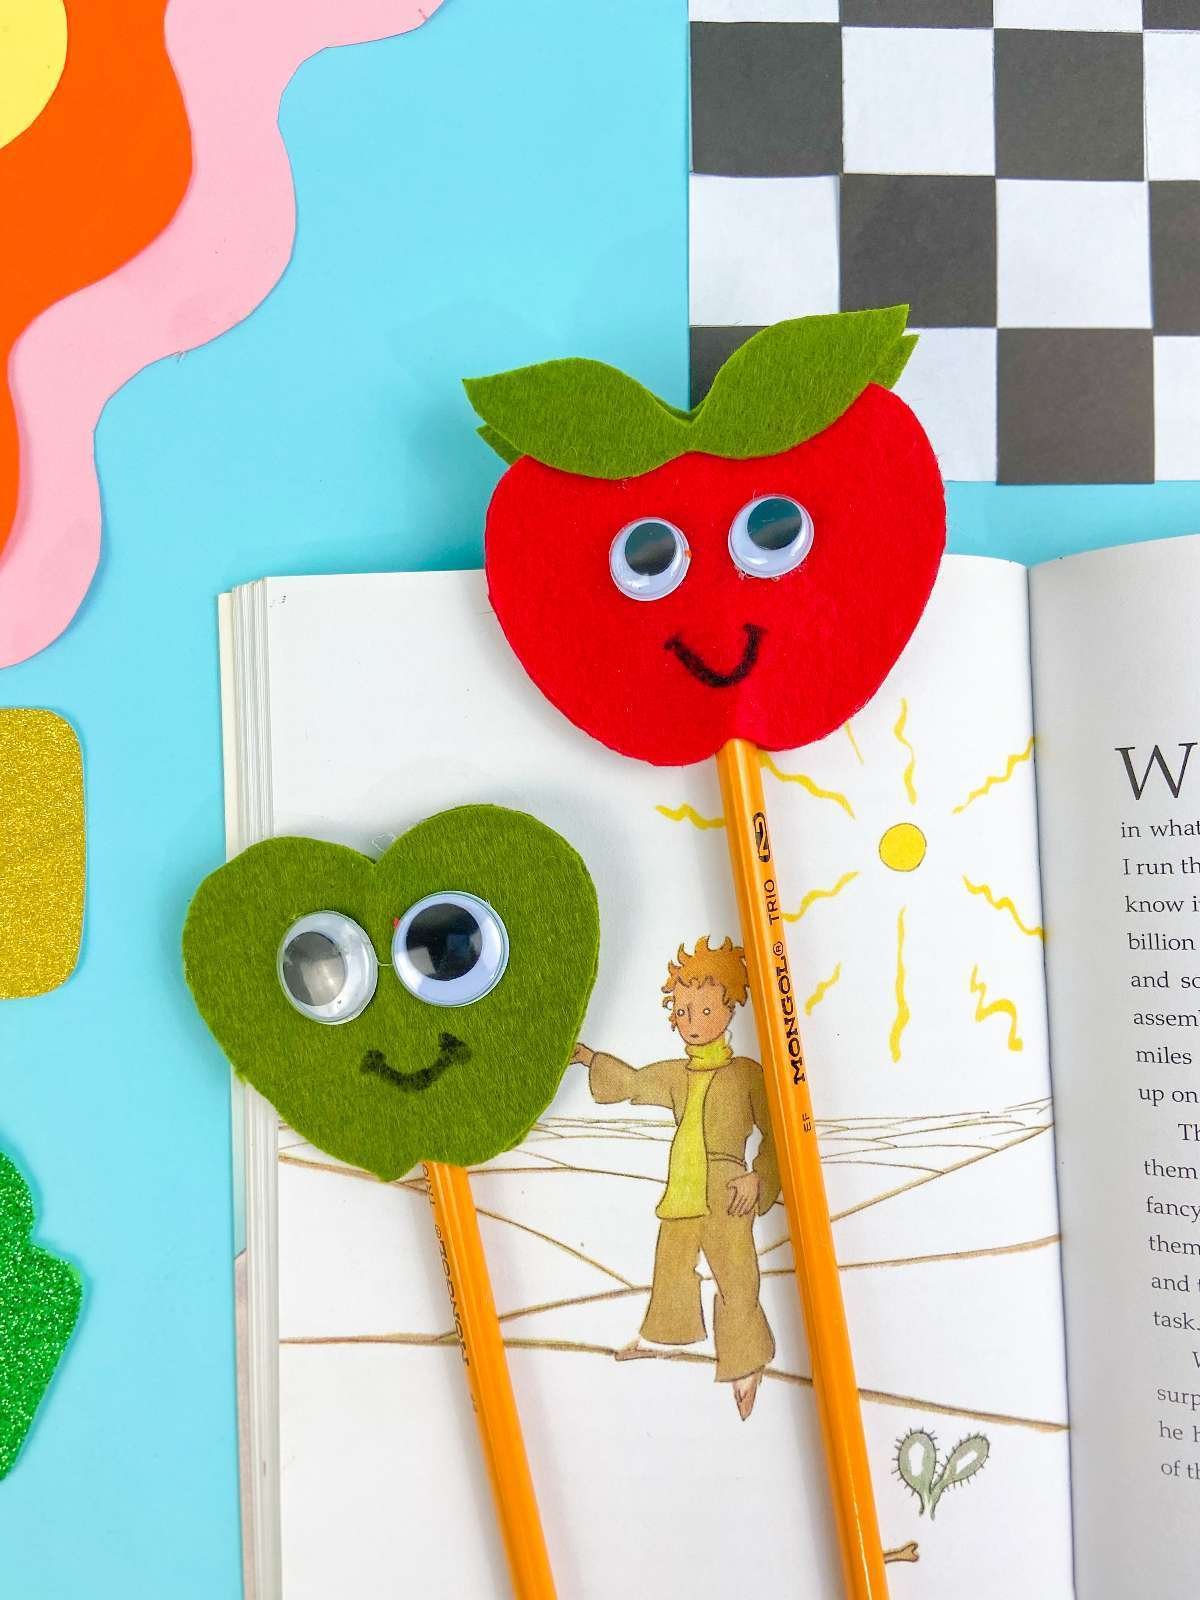
You can create adorable felt apple pencil toppers that are not only functional but also add a touch of fun to your school supplies. These crafty creations are perfect for welcoming the back-to-school season and can easily be made in different colors to match every personality.
Start by gathering some colorful felt sheets, scissors, and a hot glue gun. Cut out your apple shapes by tracing them on a piece of paper first, ensuring that each apple has a uniform size.
Next, cut mini leaves from green felt and glue them at the top of your apple shapes. You can also personalize your toppers by adding small pins or embellishments. These pencil toppers make great gifts and are a fantastic way to celebrate your creativity as the school year begins!
20. Create Adorable Unicorn Toilet Roll Crafts
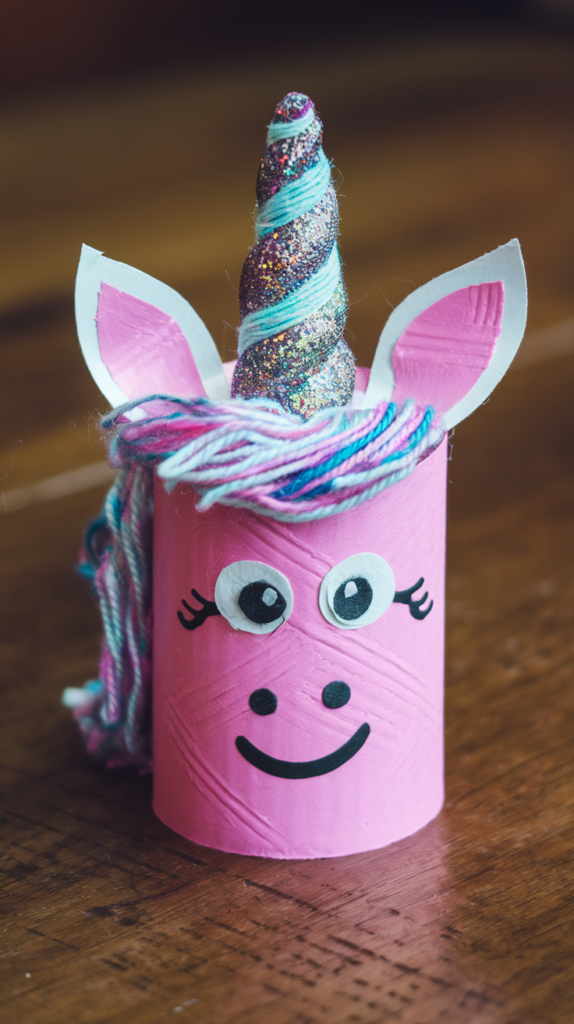
You can easily create adorable unicorn toilet roll crafts with just a few simple steps. Start by painting your toilet paper rolls in fun colors like pink, purple, or blue. Let your creative juices flow by allowing the paint to dry completely before moving to the next step.
Once your rolls are dry, it’s time to add some magical details. Cut out a horn from glittery paper and glue it to the top of the roll. Use yarn or colorful paper strips to create the unicorn’s mane. Finally, draw or stick on eyes and a smile to give your unicorn character. This craft not only provides endless fun but also a cute decoration for your space!
21. Fun Halloween DIY Paper Spider Craft
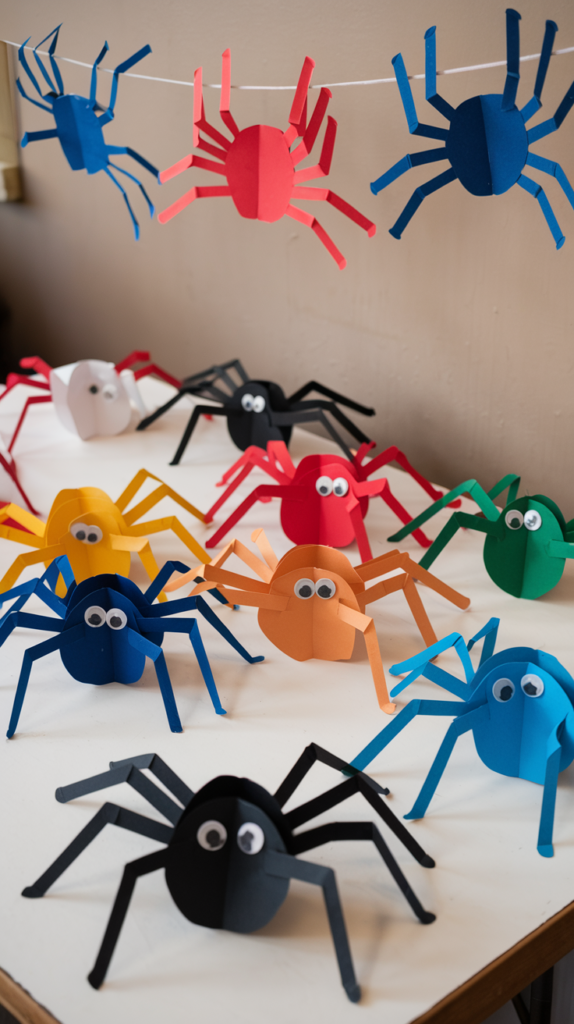
You’ll love making Halloween DIY Paper Spiders, a perfect craft to enjoy with kids or brighten your decor! Grab some colored card stock—it adds structure and fun. Choose colors like black, orange, and purple for that classic spooky feel.
To create your spider, cut out a simple oval for the body and smaller ovals or circles for the legs. For an added twist, use googly eyes! These cute creatures can be turned into cards, placed around the house, or hung as decorations. Enjoy the process and let your creativity spider-web out!
22. Colorful Suncatcher Craft for Kids
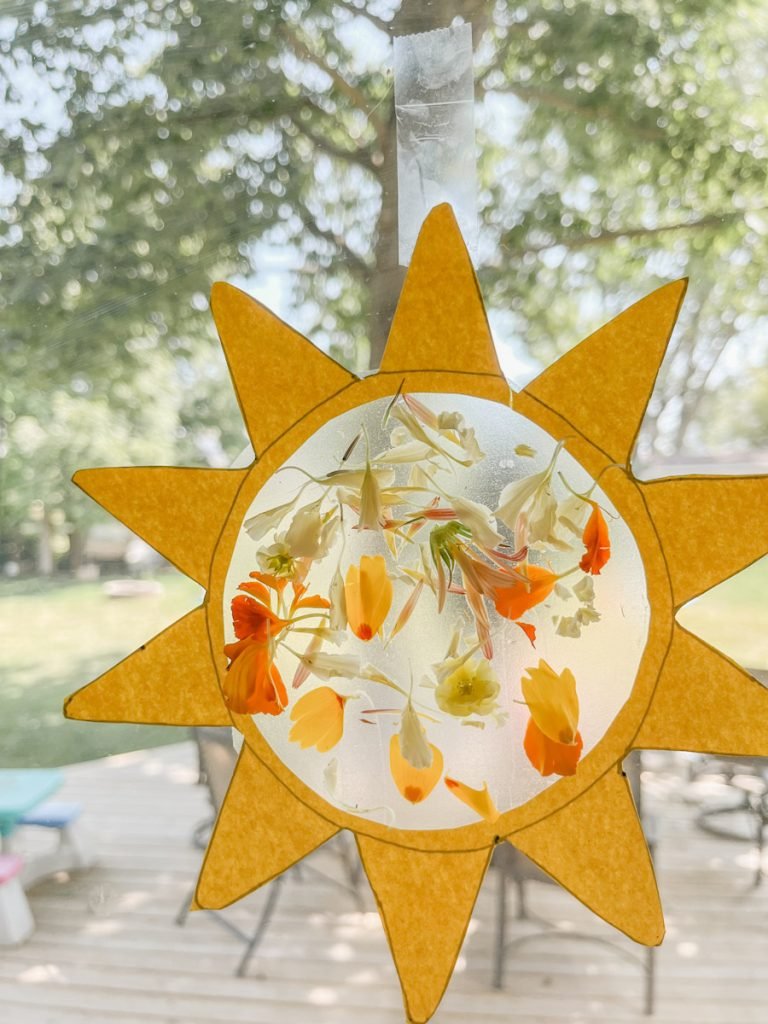
You can create a colorful suncatcher craft that will brighten up any window and engage your kids creatively. Start by gathering contact paper, which serves as the base for your project.
Cut the contact paper into fun shapes like hearts or stars. You can use various transparent materials as fillers—think of glitter, confetti, or even pieces of colored tissue paper. Kids can arrange these materials on the sticky side of the contact paper, allowing their imagination to flow.
Once they’re happy with their design, seal it with another piece of contact paper. Hang the completed suncatchers in front of sunlight to see the beautiful colors come to life!
23. Create Adorable Origami Puppies Easily
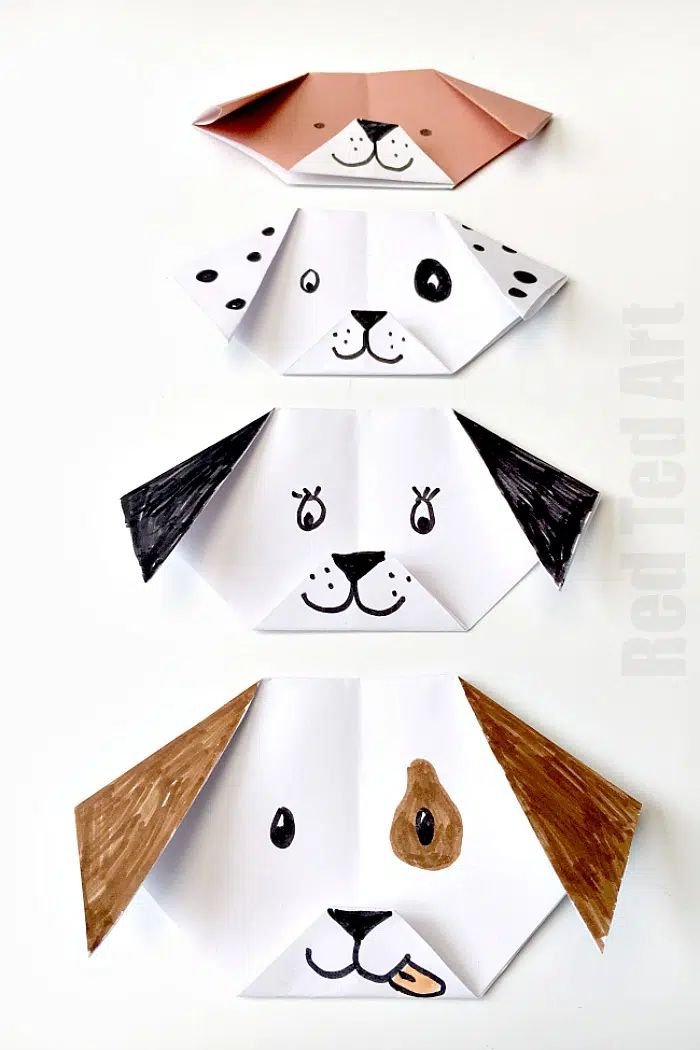
You can easily create adorable origami puppies with just a few simple folds. All you need is a square piece of paper, which can be any color or pattern you like.
Start by folding your square in half diagonally, making a triangle. Next, fold the two top corners down towards the bottom point to form the ears. With a little creativity, you can give your puppy unique features. Use markers or colored pencils to add eyes, a nose, and even spots to make each pup your own.
This fun craft is great for all ages and perfect for a rainy day activity! Plus, it only takes a few minutes to complete, so you can have a whole pack of puppies in no time!
24. Create Adorable Monthly Baby Photos
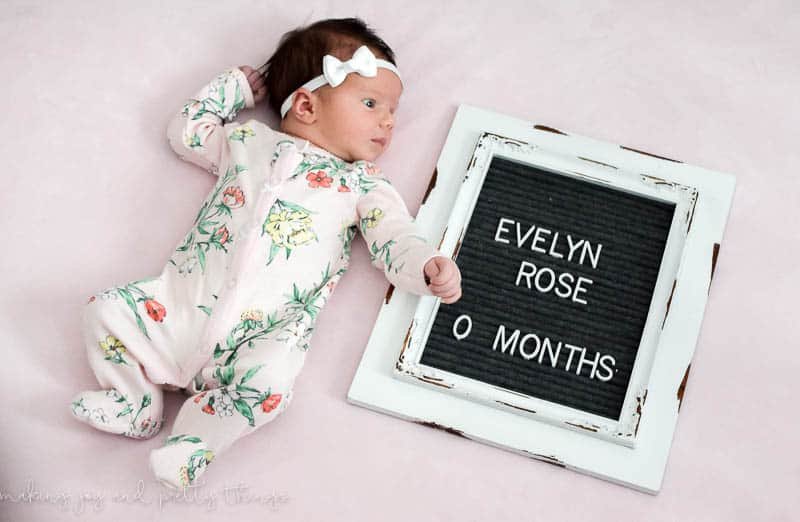
You can capture adorable monthly baby photos without breaking the bank! Start by creating a DIY photo backdrop using items you already have. A simple piece of fabric or wall hangings will work wonders.
To showcase your baby’s milestones, consider using a frame or letter board to display their age. You can easily find an old frame at thrift stores or upcycle one at home. Paint it in a color that complements your décor or baby’s theme.
Enhance the cuteness factor by including some seasonal props like flowers or toys. These small touches will make your photos even more charming and unique!
25. Magical DIY Unicorn Tree Craft Ideas
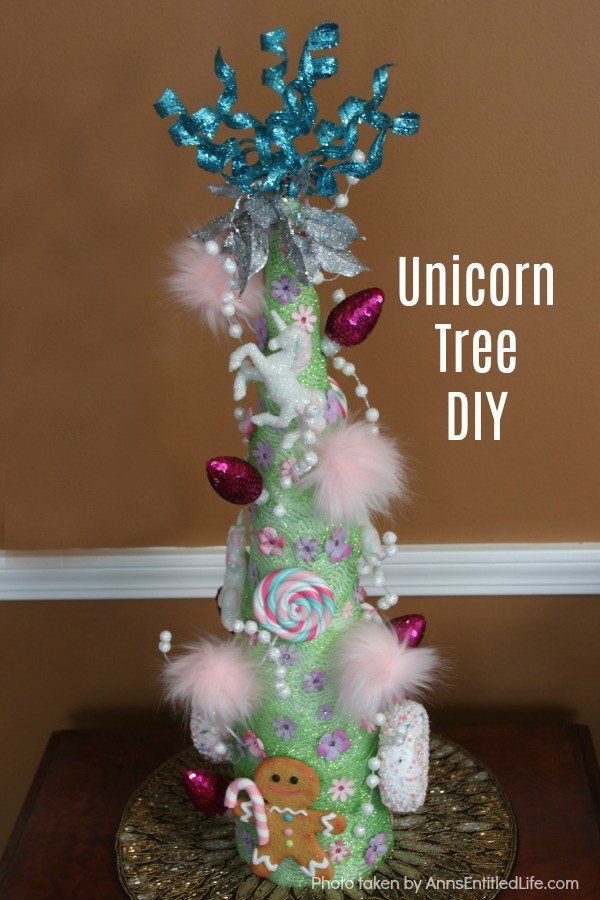
You can bring a touch of whimsy and sparkle to your decor with a magical DIY unicorn tree. These colorful creations can be a delightful addition to any room and can suit various themes, from children’s parties to everyday decorations.
To get started, you’ll need some basic supplies. Consider using construction paper, which can be easily shaped into cones for a quick craft. Alternatively, if you prefer a more durable option, styrofoam bases work wonderfully. Simply wrap these in colorful paper or paint them with your favorite pastel shades.
For added magic, embellish your trees with glitter, sequins, or ribbons. You can even create a mini unicorn figure to top your tree! Pair different sizes to create a stunning display, and let your imagination soar—each tree can be a unique masterpiece!
26. Creative DIY Embroidery Hoop Wreath Ideas

You probably have some embroidery hoops lying around, just waiting to be transformed into a stunning wreath. The charm of these wreaths lies in their versatility—use fabric scraps, faux flowers, or even twine to create a unique design.
For a seasonal touch, try these ideas:
- Autumn Wreath: Use orange, brown, and yellow fabrics, along with small faux pumpkins to celebrate the fall.
- Spring Delight: Brighten your space with pastel fabrics and fresh flowers or faux blooms for a soft look.
- Festive Holiday Decor: Wrap your hoop in green and red felt, and embellish it with miniature ornaments for a merry splash.
Get creative, mix and match materials, and let your personal style shine in every wreath you craft!
27. DIY Hair Bows: Fun and Affordable
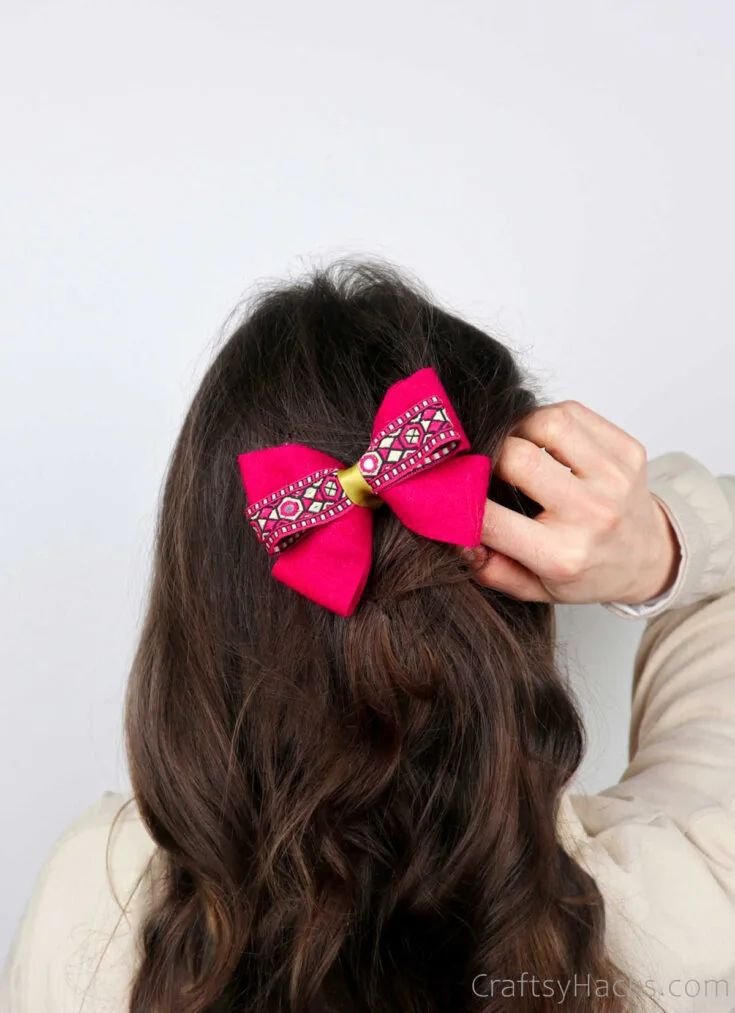
You can unleash your creativity with DIY hair bows that are both fun and affordable. Save money while making adorable accessories that can be personalized for yourself or as gifts for friends and family.
Start with basic materials: ribbon, scissors, and glue. You can also grab alligator clips or headbands as bases for your bows. With simple techniques, you can create versatile designs, from classic to seasonal themes. Don’t forget to experiment with colors and patterns that reflect your style or the holiday spirit!
To make it extra special, try adding embellishments like buttons or fabric flowers. This makes each bow unique and personal. Share your creations on social media or give them as heartfelt gifts!
28. Creative Paper Squishies Craft Ideas
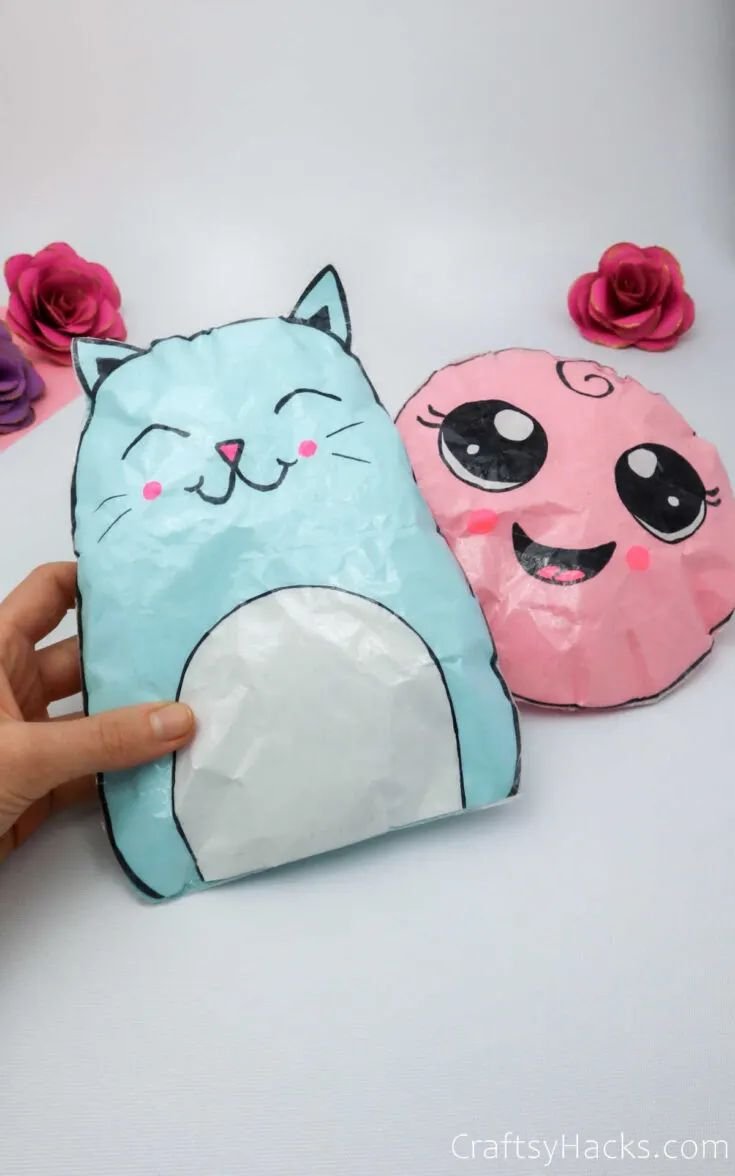
You can create creative paper squishies that your kids will adore! This fun craft is perfect for any young artist eager to design their favorite characters or objects. All you need are some basic supplies and a dash of imagination.
Start with materials like cardstock paper for durability, fabric markers, and scissors. Have your kids sketch or print their favorite squishy shapes, such as fruits, animals, or even their beloved cartoon characters.
To add extra squishiness, stuff the paper designs with cotton balls or tissue paper. This will give them a 3D effect. Once assembled, they can decorate their creations with stickers or glitter to make them even more special!
29. Adorable Sloth Craft for Kids
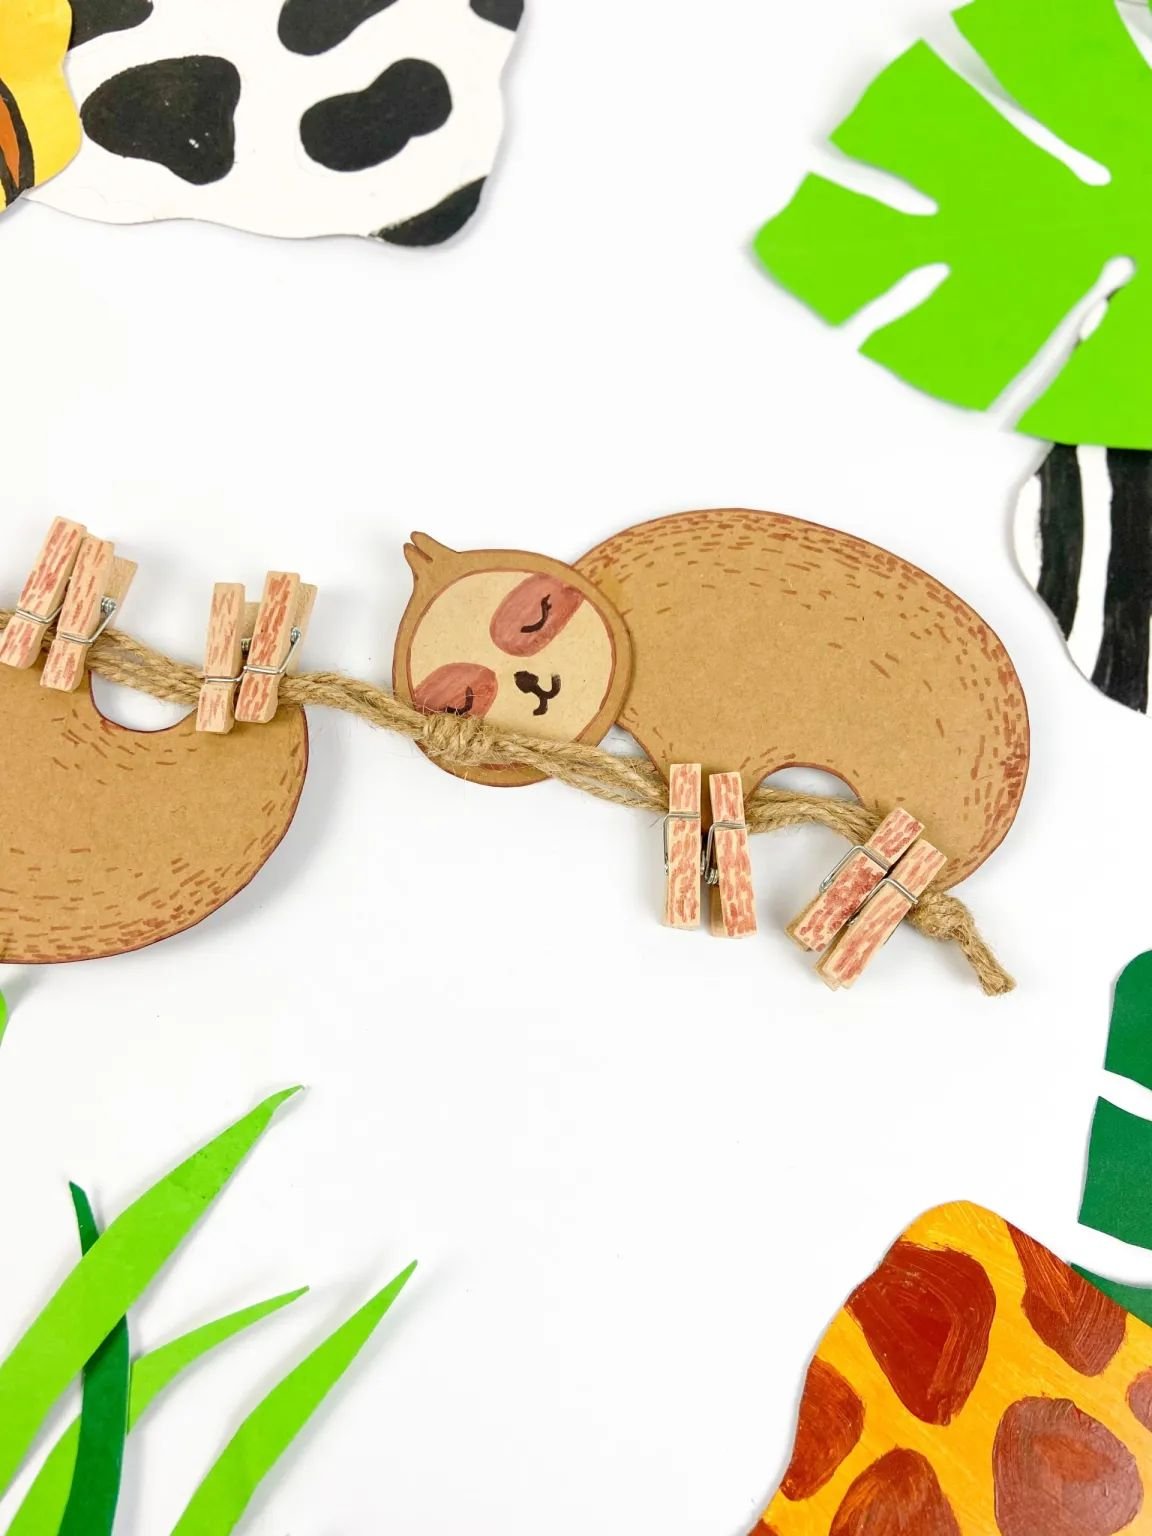
You can create an adorable sloth craft that not only entertains but also enhances fine motor skills. Grab some construction paper, markers, and wooden clips to let your creativity flow.
Begin by drawing a sloth shape on the paper and cutting it out. Encourage kids to decorate it with fun facial expressions and unique patterns.
Once your sloth is ready, you can use the wooden clips to attach your creation to “vines” made from string or paper. This interactive feature makes it even more engaging!
30. Fun Penguin Craft Ideas for Winter
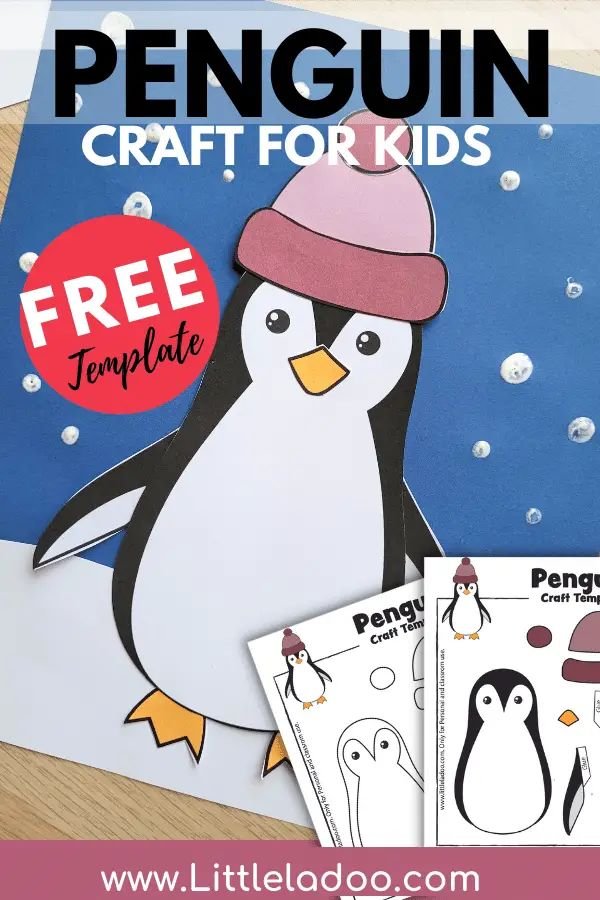
You can spark your creativity this winter with some adorable penguin crafts! These projects are perfect for all ages, making them a fun family activity.
Materials you can use:
- Paper plates for a simple penguin face.
- Black and white construction paper for cut-outs.
- Pom-poms for accessories like hats and scarves.
Try the penguin bookmark! Simply cut a penguin shape from paper, decorate it, and laminate for durability. Or, make a penguin snow globe by placing a small penguin figurine in a jar, adding water and glitter for a magical winter scene. Let the winter fun begin!