
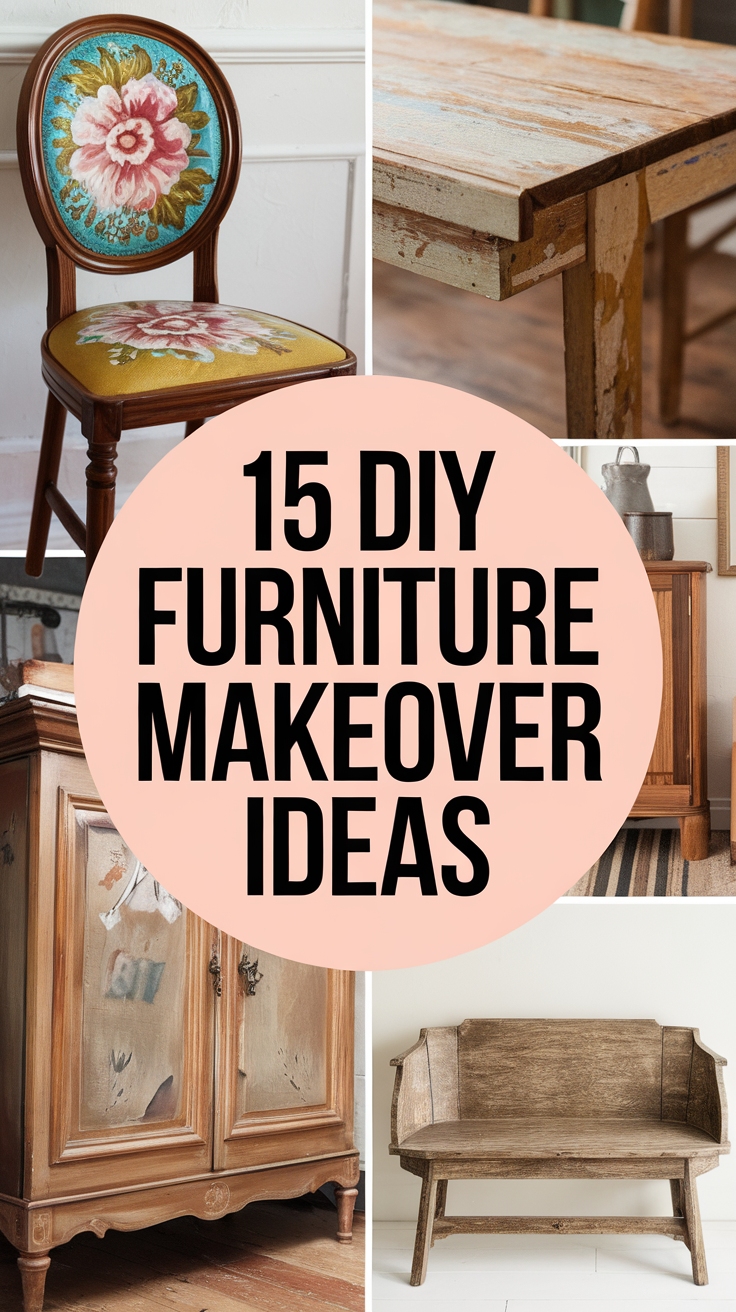
15+ Stunning DIY Furniture Makeover Ideas
Are you tired of looking at boring, outdated furniture in your home? Did you know that just a few simple changes can turn your old pieces into stunning conversations starters? In this blog, we’ll explore 17 amazing DIY furniture makeover ideas that will inspire you to unleash your creativity and transform your living space with unique, personalized touches. Get ready to learn how to repurpose and revamp your furniture, making it both functional and fabulous!
Shop Our Must-Haves


1. Transform Drawers with Creative Decoupage Techniques
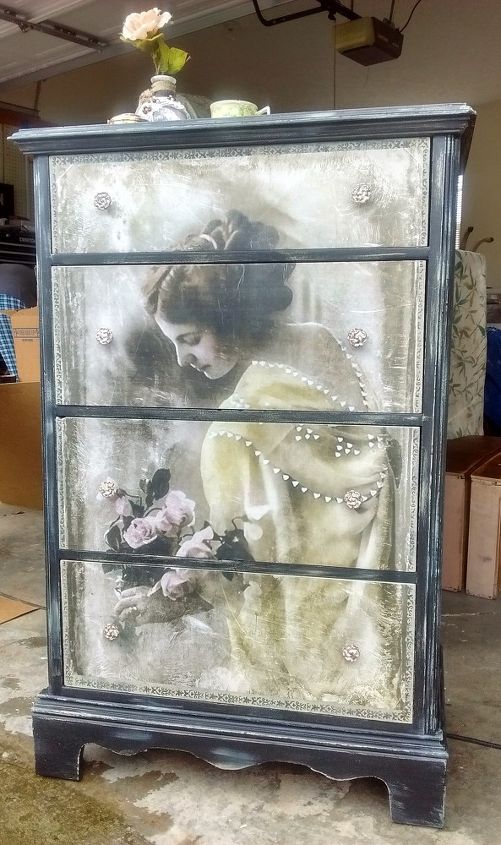
You can easily transform dull drawers into vibrant, eye-catching pieces with creative decoupage techniques. Start by selecting a design that resonates with your style—this could be anything from floral patterns to abstract art.
Gather your materials: You’ll need mod podge, a brush, scissors, and a printed design or decoupage paper. Begin by cleaning the drawer surface thoroughly. Cut your chosen design to fit and apply a thin layer of mod podge on the drawer’s surface.
Carefully place the design on the drawer, smoothing out any bubbles. Finish by applying a top coat of mod podge to seal and protect your artwork. Let it dry, and enjoy your unique, artistic storage solution!
2. Versatile Portable Kitchen Island Designs

A portable kitchen island elevates your cooking experience, offering flexibility and style. It can serve multiple purposes, whether you’re prepping meals, enjoying a drink, or hosting friends.
Consider using an old dresser or cart as a base. Sand it down, paint or stain it in your kitchen colors, and add a sturdy wooden top for a rustic feel. Don’t forget to incorporate wheels, making it easy to move as needed.
Include open shelving or hanging hooks for utensils and pots to maximize storage. This practical design transforms your cooking space into a functional and stylish hub that can adapt to your entertaining needs.
3. Transform Your Table with Decoupage
You can transform your table into a stunning focal point using the art of decoupage. This technique allows you to personalize your furniture by layering decorative papers, fabric, or even photographs, which can showcase your unique style.
Start by choosing high-quality materials—like scrapbook paper or wrapping paper—that resonate with your personality. Clean your table thoroughly and lightly sand the surface for better adhesion. Use a decoupage medium to apply the chosen materials, overlapping them as desired to create depth and texture.
Finally, seal your work with a protective finish to ensure durability. With just a little effort, you’ll have a one-of-a-kind table that reflects your creativity and enhances your interior space!
5. Transform Old Drawers into Stylish Shelves
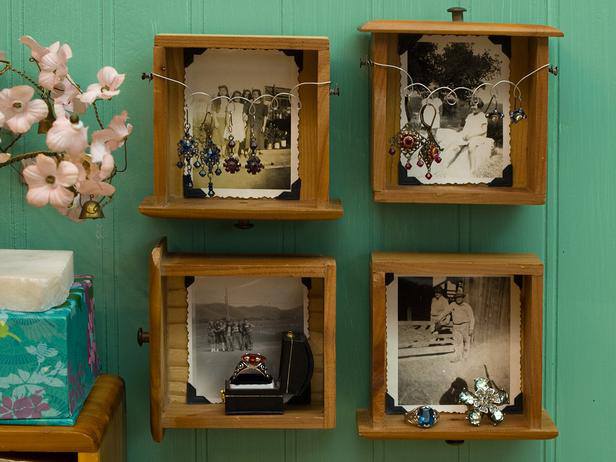
You can transform old drawers into stylish shelves with just a few simple steps. This creative project adds a vintage touch to your home while being environmentally friendly.
First, remove the drawers from an old cupboard or dresser. Sand down any rough edges and paint or stain them to match your interior style. You might choose a bold color for a pop of personality or a neutral shade for a timeless look.
Next, secure the drawers to the wall using brackets or heavy-duty adhesive strips. Position them at different heights for a whimsical, eclectic feel. Don’t forget to style your new shelves with decorative items like plants, books, or framed photos to showcase your personality!
6. Transform Vintage Suitcases into Nightstands
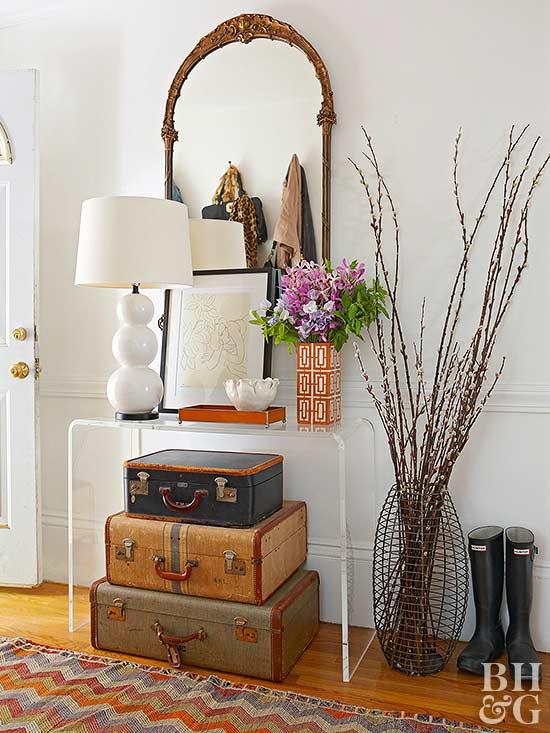
You can easily transform vintage suitcases into charming nightstands that add character to your room. Start by finding a few vintage suitcases in different sizes. Head to thrift stores or browse online marketplaces for unique finds.
Stack them one on top of the other or use a sturdy surface to secure them for stability. Mix and match colors and styles to create an eclectic look that fits your decor.
To enhance functionality, consider installing a small lamp or your favorite books and decor on top, while using the compartments for storing items. This project combines style and practicality, making it a perfect weekend DIY!
7. Transform Old Furniture into Pet Beds
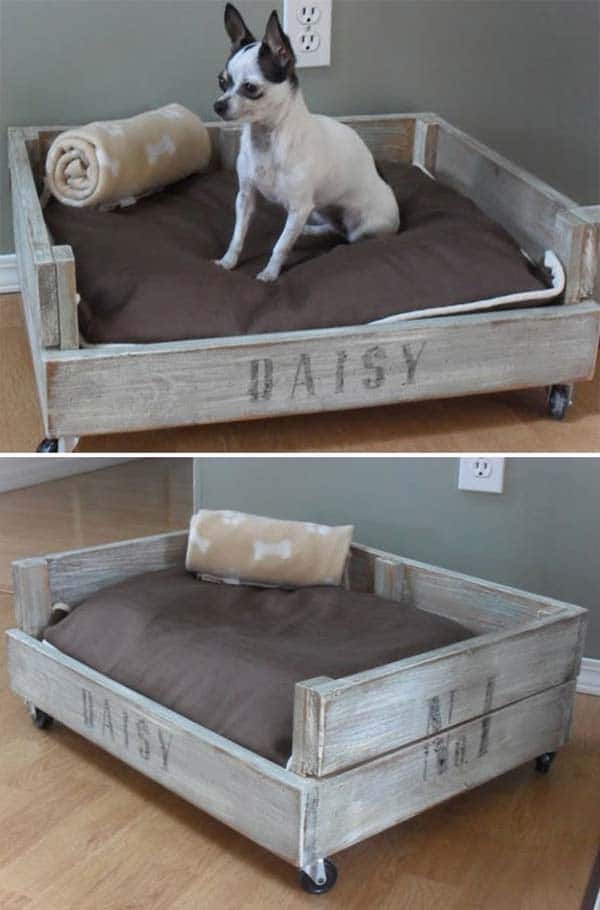
Transforming old furniture into cozy pet beds is not only a wonderful way to recycle, but it also adds a unique touch to your home. Here are some creative ideas to get you started:
-
Repurpose an old drawer: Remove the knobs, sand it down, and add a soft cushion. This low-profile bed is perfect for small dogs or cats.
-
Suitcase beds: If you have vintage suitcases, hinge them open, lay a fluffy blanket inside, and watch your furry friend snuggle in style.
-
Chair to bed conversion: Use an old armchair by removing the seat cushion. Fill the space with dog-friendly bedding for a chic, raised bed that saves floor space.
-
Add wheels for mobility: By attaching wheels to any of these designs, you can easily move your pet’s bed around the house, making it versatile and functional.
Your furry friend will appreciate the comfort and style, and you’ll feel great knowing you’ve given new life to your old furniture!
9. Transform Your Space with Mirror Décor
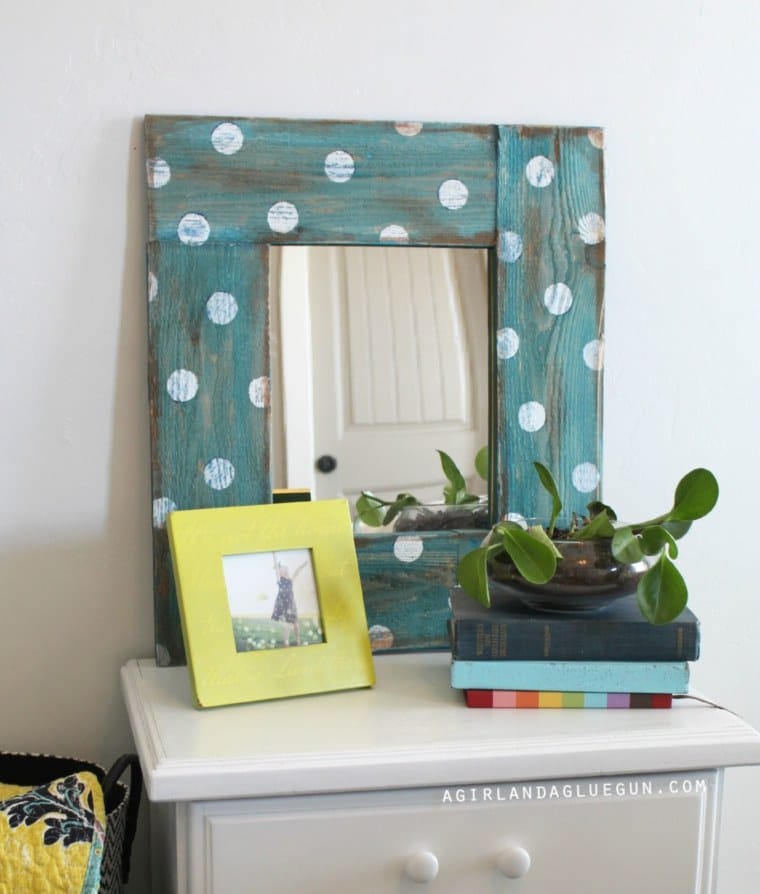
You can easily transform your space using mirror décor that adds charm and depth to any room. Mirrors not only serve practical purposes for your daily routine but also create a sense of openness and light.
Try these DIY mirror décor ideas to elevate your interiors:
- Framed Mirrors: Upcycle old mirrors with ornate frames from thrift stores to add character.
- Mirror Collage: Group smaller mirrors in various shapes and sizes on a single wall for a stunning gallery effect.
- Mirrored Furniture: Apply mirror adhesive sheets to tabletops or cabinet doors for a chic, reflective finish.
Let your creativity shine while enhancing your home’s aesthetic!
10. Chalkboard Furniture for Stylish Organization
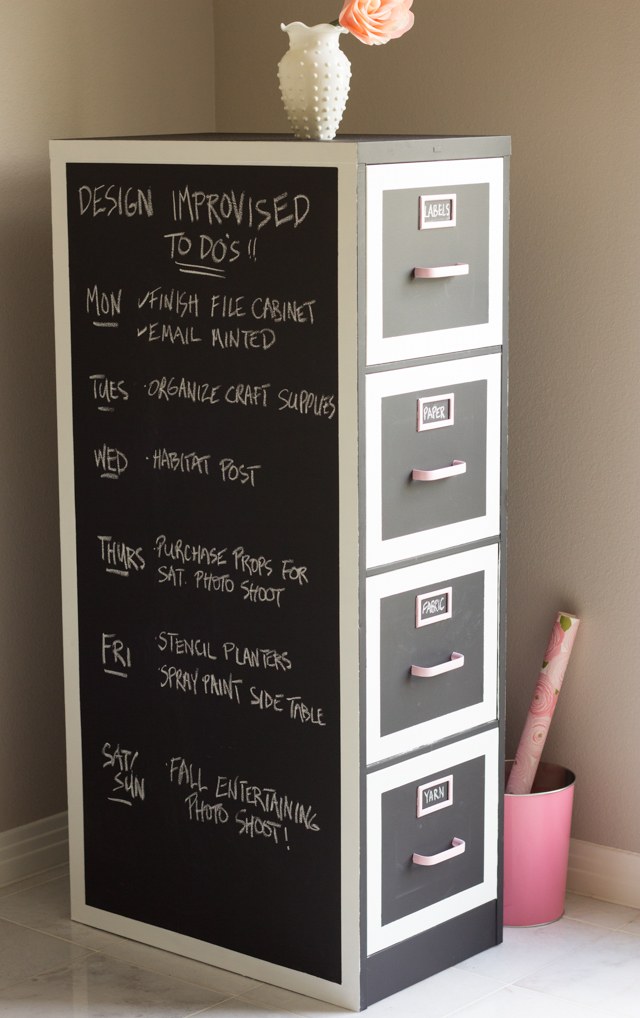
Transform your space with chalkboard furniture that blends functionality with style. Imagine a chic coffee table where you can jot down notes or leave messages for family and friends. This not only keeps your home organized but also adds a unique touch to your decor.
Consider a chalkboard dining table. It’s a fantastic spot for kids to draw while you’re preparing meals, keeping them engaged and your space neat. Just paint one side with chalkboard paint and let creativity flow!
Using chalkboard shelves can also be a game changer. Label each shelf with the contents or create fun reminders; it’s a simple yet effective way to stay tidy. With these ideas, you can effortlessly combine organization and elegance in your home.
11. Transform Old Cabinets into Creative Art Desks
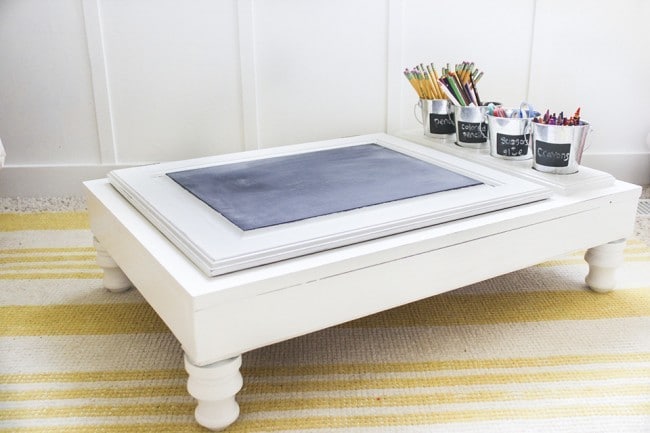
Use your old cabinets to create a magical art desk for your little Picasso! Start by removing the doors and sanding down the surfaces to ensure a smooth finish.
Once prepped, transform the interior space into a storage powerhouse for art supplies. Install small bins or jars to keep crayons, paints, and brushes tidy and within reach. A removable art tray on the top can also prevent spills and give your child a dedicated workspace.
For customization, consider attaching adjustable legs or use a sturdy stack of blocks to make the table height suitable for your child. Bright paint or fun decals can make this art desk even more inviting and display their creations proudly!
12. Transform Shutters into Stylish Mail Organizers
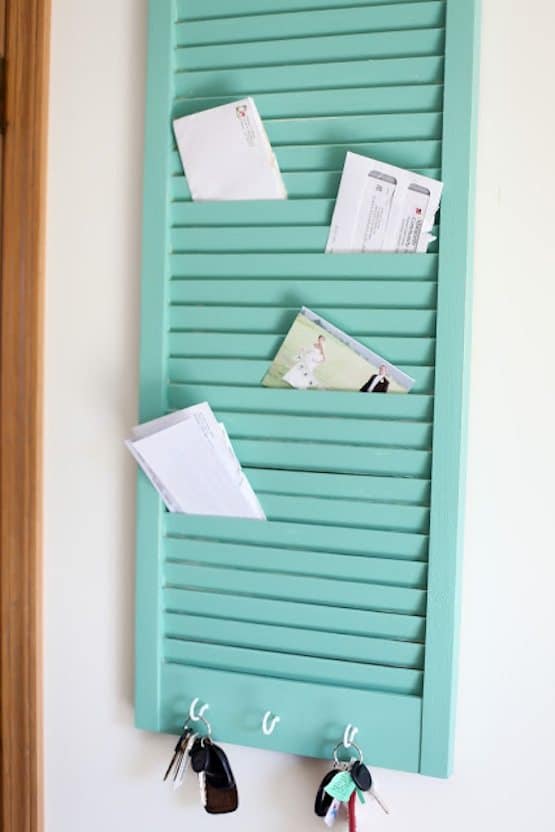
You can easily transform old shutters into a chic mail organizer that elevates your home decor. Start by scavenging local garage sales or thrift stores for a single shutter. Choose one that resonates with your style and has ample space for holding mail.
After you have your shutter, paint it with a color that complements your interior. I recommend a fresh white or a bold navy for a striking contrast. Once dry, strategically mount it on your wall at a height that’s easily reachable.
Add small clips or hooks to the slats to neatly secure your mail and bills. This not only keeps your space tidy but also makes for a unique conversation piece that blends functionality with style. Enjoy the satisfaction of a well-organized home!
13. Transform Your Coffee Table with Style
Transforming your coffee table can be a fun and rewarding project. Think about your unique style and the theme of your room. Whether it’s modern, rustic, or whimsical, a few changes can refresh its look.
- Paint it a bold color to make it pop in the room. For instance, a vibrant blue can bring a modern touch.
- Add decorative elements like old toys or natural materials. Consider using action figures glued to the tabletop for a playful vibe or a wood slab for a rustic feel.
- Use stencils or transfer designs. Personalize it with quotes, patterns, or artwork that resonate with you.
These ideas can easily transform your coffee table into a statement piece that reflects your personality and enhances your space!
14. Transform Coffee Tables into Stylish Shelves

You have those unused coffee tables gathering dust? Let’s transform them into stylish shelves that can showcase your favorite decor or books!
Start by cutting a coffee table in half to create two separate shelves. You can paint or stain the wood to match your existing decor. Enhance the look by adding decorative brackets underneath for extra support and flair.
Once assembled, use these shelves to display vintage books, plants, or artistic pieces. This DIY project not only repurposes old furniture but also adds a unique touch to your living space!
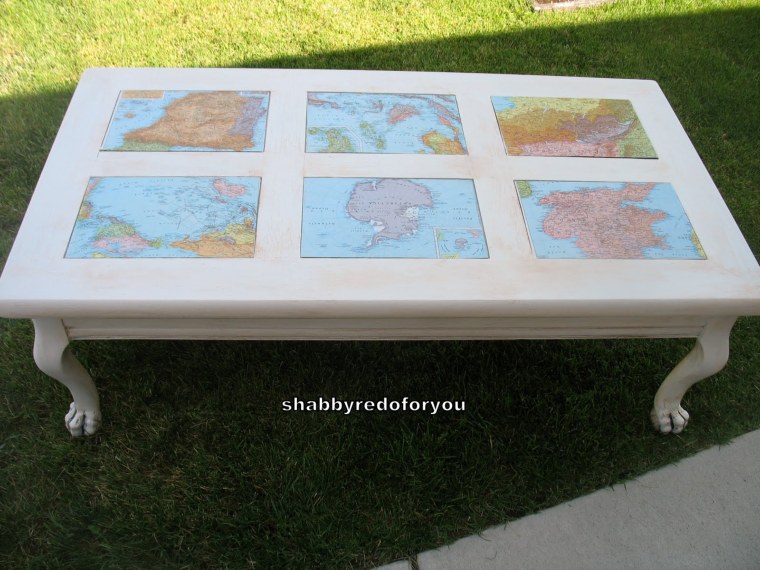
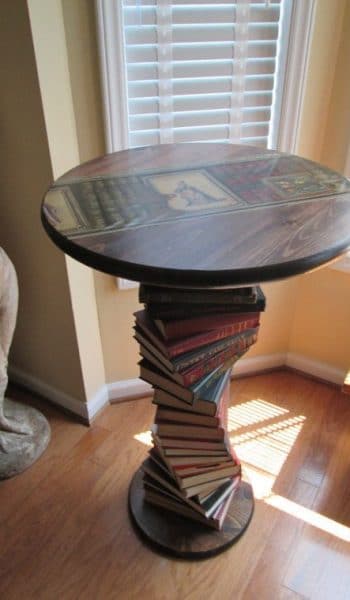
15. Create Unique Traveler-Inspired Furniture Designs
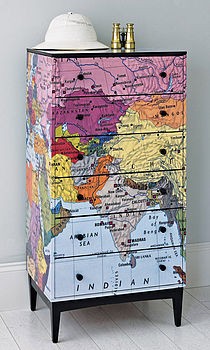
Transforming your furniture with traveler-inspired designs can vividly reflect your adventures and bring a personal touch to your home. Using decoupage techniques, you can adorn a simple coffee table or a chest of drawers with maps, postcards, or images from your favorite trips.
Tips for creating your unique pieces:
- Select a theme: Choose countries or cities that resonate with your journey.
- Materials: Gather old travel brochures, maps, or pictures, along with decoupage glue.
- Technique: Apply a layer of glue to the surface, place your travel mementos, and seal it with another coat.
This DIY project not only showcases your memories but also seamlessly integrates them into your living space.
16. Transforming Old Sewing Machines Into Vanities
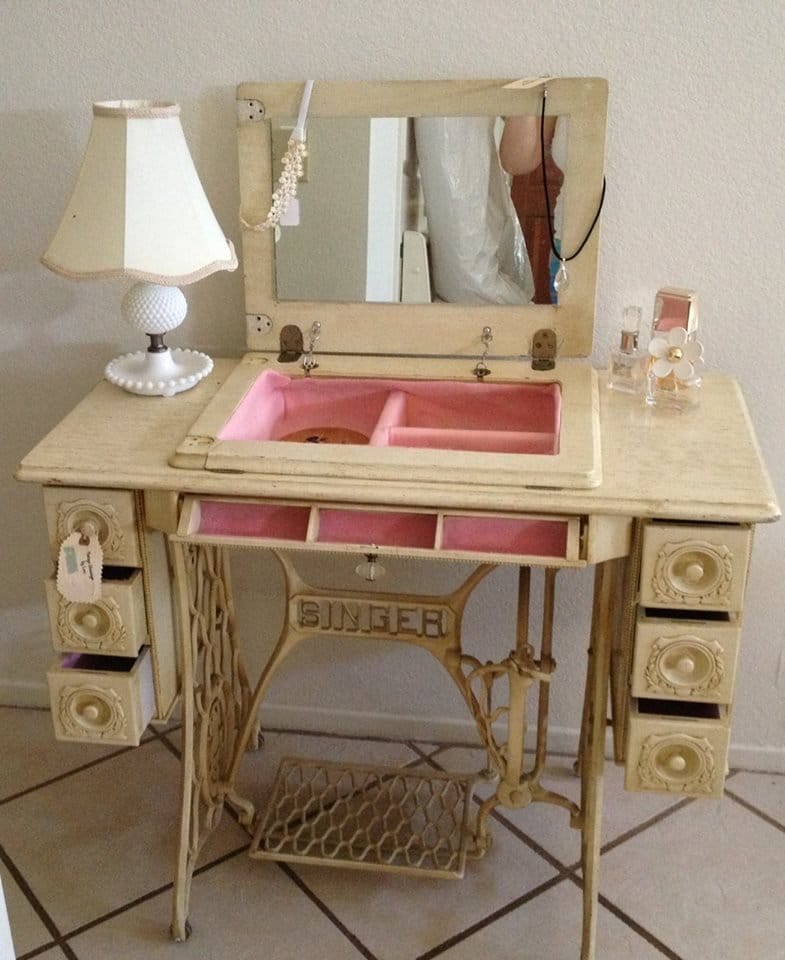
Transform that old sewing machine into a stylish vanity that speaks to your unique style! Picture this: an antique Singer machine becoming the centerpiece of your room. Start by cleaning it thoroughly and giving the base a fresh coat of paint to match your decor.
Next, add a mirror that fits seamlessly over the machine’s top. A large round mirror can create a vintage yet modern vibe. Complete the look with a few storage options like small baskets or decorative trays for your makeup essentials. Adding a cozy stool that complements the machine can bring it all together.
This inventive project isn’t just about aesthetics; it’s about making use of what you already have while creating a functional piece. Grab your tools and let your creativity shine!
17. Transform Two Chairs into Stylish Bench

Imagine transforming two old chairs into a stunning stylish bench that perfectly suits your space! Here’s how you can do it with a bit of creativity and some basic tools.
Start by selecting two similar chairs. Ideally, they should share a common design or color scheme. Remove the seat backs if you want a clean, unified look. Then, position them side by side and secure them together with strong brackets for durability.
Next, measure the length between the seats. Use this measurement to create a custom cushion or a wooden top, which will serve as the bench’s surface. Covering the cushion with a vibrant fabric can add personality, making it a standout feature in your hallway, office, or garden.
Finish off the bench by painting or staining the chairs to match your decor. With just a few steps, you’ll have a unique piece of furniture that not only saves space but also expresses your individual style!