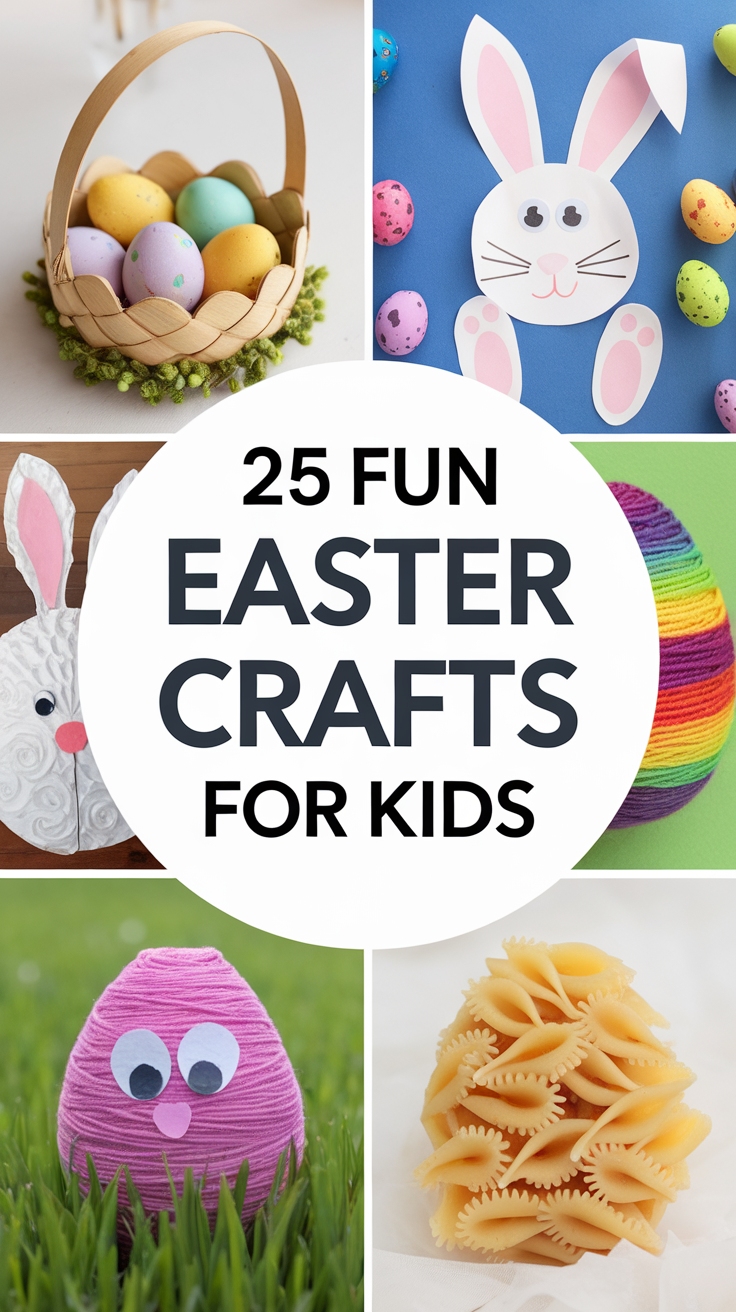
25 Easter Crafts for Kids to Have Fun
Did you know that crafting can boost children’s fine motor skills and creativity during holiday celebrations? In this blog, we’ll explore 25 fun and engaging Easter crafts that will keep your kids entertained and unleash their artistic talents. From watercolored Easter eggs to delightful bunny masks, you’ll discover a variety of exciting projects perfect for making lasting memories this Easter!
Shop Our Must-Haves


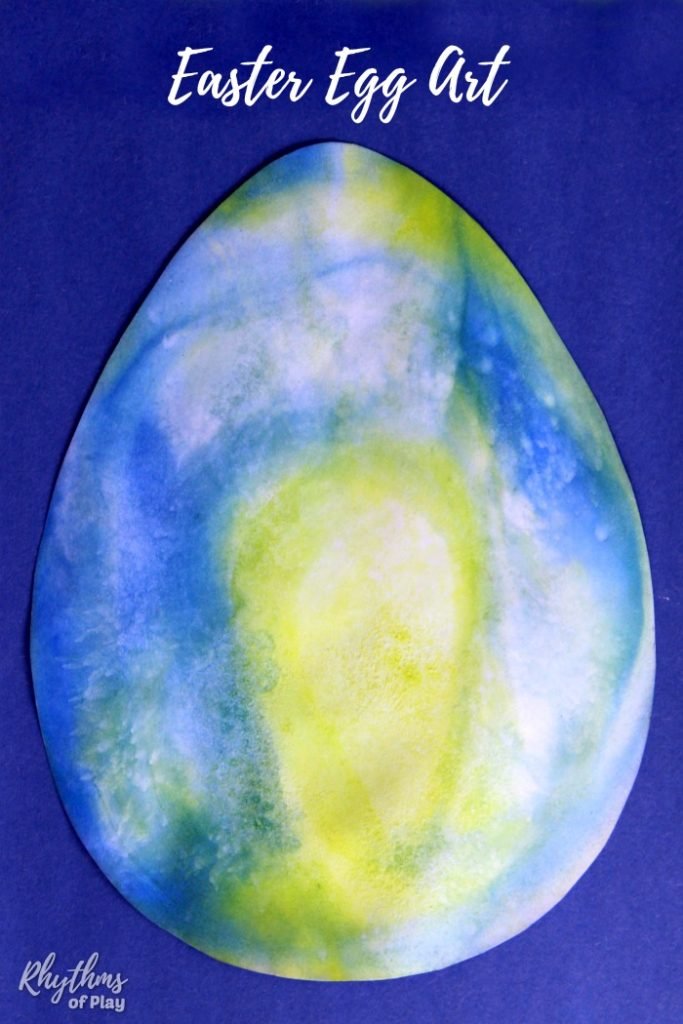
1. Creative Watercolor Easter Egg Designs
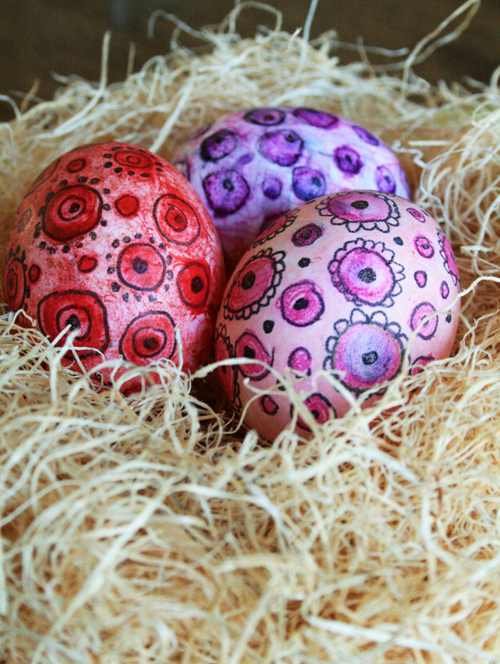
Get your little ones excited about decorating Easter eggs with watercolor pencils! This technique allows for vibrant colors and creative designs. All you need are some eggs, watercolor pencils, and a bit of water.
Start by sketching fun patterns on a hard-boiled egg using the pencils. Encourage your kids to experiment with different motifs, like flowers, polka dots, or even their favorite cartoon characters.
Once they have their designs ready, gently brush water over the pencil drawings to activate the color. Watch as the hues blend beautifully—a fun and interactive way for kids to create unique Easter eggs!
2. Craft a Paper Bunny for Easter

Get ready to bring some festive cheer into your home with a simple paper bunny craft! This adorable project is perfect for kids and can be easily hung up as a decoration to celebrate Easter.
To create your bunny, you’ll need:
- Colored construction paper (preferably pastel shades)
- Scissors
- Glue or tape
- Markers or crayons for decorating
Start by cutting out two large bunny ears and a bunny body. Allow the kids to express their creativity by decorating these pieces with markers or crayons. Once decorated, assemble the pieces and attach them to your walls or create a lovely Easter garland. This craft not only keeps little hands busy but also adds a delightful Easter vibe to your space!
3. Create Colorful Cupcake Liner Flowers
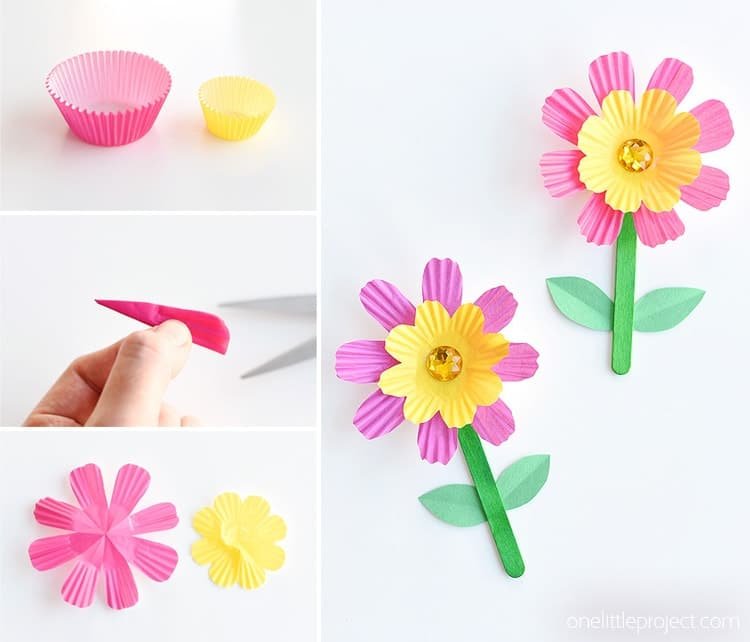
You can transform ordinary cupcake liners into delightful flowers that brighten up any room! Gather a variety of colorful liners—pastels for a soft look or vibrant hues for a striking effect.
To create your flowers, stack several liners and pinch them together at the base. Secure with a button or a gemstone embellishment for that extra sparkle. Place them on a sturdy stem made from twigs or pipe cleaners for a charming finishing touch.
Get creative! Mix and match your colors and sizes. These cheerful flowers are perfect for Easter decorations or as gifts for family and friends. Enjoy this fun and artistic project with your kids!
4. Creative Salt Dough Easter Egg Craft
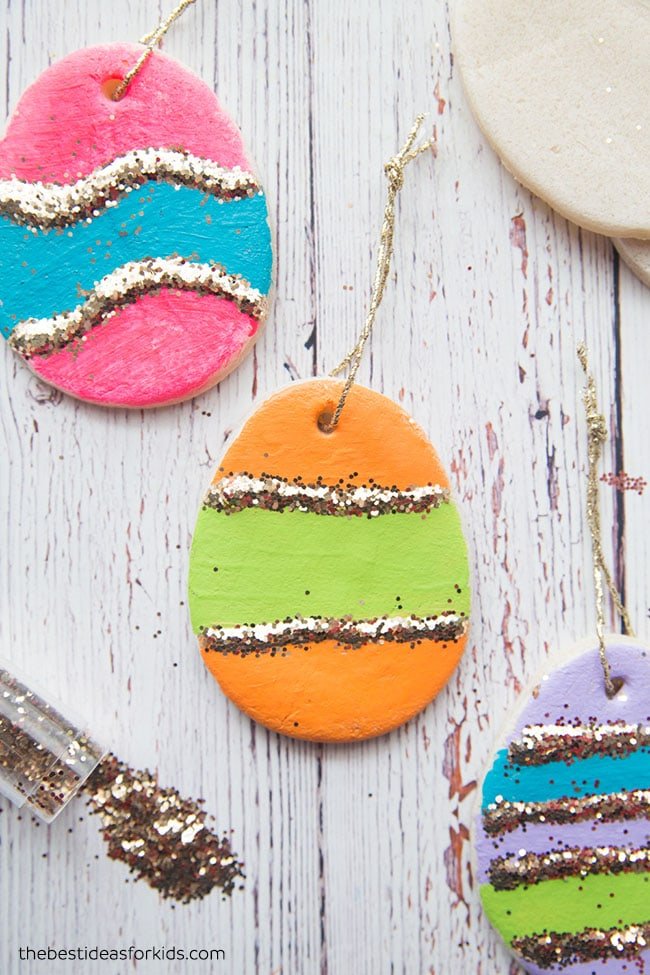
To create salt dough Easter eggs, start by making your salt dough. Mix 2 cups of flour, 1 cup of salt, and 1 cup of water in a bowl until it forms a dough. Once it’s ready, roll it out and use an Easter egg cookie cutter to shape your dough.
After baking the eggs at 200°F for about 2 hours, let them cool down completely. Now comes the fun part: paint! Use vibrant acrylic paints to decorate your eggs. Lastly, seal them with Mod Podge and sprinkle on some glitter for that festive sparkle. This craft not only enhances creativity but also adds a personal touch to your Easter decor!
5. Fun and Easy DIY Daffodils
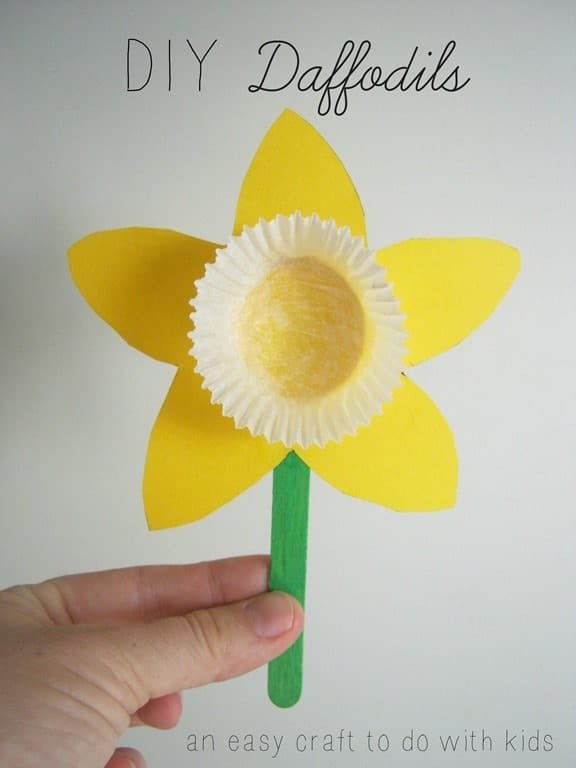
You can create fun and easy DIY daffodils using simple materials from around your home! Grab some cupcake liners, green straws or pipe cleaners, and a bit of glue. These cheerful flowers are not only appealing but also a fantastic project for kids.
Start by flattening the cupcake liners into flower shapes. You can use yellow or white liners for a classic daffodil look. Then, for the center, cut a small circle out of another colored paper to enhance the flower’s detail. Finally, attach the liners to the green straws or pipe cleaners to create sturdy stems. Your kids will love bringing these vibrant daffodils to life!
6. Easy DIY Paper Wreath for Kids
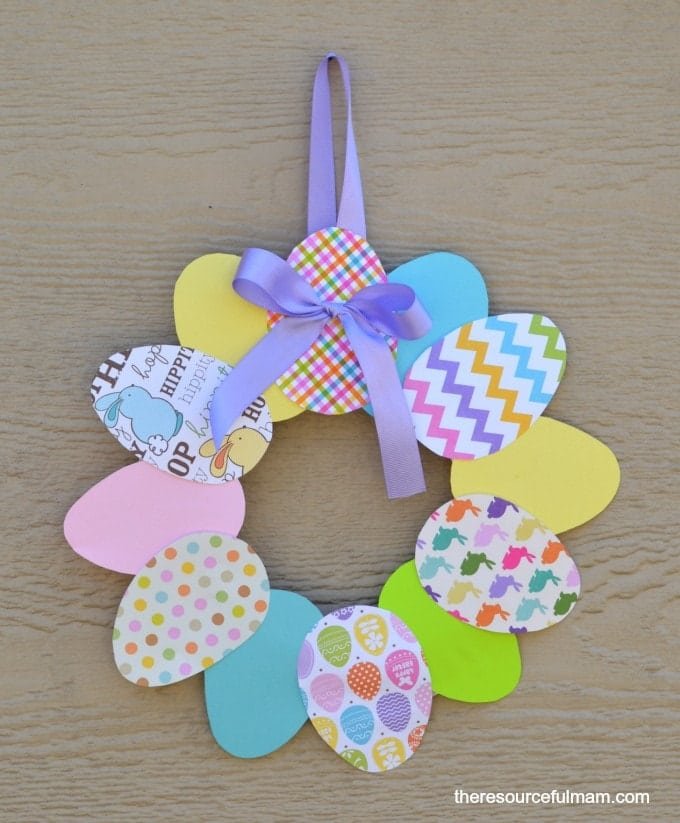
Let your kids unleash their creativity with a DIY paper wreath that’s simple and fun to make! Start with some colored construction paper, scissors, and a paper plate.
- Cut the center out of the plate to create a ring.
- Have your kids cut various shapes from the colored paper, like flowers or eggs.
- They can then glue these shapes around the ring, decorating it as they please.
This easy craft not only brightens up your home for Easter, but also allows kids to express themselves artistically. Hang it up to showcase their handiwork!
7. Create Adorable Foam Cup Bunnies
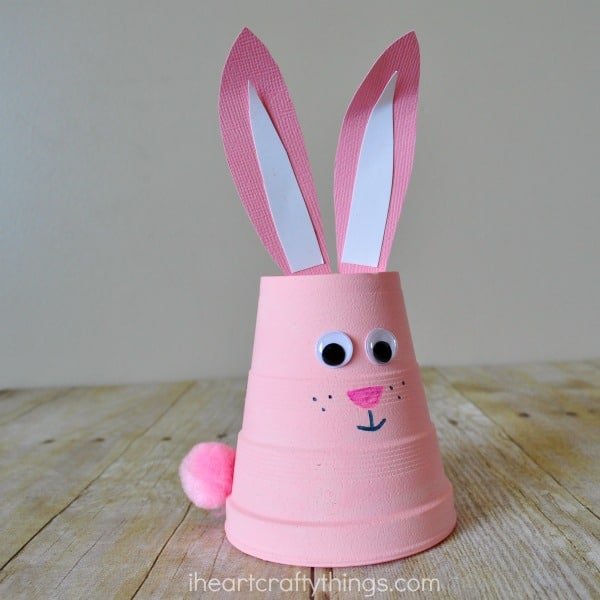
You can create adorable foam cup bunnies that will add a whimsical touch to your Easter decor. Start by gathering foam cups in pastel colors, which will brighten up your craft space.
Next, cut out bunny ears from foam sheets and glue them onto the rim of the cup. You can also add googly eyes and a button for the nose to make each bunny unique. For extra flair, decorate with ribbons or markers to design cute whiskers!
These little bunnies are perfect for displaying on your dinner table or as delightful gifts for friends and family. Enjoy crafting and watching your kids’ creativity shine!
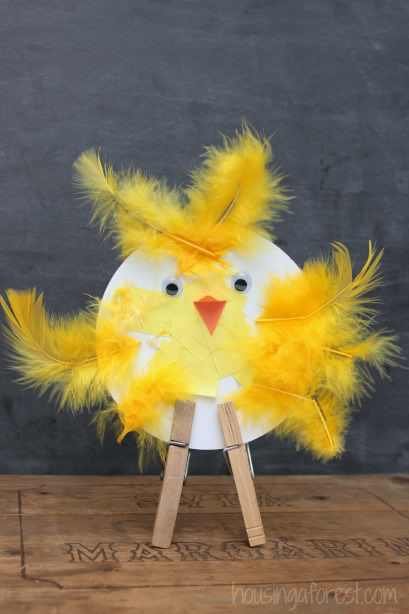
8. Create Adorable Easter Chick Cards
You can create adorable Easter chick cards that bring some flair to your holiday greetings! Here’s what you need to do:
Gather supplies: You’ll need card stock, colorful construction paper, sticky wiggle eyes, and feathers. You can find feathers in arts and crafts stores online if they aren’t available locally.
Get creative: Cut a chick shape from the yellow card stock, and let your kids embellish it with colorful feathers. They can mix and match colors, so the possibilities are endless!
Add eyes and details: Paste on the sticky wiggle eyes and draw or cut out a beak and feet from construction paper. This is the perfect opportunity for your little ones to unleash their creativity and personalize their cards!
These cheerful cards can brighten anyone’s day this Easter!
9. Creative Toilet Paper Bunny Craft
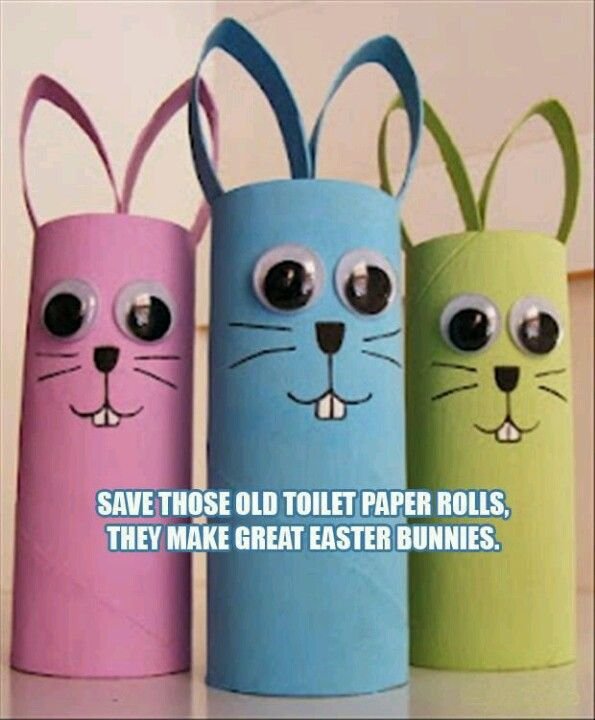
I love getting creative with my kids, and making toilet paper bunnies is a fun way to recycle! Start by gathering empty toilet paper rolls, watercolor paint, and wiggle eyes.
First, paint the rolls in your favorite spring colors. Once dry, cut out ears from cardboard or thick paper and attach them to the top of the roll. Use markers to add cute faces and glue on those wiggle eyes.
These adorable bunnies make great Easter décor and can even become part of a festive centerpiece! Let your kids personalize them with different colors and decorations for extra fun.
10. Creative Paper Plate Flower Crafts
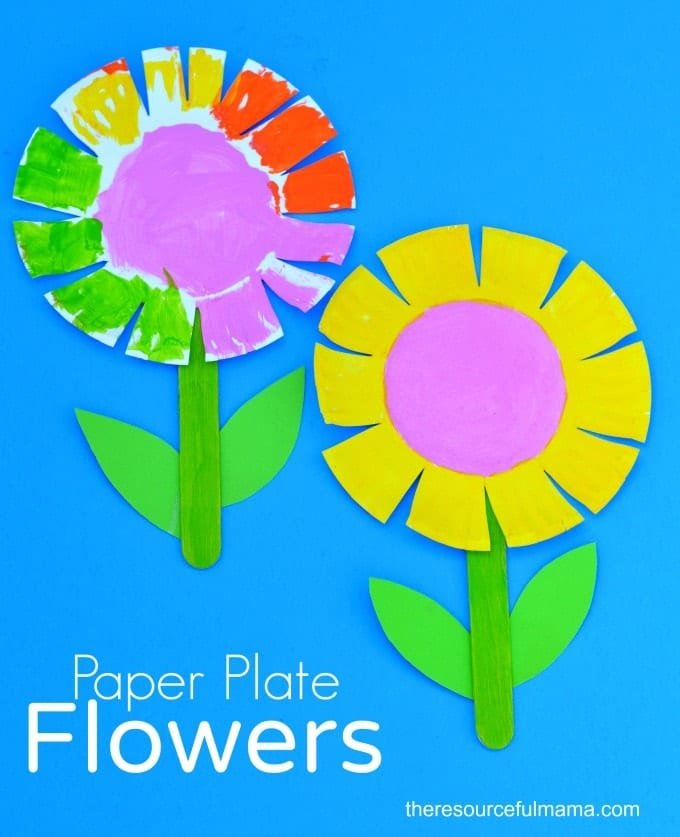
You can create stunning paper plate flower crafts that will brighten up your home this Easter. Grab some colorful paper plates and let your creativity bloom!
Start by cutting the plates into petal shapes. Use paint, markers, or tissue paper to add vibrant colors. You can layer different colored petals for a unique look. Once they are decorated and dried, attach them to a stick or straw to create a lovely flower display.
You can also add glitter or buttons at the center for that extra sparkle. These flowers aren’t just for Easter; they’ll bring a touch of spring to your home all season long!
11. Creative Watercolor Easter Egg Projects
You can transform ordinary Easter eggs into works of art with some simple watercolor techniques. Grab your liquid watercolors and watercolor paper to start practicing your designs. A great idea is to sketch out patterns—like flowers or geometric shapes—with crayon first, then layer your watercolors on top.
Once you feel confident, move to real eggs! Use a white shell for optimal color vibrancy. Once painted, you could give them a glossy finish by applying a clear coat of Mod Podge. This will make your eggs not only beautiful but also durable for display!
12. DIY Colorful Easter Egg Glasses Craft
Transform ordinary paper into colorful Easter egg glasses that your kids will love! Simply download the printable template and print it in your desired size.
Once printed, have your children cut out the glasses and let their creativity shine by coloring them in vibrant hues. This craft fosters creativity and is a breeze to clean up!
- Materials needed: Printable template, scissors, crayons or markers.
- Tip: Create a mini fashion show post-crafting to showcase their unique designs!
13. Cute Paper Plate Bunny Craft Idea
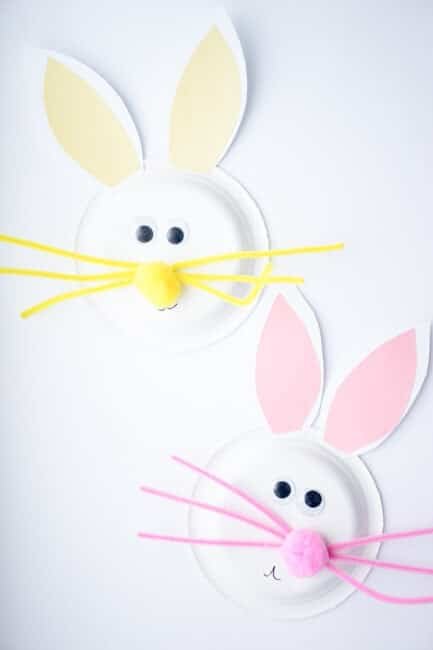
Create adorable paper plate bunnies with your little ones using materials you likely already own! All you need are two paper plates, googly eyes, pipe cleaners, colored paper, and some reliable glue.
Start by stacking the plates—use one for the bunny’s face and the other cut in half to create ears. Have fun decorating! Attach the googly eyes and draw a smile. Use pipe cleaners for whiskers and a pom-pom for the nose.
This craft not only sparks creativity but makes for a delightful Easter decoration. Place them around the house to add a festive touch!
14. Create a Colorful Easter Button Wreath
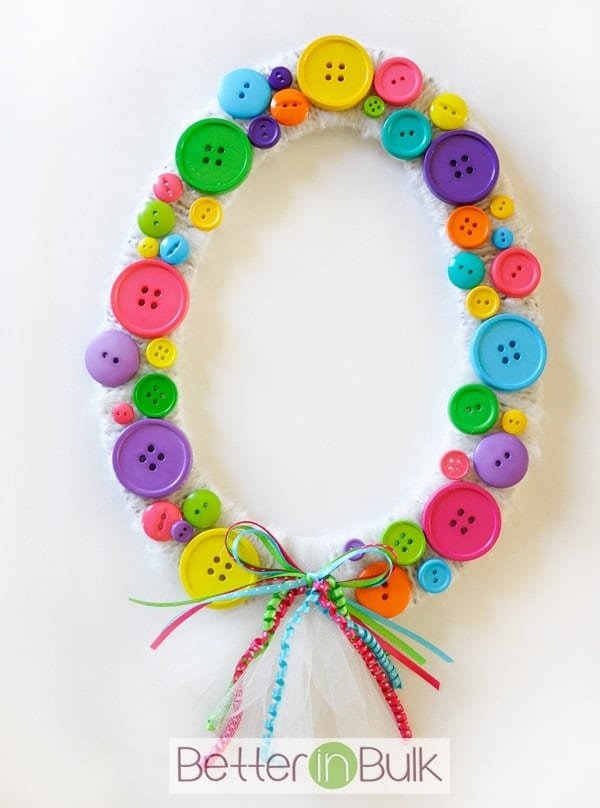
Gather all those colorful buttons you have lying around or visit a craft store to snag some vibrant ones! This engaging project will surely bring the whole family together and spark creativity.
Start with a sturdy wreath base—you can use foam, cardboard, or a wire frame. Invite your kids to sort the buttons by color, encouraging them to create a fun pattern or design. Let them glue the buttons onto the base, filling every inch for a playful look.
Finally, hang your masterpiece with a cheerful ribbon for all to see. This decorative wreath will brighten up your home and become a cherished keepsake!
15. Creative Tin Foil Easter Egg Decoration

You’ll love the idea of using aluminum foil for unique Easter egg decorations! Simply mold the foil into egg shapes, creating a fun and shiny surface.
Let your little ones get creative by using markers or paint to add color and designs. This activity is perfect for younger kids, as they can safely express their artistic flair without the worry of breaking actual eggs.
To add a twist, you can use different types of foil (like patterned or colored) for a variety of textures. It’s an easy, mess-free way to make beautiful Easter decorations together!
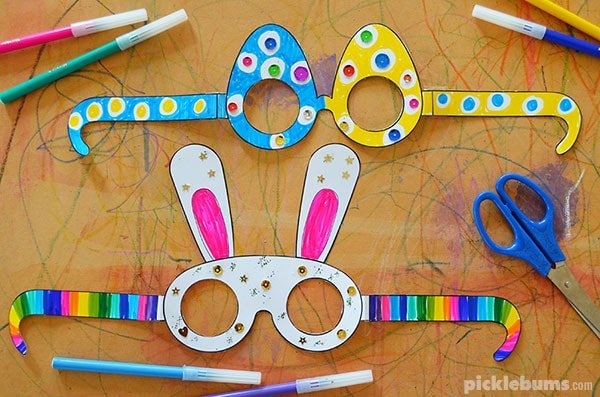
16. Create Fun Bunny Masks for Easter
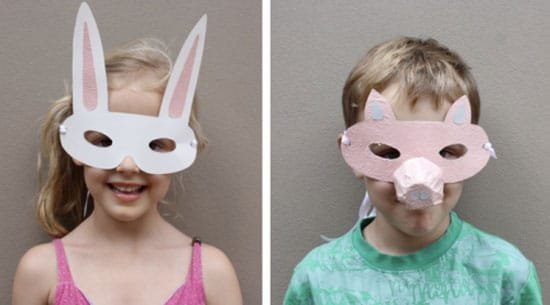
Get ready for a hoppy Easter by creating fun bunny masks with your kids! This simple craft can boost imagination and add excitement to your holiday celebrations.
Start with basic materials like paper plates, scissors, and crayons. Cut out eye holes in the plates and let your kids go wild decorating with fluffy cotton balls for whiskers or funny googly eyes.
For an added twist, use elastic bands to secure the masks. This allows your little ones to wear their creations while joining in on Easter egg hunts or playing imaginative games. Grab your supplies and enjoy a crafty day with your little bunnies!
17. Creative Bunny Pots for Easter Decor
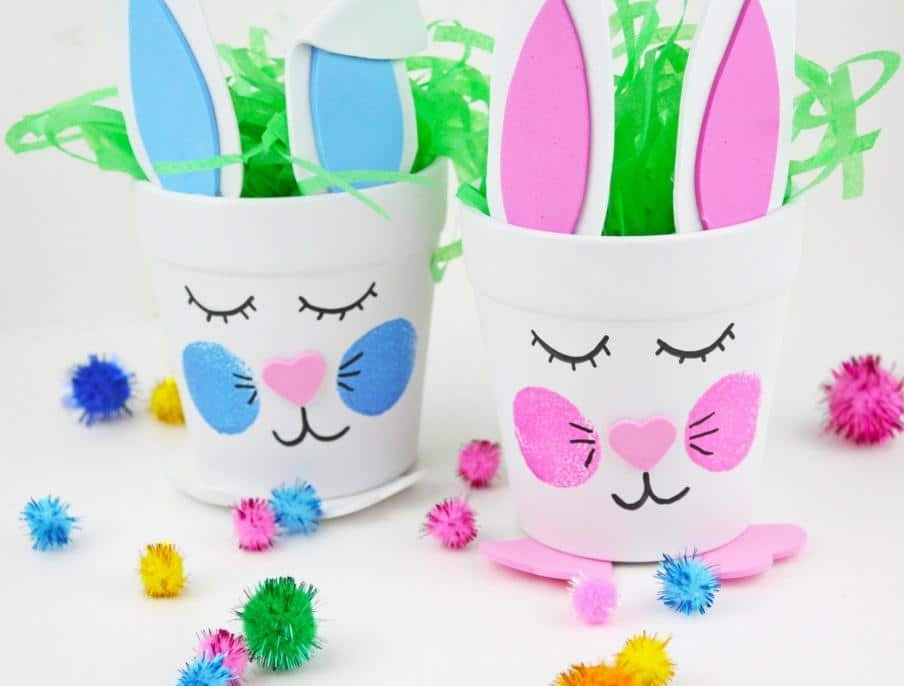
Transform plain white pots into adorable bunny decorations for your Easter decor! Start by choosing pots that are smooth and untextured; this allows for better detailing.
Use non-toxic paints or markers to bring your bunny to life. Create long ears by painting them at the top, and don’t forget to add a fluffy white tail on the back with cotton balls or pom-poms.
Fill these charming pots with colorful flowers or carrots to complete the look. These creative bunny pots can even be a delightful project for kids, allowing their artistic side to shine this Easter!
18. Creative Bunny Juice Box Wrap Ideas
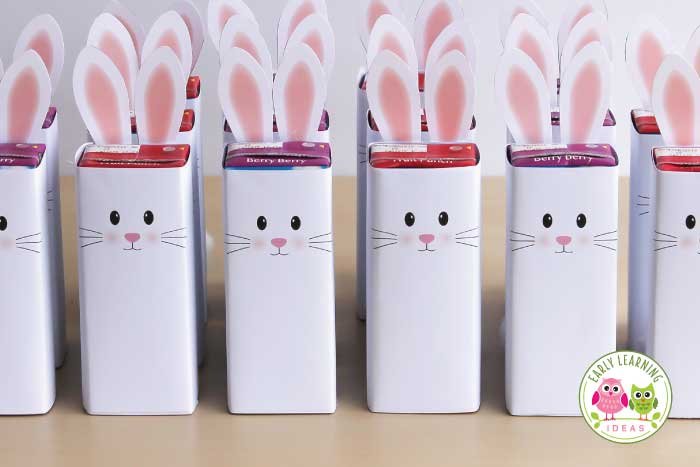
Transform ordinary juice boxes into adorable bunny creations that kids will love! Start by cutting long strips of colorful paper or wrapping paper. Use pastels for a spring vibe and encourage kids to personalize their wraps with stickers or drawings.
Next, wrap the paper around the juice box and secure it with tape. For the bunny ears, cut out two long oval shapes from additional paper, fold them at the base, and glue or tape them to the top.
Not only will this craft make your juice box look festive, but it will also keep little hands clean while they sip! Enjoy a fun crafting session with the kids this Easter!
19. Craft Adorable Pom Pom Easter Chicks
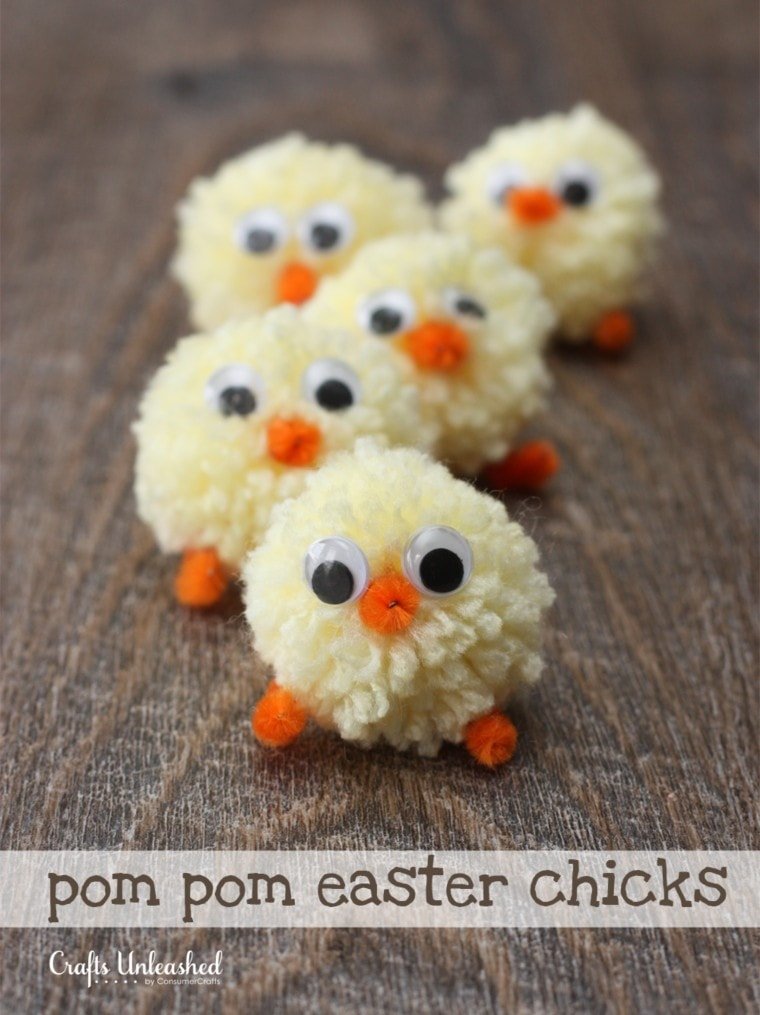
You can craft adorable pom pom Easter chicks with just a few supplies for a delightful spring decoration. Grab some yellow yarn, scissors, and a pom pom maker or a simple cardboard template.
- Wrap the yarn around the maker or template multiple times to create a fluffy pom pom.
- Secure it with a tight knot in the center, then trim the loops for a round shape.
- For the chick features, cut out little felt beaks and eyes, and glue them onto your finished pom pom.
Display these cheerful chicks around your home for a touch of spring joy!
20. Adorable Popsicle Stick Chick Craft
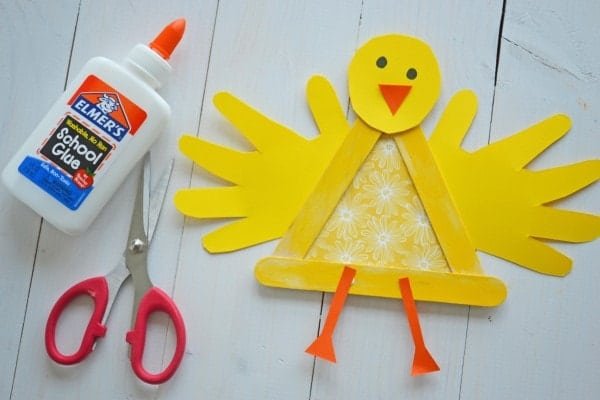
You can create an adorable popsicle stick chick craft that’s perfect for celebrating Easter! Gather some popsicle sticks, yellow paint, and basic supplies like scissors, glue, and markers.
Start by painting the popsicle sticks bright yellow and allow them to dry. Then, glue them together in a triangular shape to form the chick’s body.
Use a paper plate to cut out a circle for the chick’s face. Add eyes and a beak with black markers or orange paper. This craft is not just fun—it’s an excellent way to boost your child’s creativity while decorating for Easter!
21. Easy Homemade Easter Chicks Craft
You can create adorable homemade Easter chicks using items you already have at home! This fun craft is not only simple but also allows your kids to explore their creativity with minimal supplies.
To get started, gather yellow construction paper, scissors, glue, and some googly eyes. Cut out chick shapes and accessories like wings and beaks from the yellow paper.
Once everything is cut out, glue the pieces together. Add googly eyes for that extra charm! These cheerful chicks make great decorations for your home or can be used as gift toppers. Enjoy crafting together!
22. Cute Bunny Hugs Easter Craft Activity
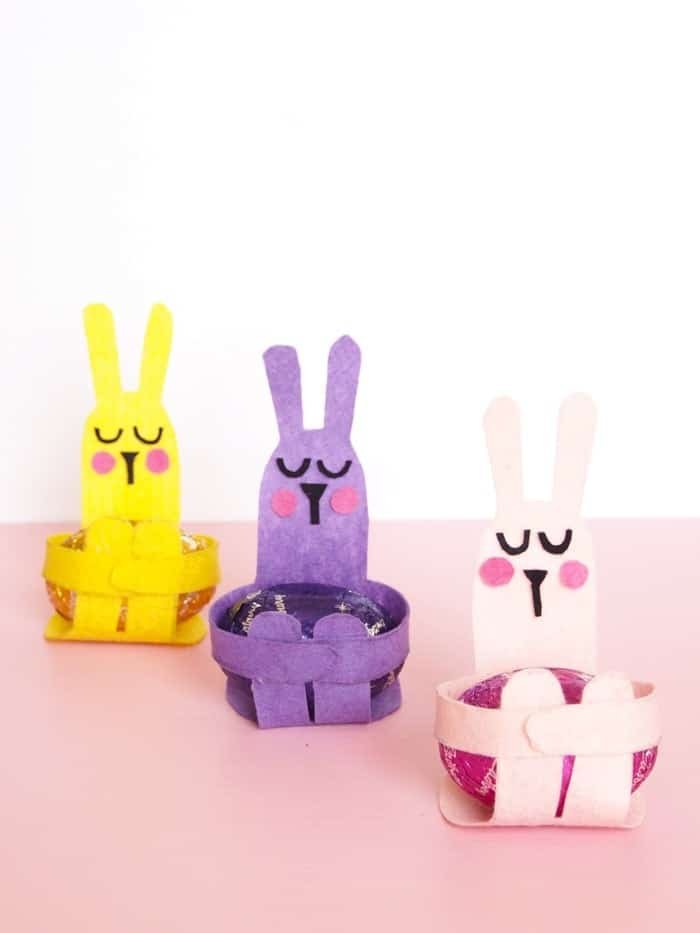
You will love making Cute Bunny Hugs with your kids! This craft is not only adorable but also encourages creativity. Grab some acrylic felt in various colors to create your bunny hugs. You can choose shades for the bunnies and contrasting colors for the hugs.
Start by downloading a template online, or challenge each other to draw your own. Cut out the pieces together, ensuring your little ones handle safety scissors. Once you have the pieces ready, use fabric glue to attach the bunnies onto small paper or cardboard hugs.
To add a personal touch, let the kids decorate their bunny hugs with markers or stickers. These cute creations make great gifts for friends or can be used as adorable decorations around the house!
23. Creative String Easter Egg Craft Idea
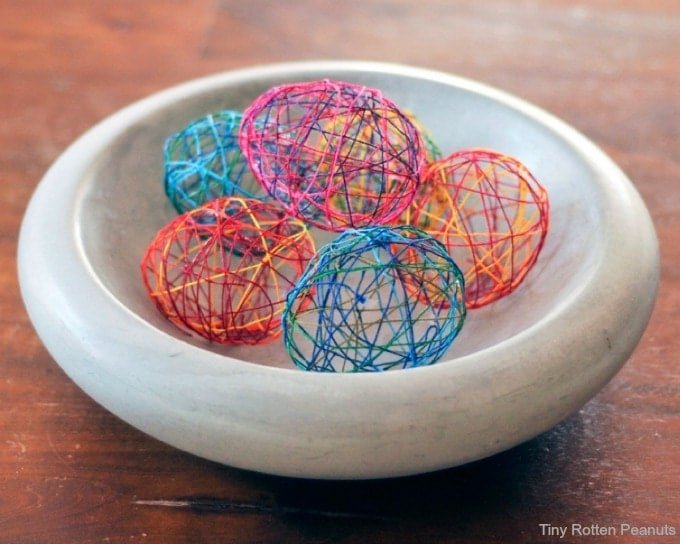
Create string Easter eggs with your kids for a fun and colorful activity! You’ll need water balloons, embroidery floss, and glue to get started.
First, inflate the water balloons to your desired egg shape and secure them tightly. Then, dip the embroidery floss in diluted glue and start wrapping it around the balloon in various directions. Be creative with colors!
Once you’ve covered your balloon, allow it to dry completely. Afterward, pop the balloon and gently remove it to reveal your beautiful string egg. Hang them up as vibrant decorations or use them in an Easter egg hunt!
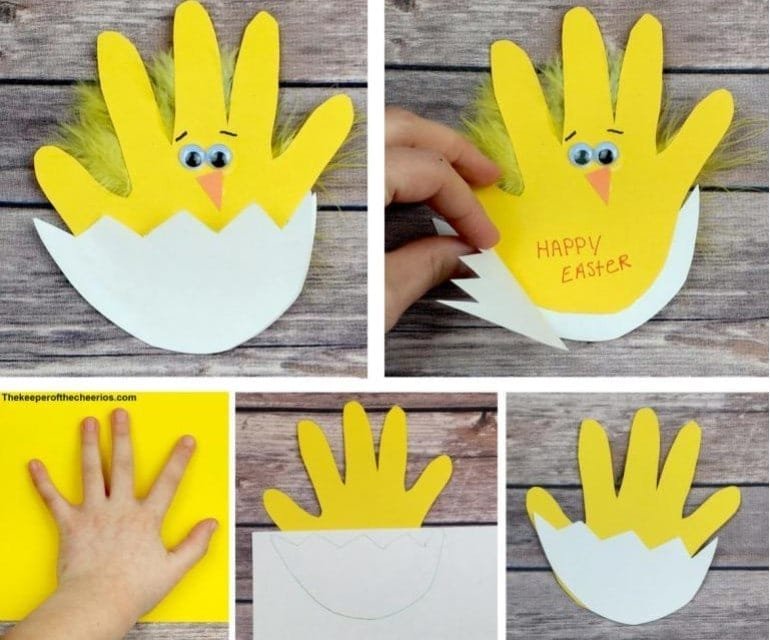
24. Creative Handprint Chick Puppet Craft
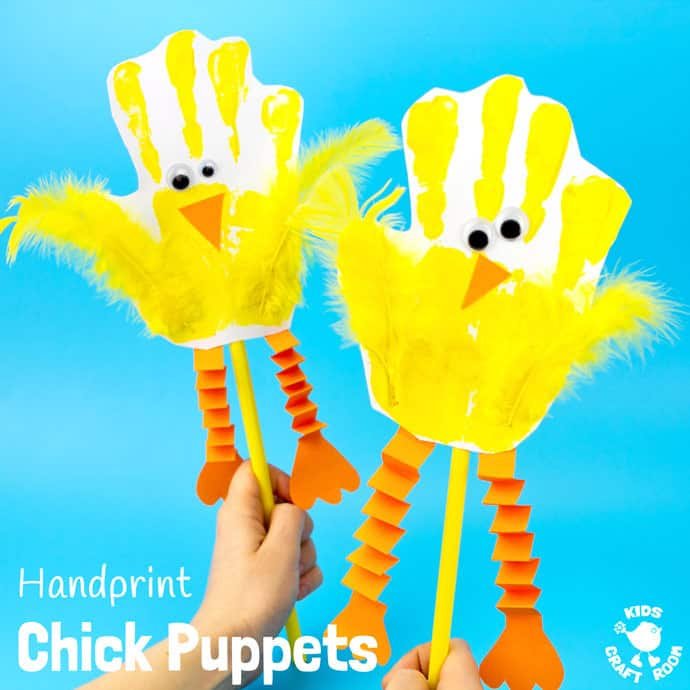
You’ll love making Creative Handprint Chick Puppets with your kids for Easter! This craft is not only fun but also a fantastic way to bond while unleashing creativity. Simply trace your child’s hand on colorful paper to create the chicken body and cut it out.
To bring your puppets to life, add googly eyes and some cute feathers for that playful look. Encourage your little ones to decorate with markers or additional craft supplies to personalize each puppet. These adorable chicks are perfect for puppet shows, enhancing imaginative play while also serving as delightful decorations around the house!
25. Beautiful Paper Egg Decorations for Easter
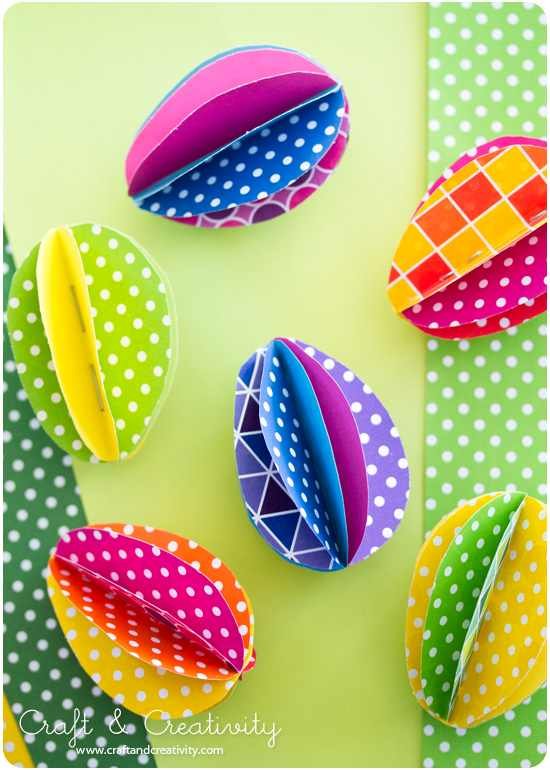
Create stunning paper egg decorations for Easter with your kids! This is a fun craft that truly brightens up your home and adds a festive touch.
Start by gathering materials like colorful cardstock, scissors, and a hole punch. Cut out egg shapes from the cardstock and let your children decorate them with markers, glitter, or stickers. For a touch of elegance, use the hole punch to make a small hole and thread a pretty ribbon through, allowing them to hang the eggs around the house.
Keep in mind that while your kids can join in the fun of decorating, you’ll need to handle any needlework involved for safety. Make it a delightful bonding experience and enjoy the beautiful colors filling your space!