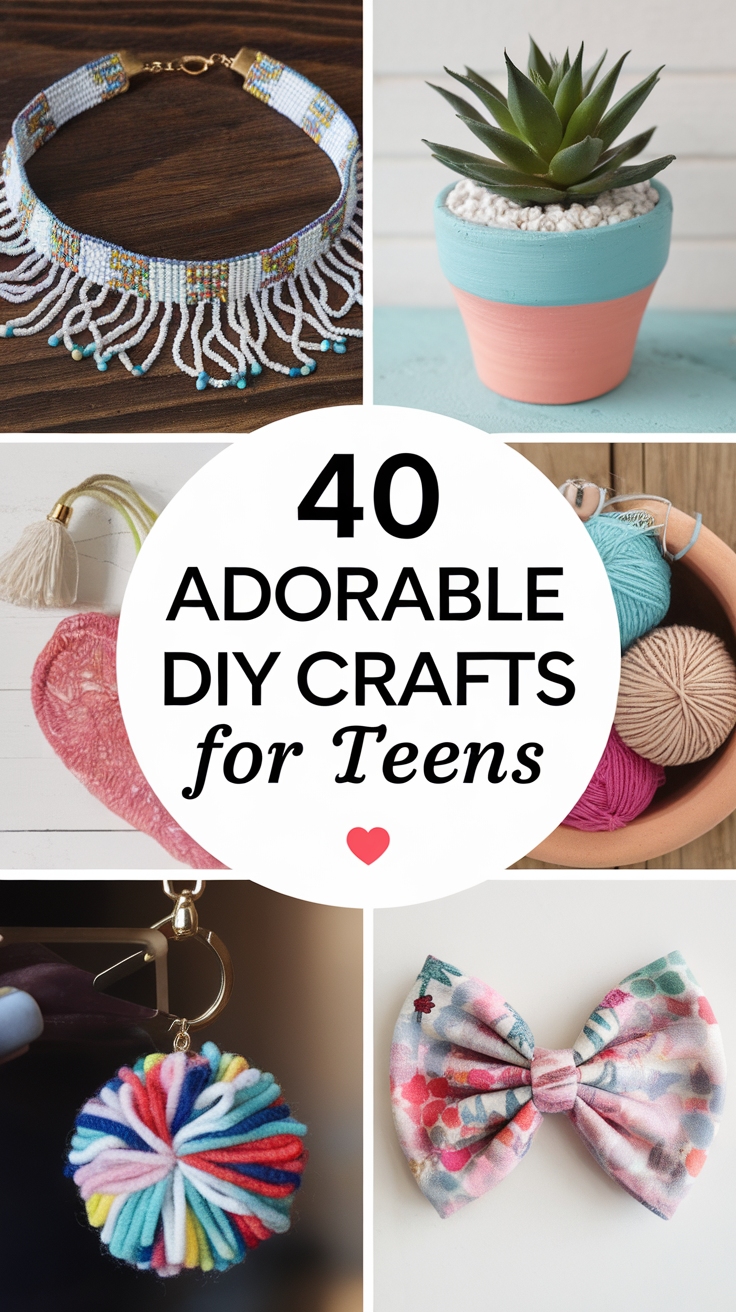
40 Super Cute DIY Crafts for Teen Girls
Have you ever wondered how making your own crafts can boost creativity and self-expression? In this blog post, we’ll explore 40 super cute DIY crafts perfect for teen girls, from custom ceramic mugs to charming dreamcatchers. Get ready to unleash your inner artist and discover fun, easy projects that will not only brighten your space but also add a personal touch to your style!
Shop Our Must-Haves


1. Create Your Own Unique Ceramic Mugs
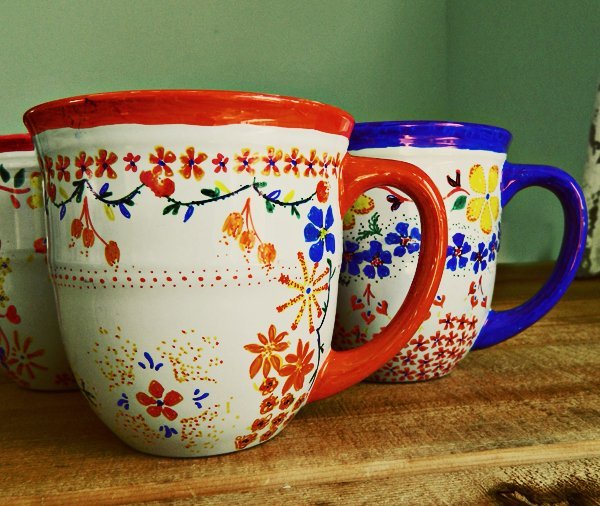
You can easily create your own unique ceramic mugs that showcase your personality! Start with plain white ceramic mugs, which you can find at craft stores.
To personalize them, grab some oil-based paint markers or ceramic paint. Don’t be afraid to experiment! Write your favorite quotes, draw cute doodles, or even create a themed design for holidays or special occasions.
After decorating, let your artistry dry completely, then bake the mugs in the oven according to the paint instructions. This seals your designs, making the mugs both functional and fabulous! Enjoy sipping your drinks from personalized mugs that are totally one-of-a-kind.
2. Create Stunning DIY Macrame Earrings
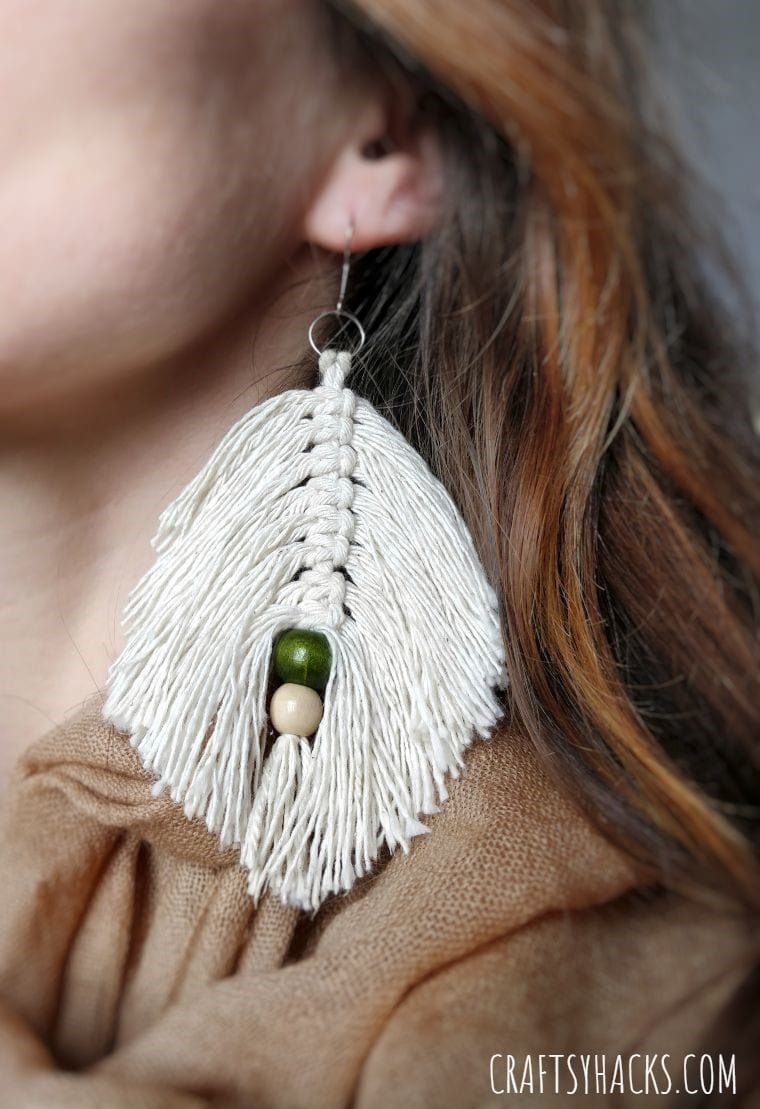
You can create stunning DIY macrame earrings that make a perfect addition to your boho collection. Start by gathering materials like cotton cord, earring hooks, and scissors.
Choose a simple knotting technique, such as the square knot, to add texture. Experiment with different colors to match your outfits, using vibrant cords for a bold look or muted tones for something subtle.
Invite your friends over for a fun craft night! Each of you can design unique styles, making it a creative bonding experience. With just a little practice, you’ll have your very own handmade jewelry in no time.
3. Create Your Own Cozy Ribbed Beanie
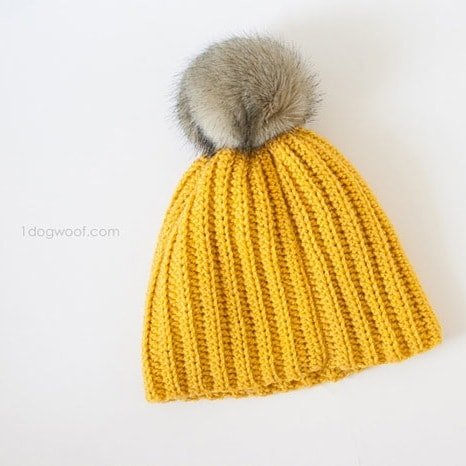
You can easily create your own cozy ribbed beanie with just a few materials! All you need is some soft chunky yarn, a pair of knitting needles, and a basic knitting pattern. If you’re new to knitting, start with a simple rib stitch to give your beanie that adorable texture.
Customize your beanie by selecting your favorite color or add a fun touch with a faux fur pom pom on top. Not only will you stay warm, but you’ll also showcase your personal style! Don’t forget to check out online tutorials for easy step-by-step guidance.
4. Create Your Own Unicorn Dreamcatcher
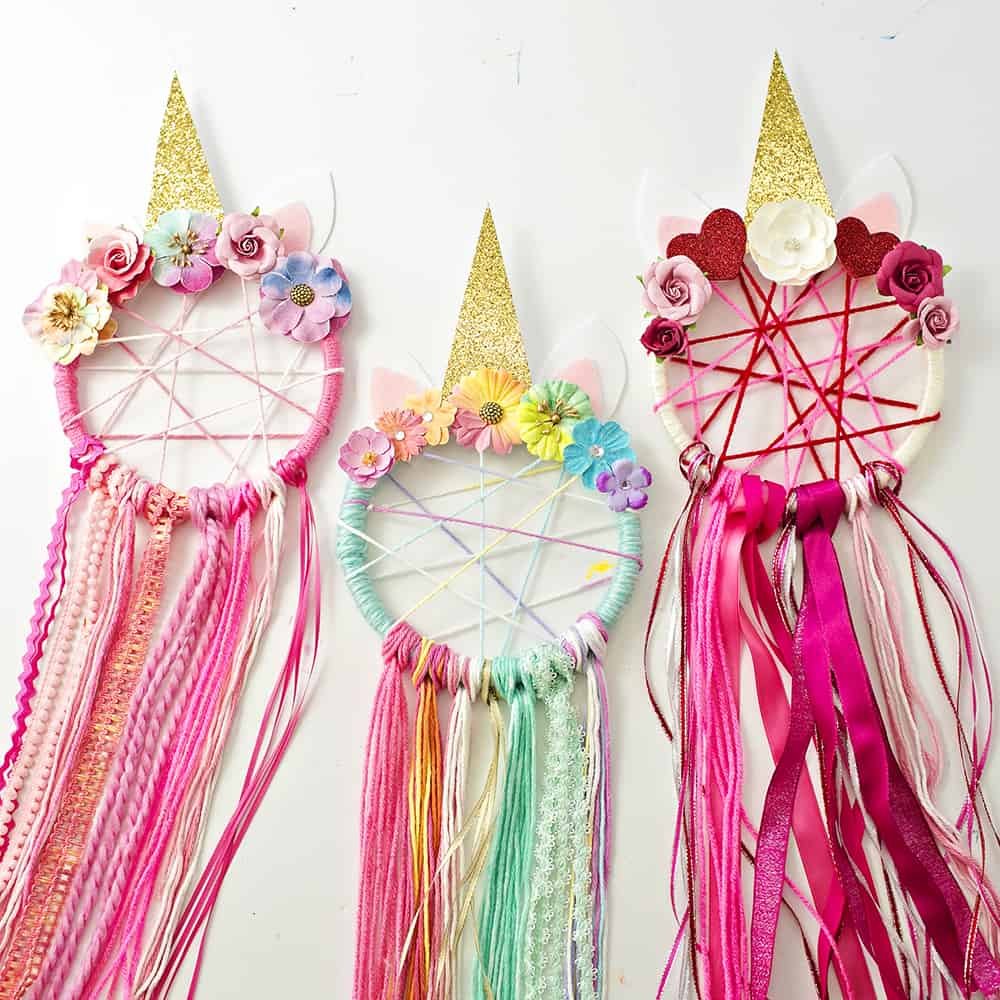
You can easily add a touch of magic to your space by crafting your own unicorn dreamcatcher! This enchanting project combines creativity and personalization, perfect for brightening up any wall.
Start by gathering your materials: a hoop (wooden or metal), yarn in pastel colors, a few feathers, and some sparkly embellishments. Wrap the yarn around the hoop, ensuring it is covered evenly. Then, create a web using additional yarn, tying knots for an intricate design.
For that whimsical unicorn touch, attach feathers and glittery beads to the bottom of the dreamcatcher. You could even paint a small unicorn horn out of craft foam and adhere it at the top! Hang your masterpiece near your bed for a sweet dream-making effect.
5. Create Charming Light Bulb Flower Arrangements

You can create charming light bulb flower arrangements that transform your space with a touch of creativity. Start by gathering materials like glass light bulbs, dirt, and your favorite tiny flowers or succulents.
Here’s how to get started:
- Carefully remove the metal base of the light bulb and clean it thoroughly.
- Fill it with a bit of soil and position your flowers inside.
- For a unique touch, decorate the light bulb with twine or paint to match your room.
This therapeutic project is perfect for a weekend bonding activity, allowing you and your teen to unleash your artistic sides while creating stunning pieces for your home. Enjoy the process!
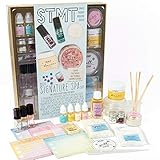
6. Create Stunning Crystal-Infused Lip Gloss
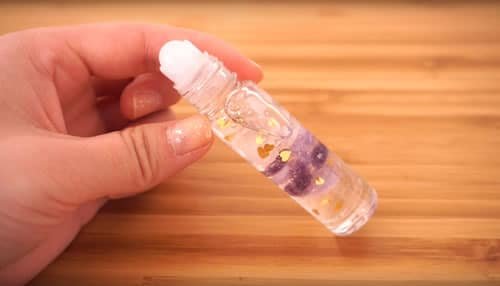
You can easily create stunning crystal-infused lip gloss that’s perfect for adding a touch of glam to your look. Start by gathering your supplies, including clear lip gloss, lip gloss containers, and colorful crystal beads.
Begin by pouring a small amount of your chosen lip gloss into the container. Then, add a few crystal beads to elevate the gloss’s style and bring in a bit of personality. You can mix and match colors to suit your mood or outfit!
Seal the container tightly, and voilà! You’ve got a unique, dazzling lip gloss that not only shines but also reflects your creativity. Enjoy your fabulous new creation!
7. Create Stylish DIY Storage Boxes Today
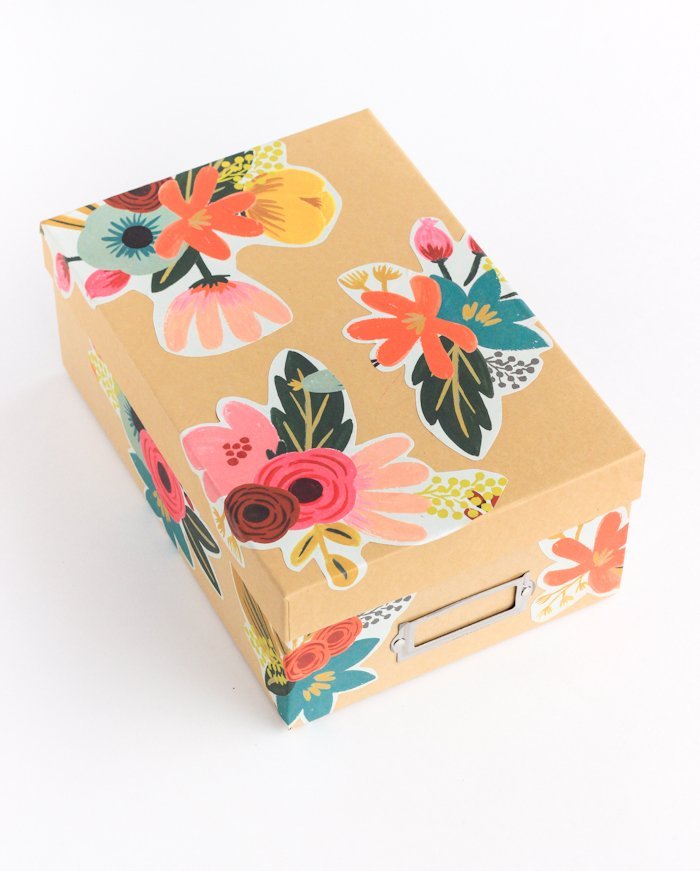
You can easily transform your clutter into chic decor with stylish DIY storage boxes! Start with basic materials like cardboard boxes and your choice of wrapping paper or fabric that reflects your personality.
- Select a size that fits your needs—small for stationery or large for winter clothes.
- Wrap your boxes tightly, securing the paper with glue or double-sided tape.
- Finish off with a decorative ribbon or label to personalize each box.
You’ll not only add style but also function to your space!
8. Crafting Colorful Homemade Soap Bars
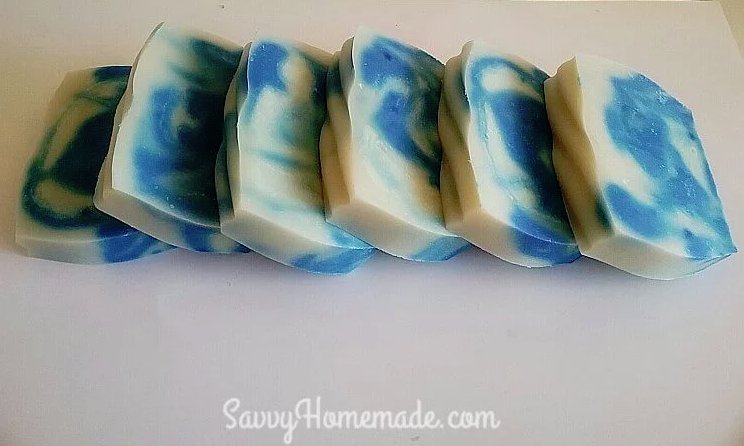
You can dive into the fun world of homemade soap-making to create beautiful, colorful soap bars. First, gather your supplies: glycerin soap base, molds, food coloring, and essential oils.
Melt the glycerin in the microwave, then add a few drops of your favorite scent and a splash of color. Stir gently to combine these ingredients. Pour the mixture into molds and let it set. For a unique touch, try layering different colors or adding flower petals or exfoliants like oatmeal for texture!
Once set, pop them out and enjoy your soap or gift them to friends. It’s a creative, personalized gift that anyone will appreciate!
9. Create Your Own Stylish Headband
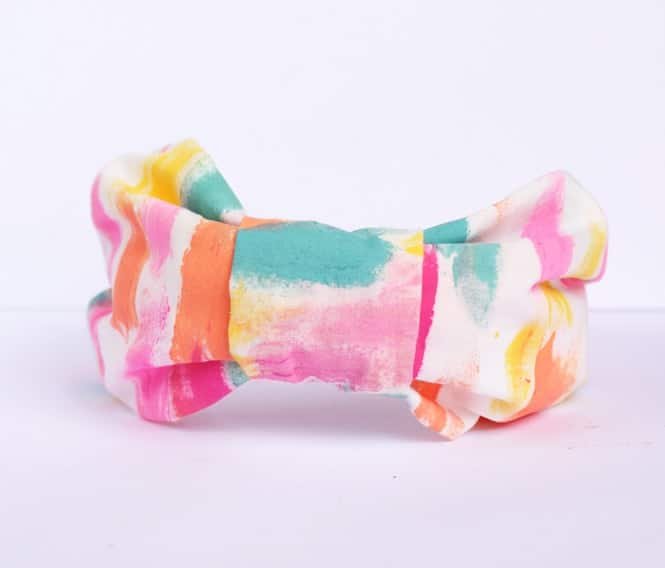
You can create your own stylish headband easily and make a fashion statement without spending much. Start with a plain fabric or an old t-shirt. Simply cut a strip about 2-3 inches wide and 20-24 inches long, depending on your head size.
For a fun twist, customize it with acrylic paint! Use stencils or freehand designs to add your personal flair. You can even incorporate beads or sew on some lace for a textured look. Once you’re satisfied with your design, tie it around your head—voilà, a beautiful headband that’s uniquely yours!
10. Create Your Own Yarn Chandelier Decor
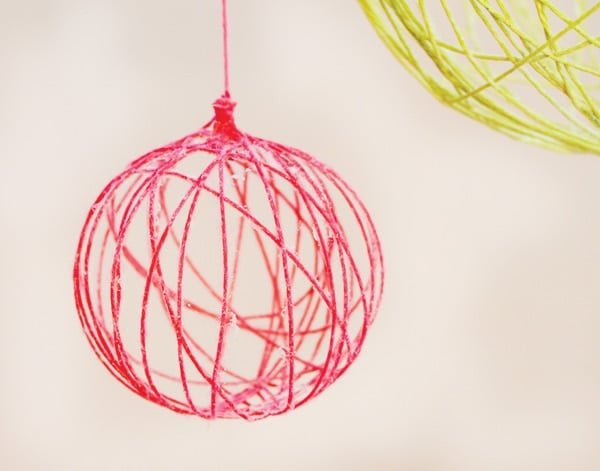
Transform your space with a yarn chandelier that’s not only stylish but also a delight to create! This fun DIY project allows you to showcase your personality while adding a vibrant touch to your room.
Start by gathering your materials: you’ll need a sturdy embroidery hoop, some colorful yarn, scissors, and a light source like an LED bulb. Wrap the yarn around the hoop until it’s fully covered, choosing colors that resonate with your room’s theme.
Once the hoop is complete, secure it with the yarn to hang down from the ceiling. You can even incorporate fairy lights within the yarn for a magical glow. Your custom chandelier will not only brighten your space but also serve as a unique conversation starter!
11. Create Your Own Stylish Tote Bag
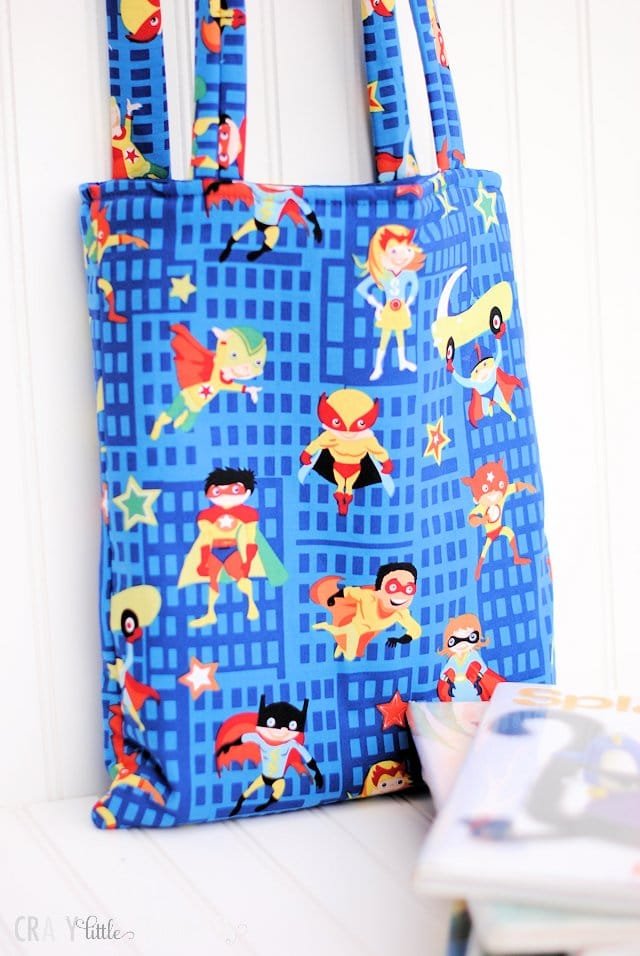
You can express your creativity by designing your own stylish tote bag! Start by selecting a fabric that resonates with your style—consider floral patterns for a fresh vibe or solid colors for a minimalist look.
Here’s how to get started:
- Gather materials: You’ll need fabric, scissors, a sewing machine (or needle and thread), and some sturdy handles.
- Cut your fabric: For a standard-sized tote, cut two rectangles measuring about 15"x 18".
- Assemble: Sew the sides and bottom, turning it inside out to hide the seams.
Customize it further with fabric paint or iron-on patches for that unique touch. Carry your one-of-a-kind creation everywhere you go!
12. Create Your Own Stylish Trinket Dish
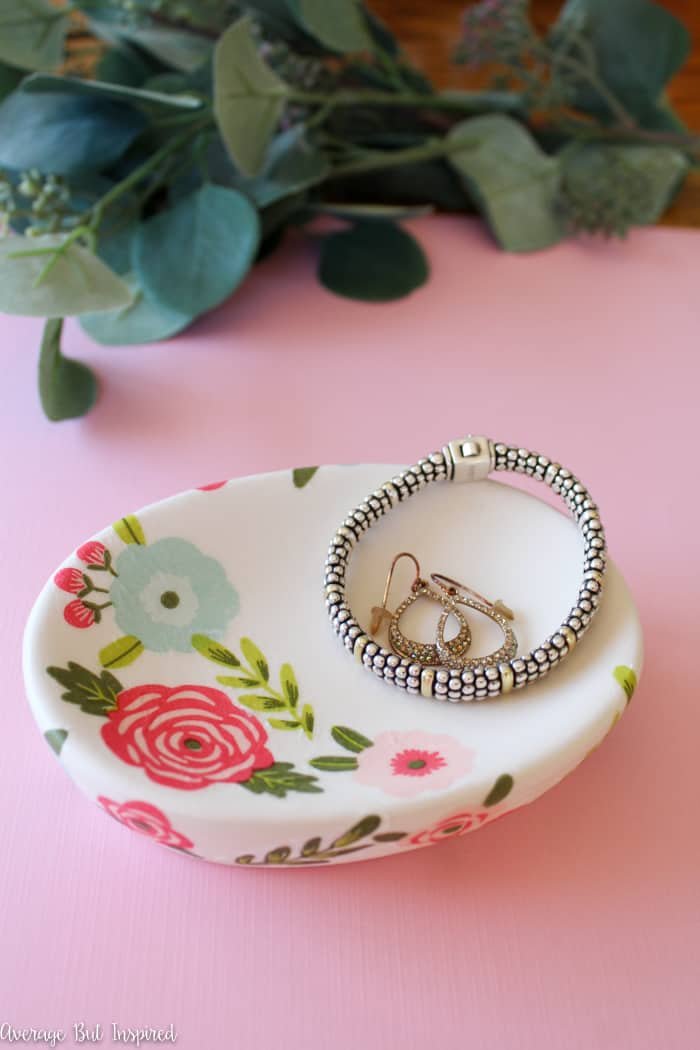
You can create your own stylish trinket dish in just a few simple steps. Start with a plain porcelain soap dish or a small bowl—these serve as the perfect base for your DIY project. Gather essential supplies: Mod Podge, decorative paper napkins, scissors, and a paintbrush.
First, cut out interesting patterns or designs from your napkins. Lay these on your dish to visualize the arrangement. Once you’re happy with the look, adhere the pieces using Mod Podge, applying a thin layer underneath and on top to seal everything in place. Allow it to dry completely, and you’ll have a unique, chic trinket dish to store your little keepsakes!
13. Transform Old DVDs into Beautiful Trays
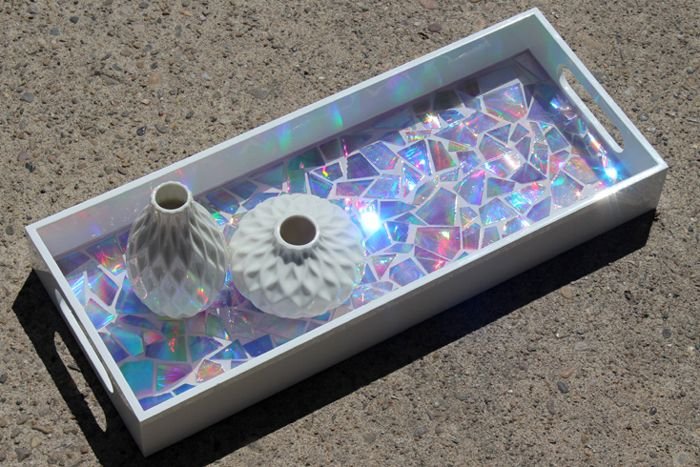
Transforming old DVDs into stunning trays is a fun and creative project you can tackle with your teen. Start by gathering your materials: old DVDs, a plain tray, high-gloss clear-casting epoxy, measuring cup, scissors, stirring sticks, and a hot glue gun.
Begin by cutting the DVDs into fun shapes or leaving them whole for a unique design. Use the hot glue gun to attach the DVDs to the tray, arranging them in a way that catches the eye.
Once the DVDs are fixed, mix the epoxy according to the instructions and pour it over your design for a glossy finish. This not only looks beautiful but also protects your creation!
14. Create Your Own Ombre Tassel Necklace
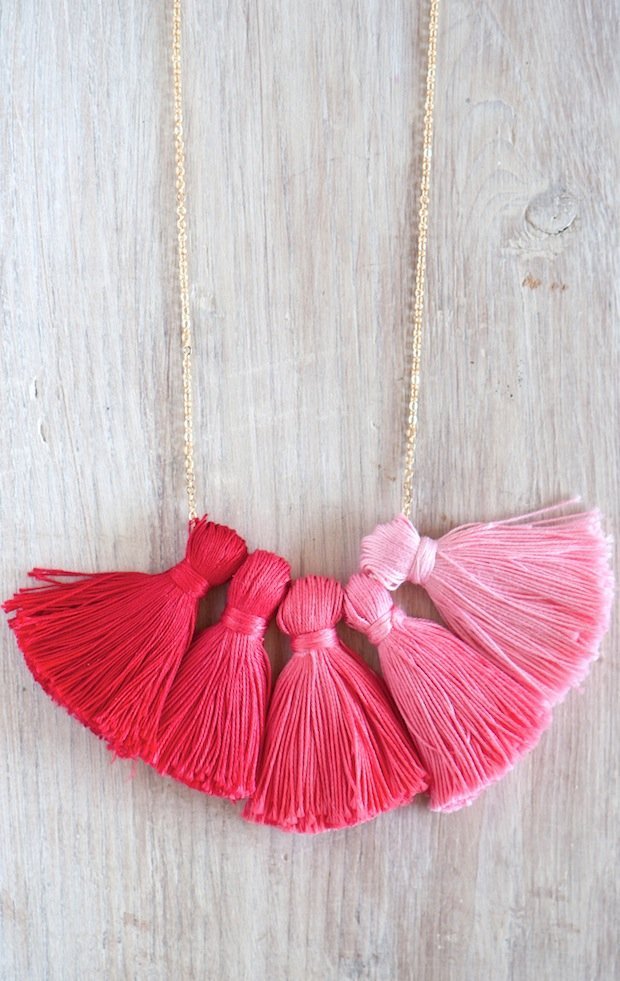
You can craft your own ombre tassel necklace effortlessly! Start with a simple chain necklace and gather materials like white embroidery thread and your favorite fabric dye. If you prefer convenience, opt for a vibrant set of pre-dyed threads.
To make the tassels, cut lengths of thread and bind them at the top. Then, dip the lower half in your chosen dye, gradually increasing exposure for that stunning ombre effect. Finish by attaching the tassels to your chain.
This trendy accessory is not just stylish; it showcases your creativity. Embrace the DIY spirit!
15. Create Your Own Stylish Braided Bracelet
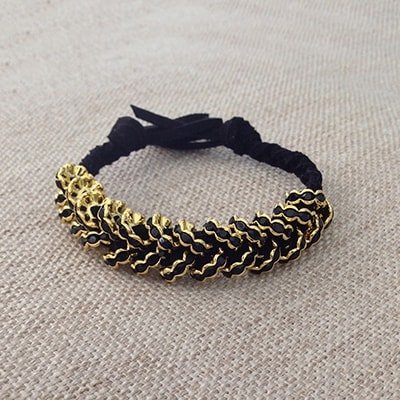
You can create your own stylish braided bracelet with just a few materials found around your home. Grab some suede lace and a handful of crystal rondelle beads to get started. These elements can transform into a unique piece of jewelry that reflects your personal style.
- Cut the suede lace to your desired length—usually around 24 inches works well.
- String the crystal beads onto the lace; feel free to mix colors for a vibrant look.
- Braid the lace, incorporating the beads as you go. Secure the ends with a knot.
This simple yet chic accessory elevates your outfit effortlessly!
16. Create Adorable Yarn-Wrapped Flower Pots
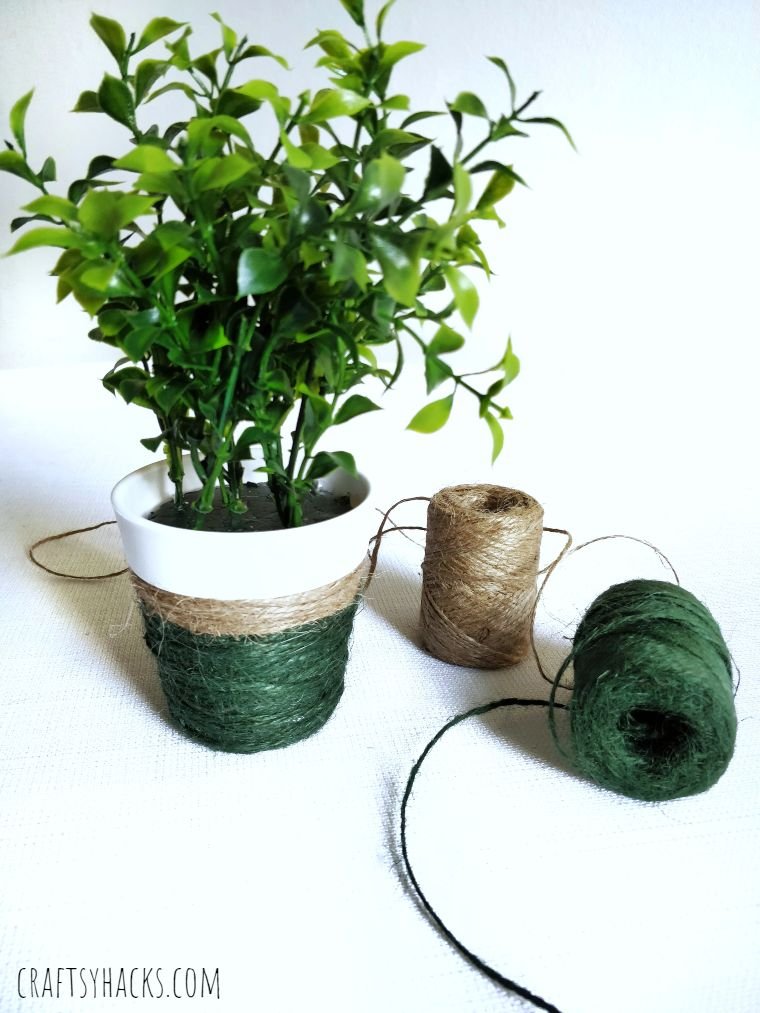
Transform your ordinary flower pots into stunning decor with just a roll of yarn! This simple DIY project is perfect for adding a splash of color to your space while nurturing your plant-parenting skills.
Start with an empty terracotta pot and choose your favorite yarn colors. Wrap the yarn around the pot, using a hot glue gun to secure it at each change of color or at the ends. Feel free to mix and match patterns for an extra fun look!
Once you’re finished wrapping, fill the pot with soil and your choice of vibrant plants or flowers. This charming craft not only supports your green thumb but also makes for a cheerful gift or bedroom accent.
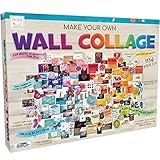
17. Create Stunning DIY Wall Art Ideas
You can easily transform your space with stunning DIY wall art that showcases your creativity! Consider creating a colorful canvas using acrylic paints and sponges. Simply dab the paint onto the canvas in various colors to achieve a chic, abstract look.
Another fun idea is to craft a photo collage. Print out your favorite memories, cut them into fun shapes, and arrange them on a large piece of poster board. This personal touch not only brightens up your walls but also tells your story.
Lastly, try making hanging macramé plant holders. They add a boho vibe while giving your plants a stylish way to hang. Use simple knots and sturdy rope—perfect for showcasing your green thumb!
18. Stylish Yarn-Wrapped Glass Vase Tutorial
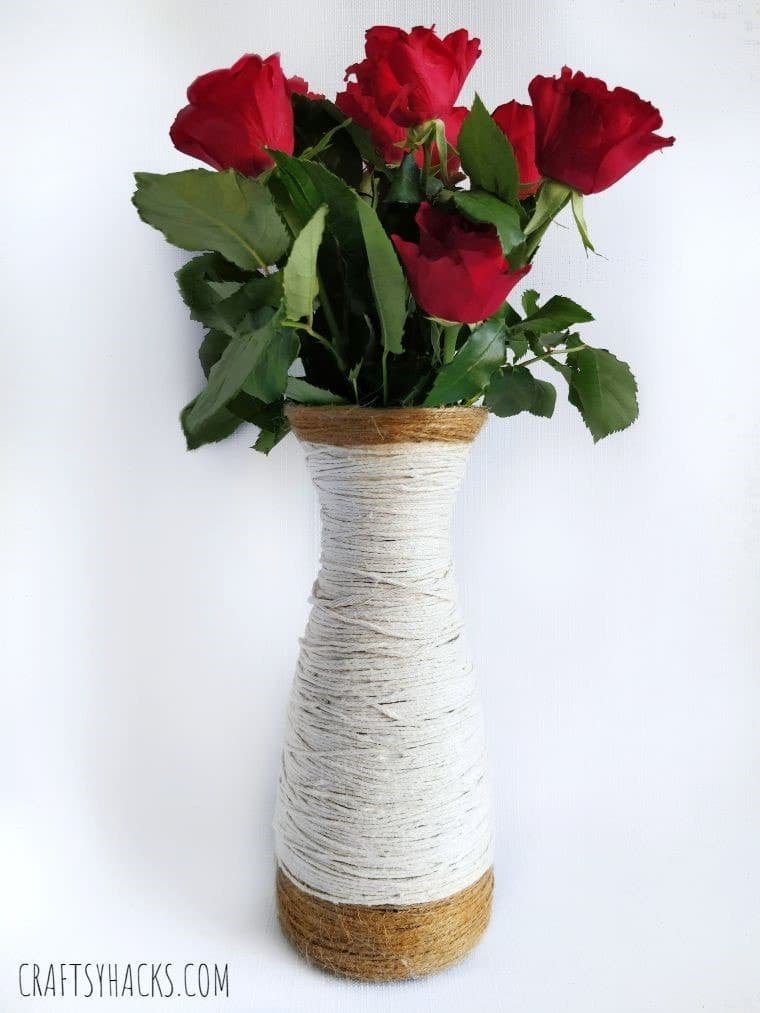
You can transform a plain glass vase into a chic decor piece with just some yarn and a bit of creativity! Here’s how to do it.
What You’ll Need:
- An elongated glass vase
- Yarn in your favorite colors
- Hot glue gun
- Scissors
Start by applying a thin line of hot glue at the base of the vase. Carefully attach the yarn, wrapping it tightly around the glass. As you go, add more glue every few inches to keep it secure and neat.
When you reach the top, cut the yarn and glue down the end securely. Fill your vase with beautiful, long-stemmed flowers. This simple touch can brighten up your room and showcase your unique style!
19. Create Charming Rustic Wood Frames
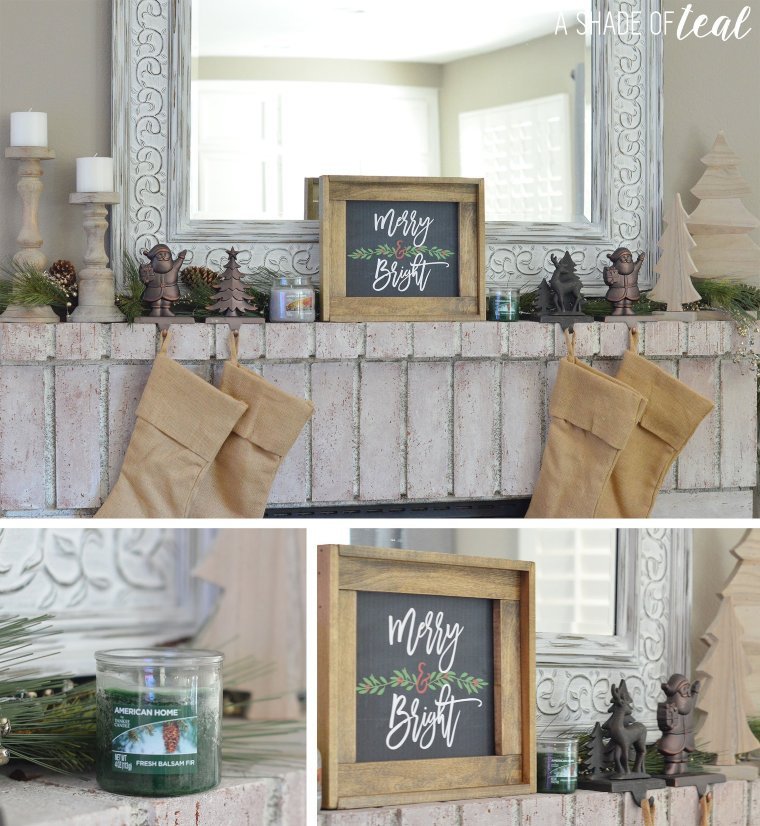
You can easily create charming rustic wood frames that will enhance your home décor and showcase your favorite memories. Start by gathering materials like reclaimed wood, twine, and some sturdy screws. The weathered look of the wood will give your frame that inviting, rustic charm.
To make your frame:
- Cut wood pieces to your desired size.
- Sand the edges for a smooth finish.
- Assemble the pieces and secure them with screws for durability.
- Add a touch of flair by wrapping twine around the edges or attaching a small chalkboard for messages.
This simple yet elegant project not only beautifies your space but also provides a personal touch, making it a fun and rewarding DIY experience!
20. Create Your Own Stylish Chain Mail Bracelet
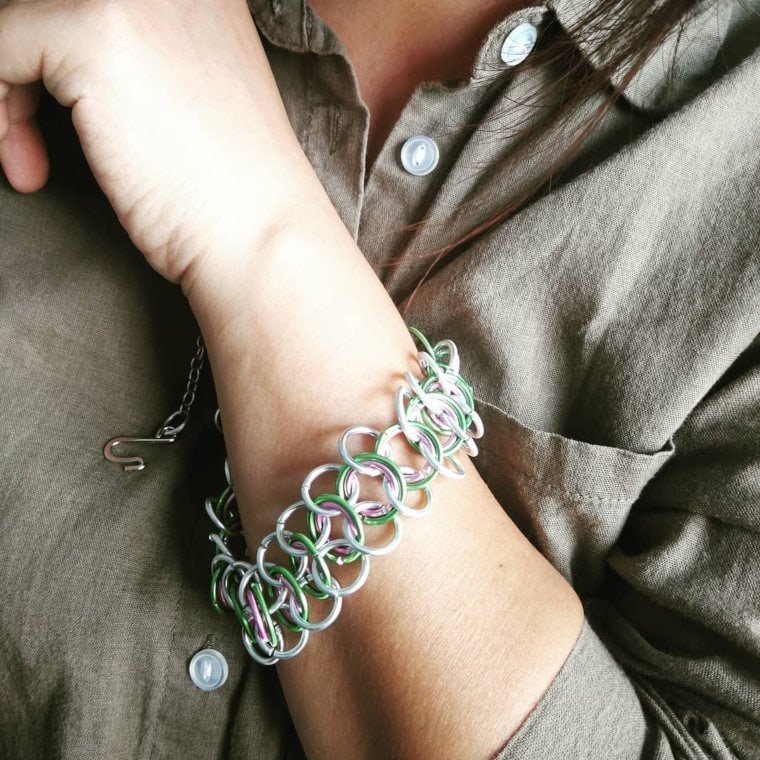
You can easily create your own stylish chain mail bracelet, and it’s a fun way to showcase your creativity. Start by gathering supplies like jump rings (make sure they’re sturdy), a pair of needle-nose pliers, and a clasp.
Choose a design—simple patterns like the 4-in-1 weave are perfect for beginners. Once you’ve mastered that, try experimenting with colors or even adding a charm for a personal touch.
This project not only helps you save money but also gives you impressive pieces to flaunt or gift to friends. Plus, creating matching stackable bracelets can add a trendy flair to your style!
21. DIY Drawer Organizers from Cereal Boxes
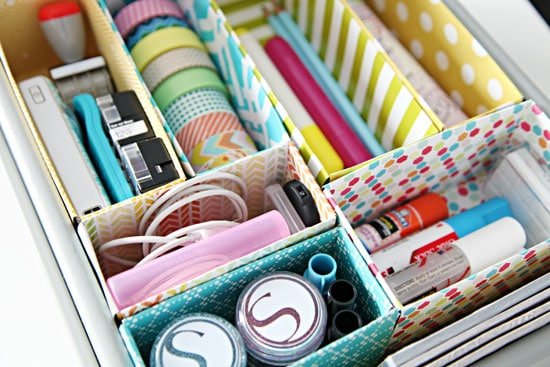
Transform those empty cereal boxes into practical drawer organizers without breaking the bank. You’ll be amazed at how easy it is to declutter your space with just a few simple steps.
Start by cutting the cereal boxes into various heights. For small items like hair accessories, create shorter dividers. For taller items, like makeup brushes, cut them higher. Use adhesive tape or glue to secure the pieces, forming compartments that fit your needs.
You can also decorate the boxes with washi tape or paint for a fun, personalized touch. Not only will your drawers look organized, but you’ll also enjoy the satisfaction of reusing materials that might otherwise end up in the trash!
22. DIY Sparkly Tube Bracelet Tutorial
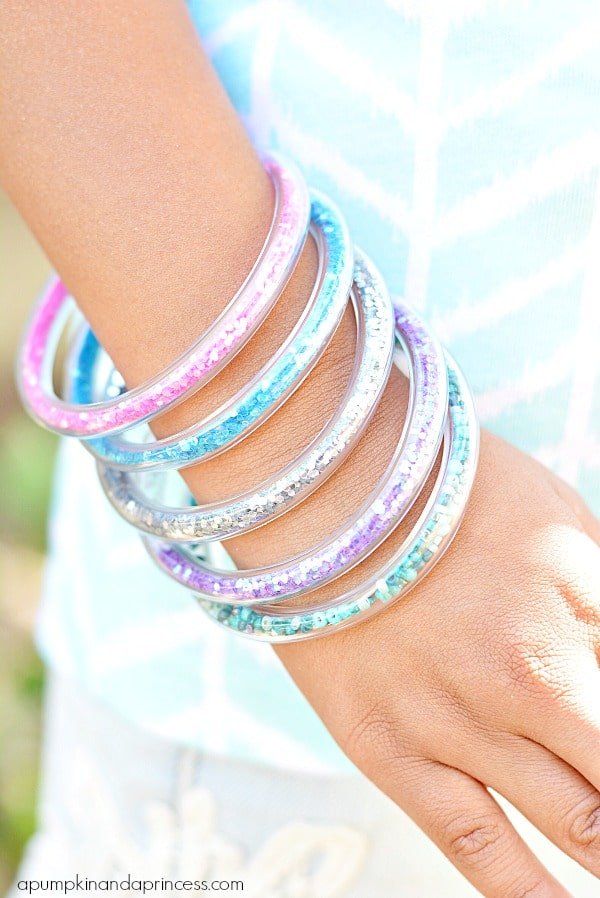
Get ready to create your own sparkly tube bracelet! This fun craft is not only a great way to express creativity, but it’s also super simple to make.
You’ll need ¼-inch and 3/8-inch vinyl tubing, both available at craft stores. Grab a mix of glitter crystals to add that fabulous sparkle. A glitter funnel will help you easily fill the tubing—look for one at your local dollar store.
Start by pouring your chosen glitter into the ¼-inch tubing using the funnel. Once filled, secure both ends with epoxy glue and cap them with the 3/8-inch tubing. Let it dry, and voila! You have a stylish, handmade bracelet to showcase your dazzling style.
23. Create Trendy Pom Pom Earrings Easily
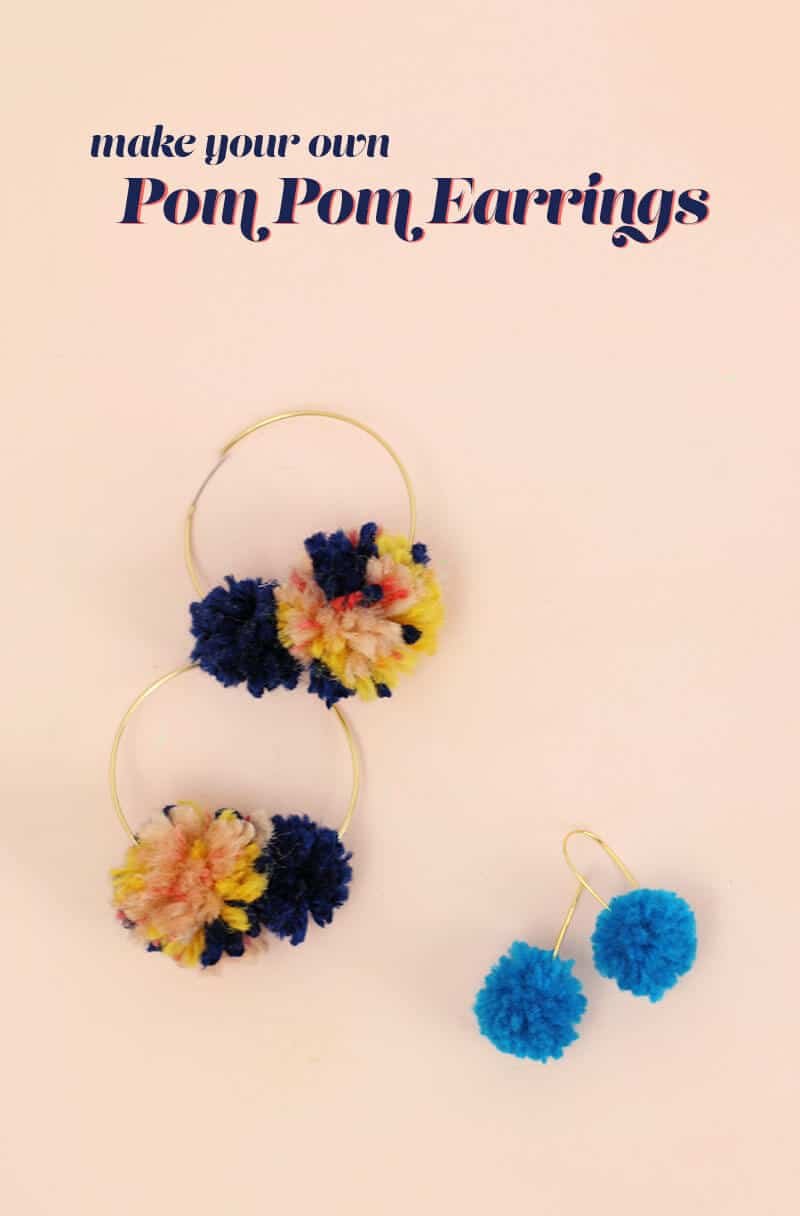
Get ready to make a fashion statement with trendy pom pom earrings! You can create these adorable accessories with just a few simple materials.
Start by gathering yarn, small scissors, and earring hoops. Cut the yarn into lengths—about 10 inches for the pom poms. Then, take a bundle of yarn and wrap it around four fingers several times. Slide it off, secure the center with a knot, and cut the loops to form your fluffy pom pom. Attach your creations to the hoops using jump rings for an easy, stylish finish.
Mix and match colors to reflect your personality, and don’t hesitate to make multiple pairs! These earrings are not only cute but also a fun craft to share with your friends.
24. Create Custom Luggage Tags Easily
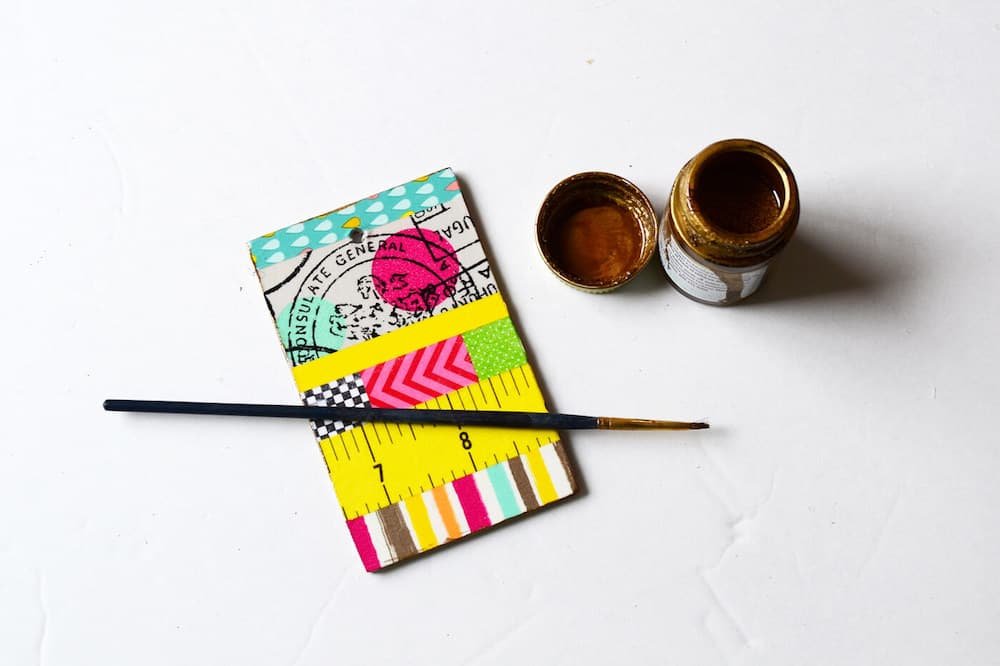
You can easily create custom luggage tags that reflect your unique style without breaking the bank. All you need is some MDF wood for durability and a few simple tools.
Start by cutting your MDF into fun shapes—think hearts, stars, or even your initials. Once shaped, paint or decorate them with washi tape, stickers, or markers to make them truly personal. After drying, punch a hole at the top to attach your colorful ribbons or strings.
Don’t forget to add your contact information on the back! These custom tags will not only help you identify your luggage but also showcase your creativity.
25. Magical Fairy Light Photo Display Ideas
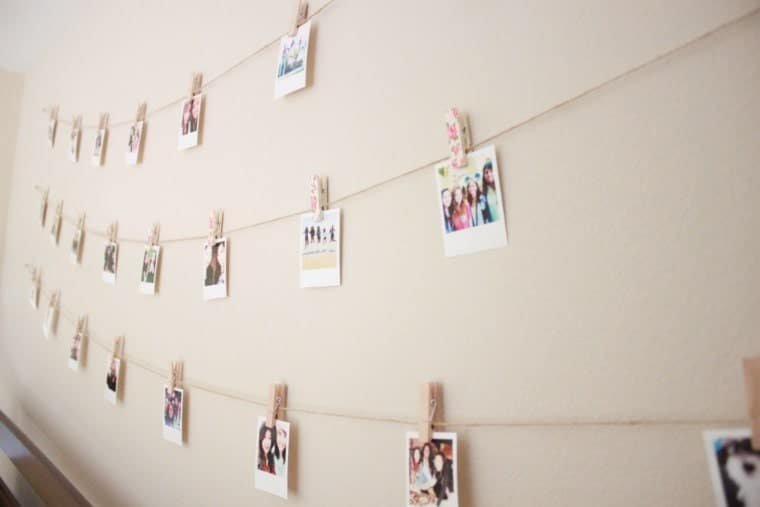
Transform your space with a fairy light photo display that adds both charm and personality. You can create this enchanting décor with simple tools and materials.
Start by choosing a location on your wall where you can arrange your favorite photos. Grab a few strands of fairy lights, preferably LED for a softer glow.
Use clip-style photo holders to attach your pictures directly onto the lights or string them along with mini clothespins. This setup not only beautifies your room but also allows for easy swapping of images as you capture new memories. Enjoy a whimsical way to showcase your style!
26. Create Colorful Sharpie Sneakers Easily
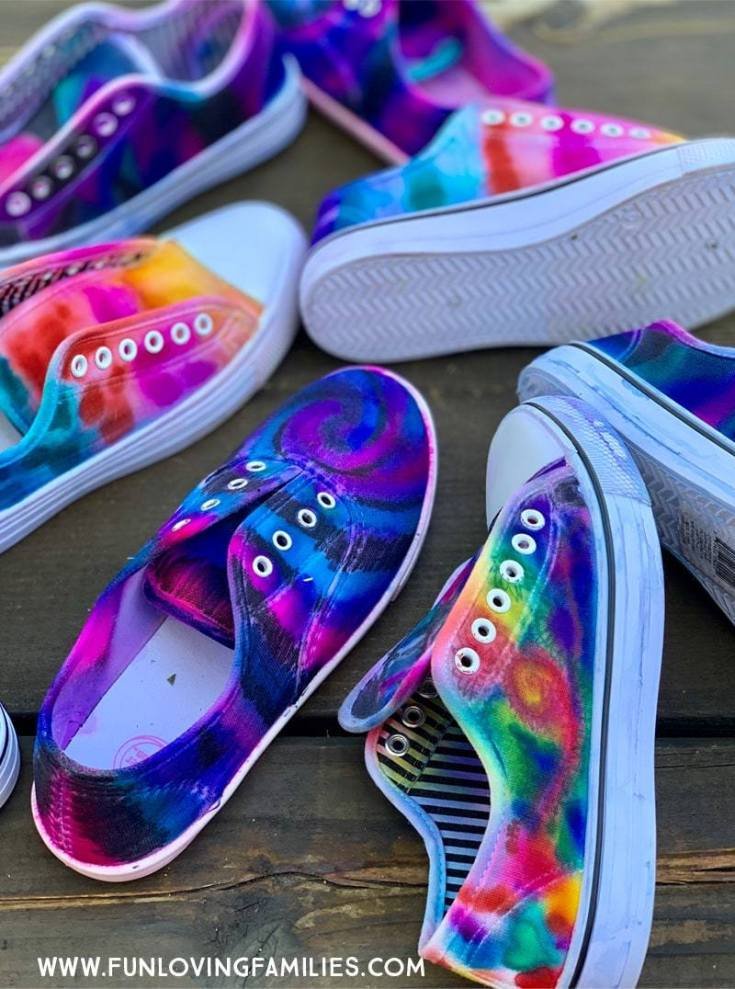
You can easily transform a plain pair of white sneakers into a vibrant work of art using colorful Sharpie markers. Gather a set of your favorite colors and let your creativity flow! Start by sketching out your designs lightly, so you have a roadmap for your masterpiece.
To achieve a stunning tie-dye effect, simply spray a bit of rubbing alcohol over your colored designs. This causes the ink to blend beautifully, giving your sneakers that sought-after faded look.
Don’t be afraid to experiment! Whether you want a bold pattern or delicate details, the design is uniquely yours to create and wear with pride.
27. Elevate Decor with Glamorous Candle Holders
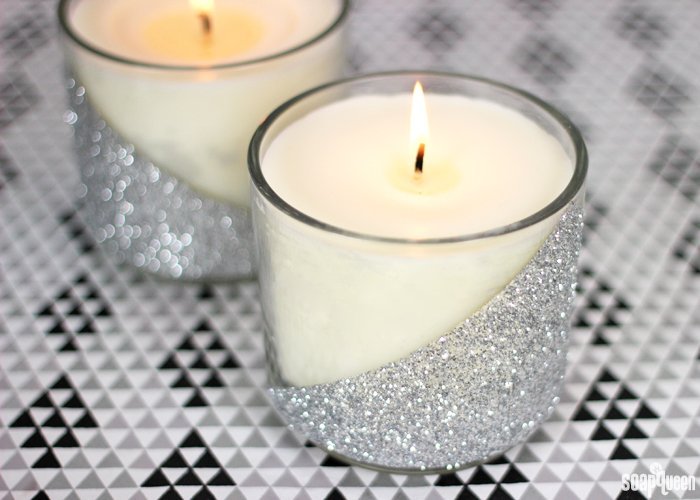
You can transform your space instantly by upgrading your candle holders into glamorous decor pieces. Grab some basic candle holders from your local store, a bit of silver nail polish or glitter, and let your creativity shine!
- Clean the holders: Make sure your candle holders are dust-free.
- Apply polish or glitter: Use a sponge brush to apply silver nail polish or sprinkle glitter over wet glue.
- Let dry: Allow them to dry completely for a stunning finish.
Incorporating different colors or metallic touches adds style and complements your existing decor. Your mood lighting will be enhanced, and you’ll love the unique flair these glamorous holders bring to your environment!
28. Create Your Own Custom Bath Bombs
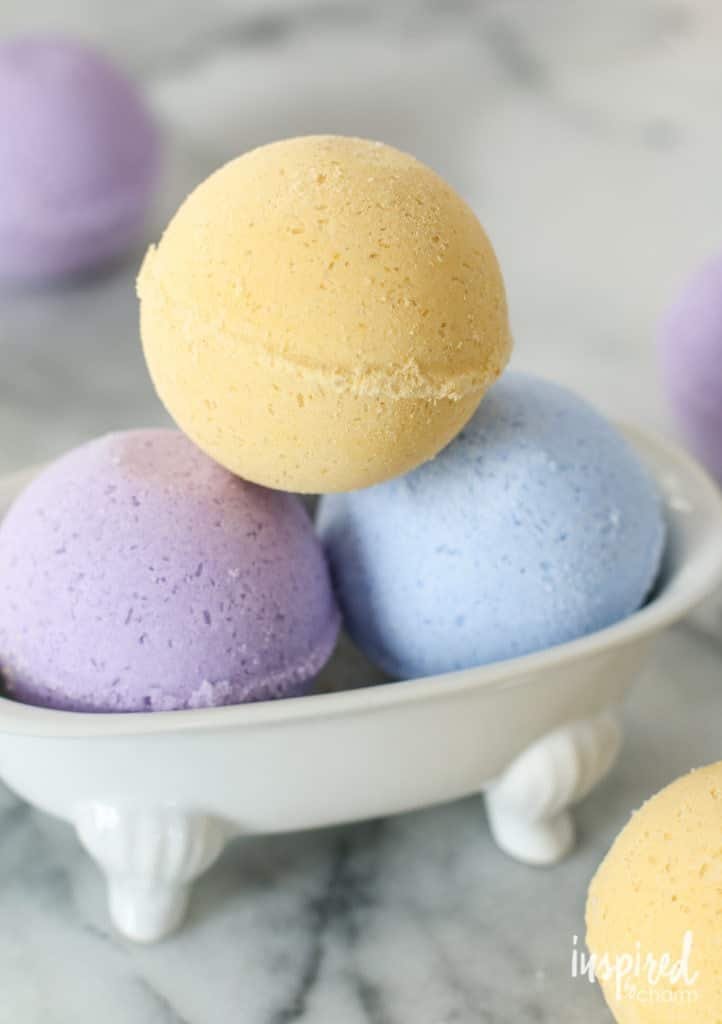
You can easily create custom bath bombs that elevate your bath experience! With just a few simple ingredients, you can craft colorful, fragrant, and unique bath bombs tailored to your preferences.
Here’s what you’ll need:
- 1 cup baking soda
- 1/2 cup citric acid
- 1/2 cup Epsom salt
- 2.5 tablespoons of oil (coconut or olive)
- Essential oils for fragrance
- Food coloring for that vibrant touch
Mix the dry ingredients in one bowl and the wet ones in another. Slowly combine them, ensuring they maintain a moldable texture. Fill your bath bomb molds tightly, let them dry for 24 hours, and voilà! You have delightful, personalized bath bombs ready for pampering or gifting.
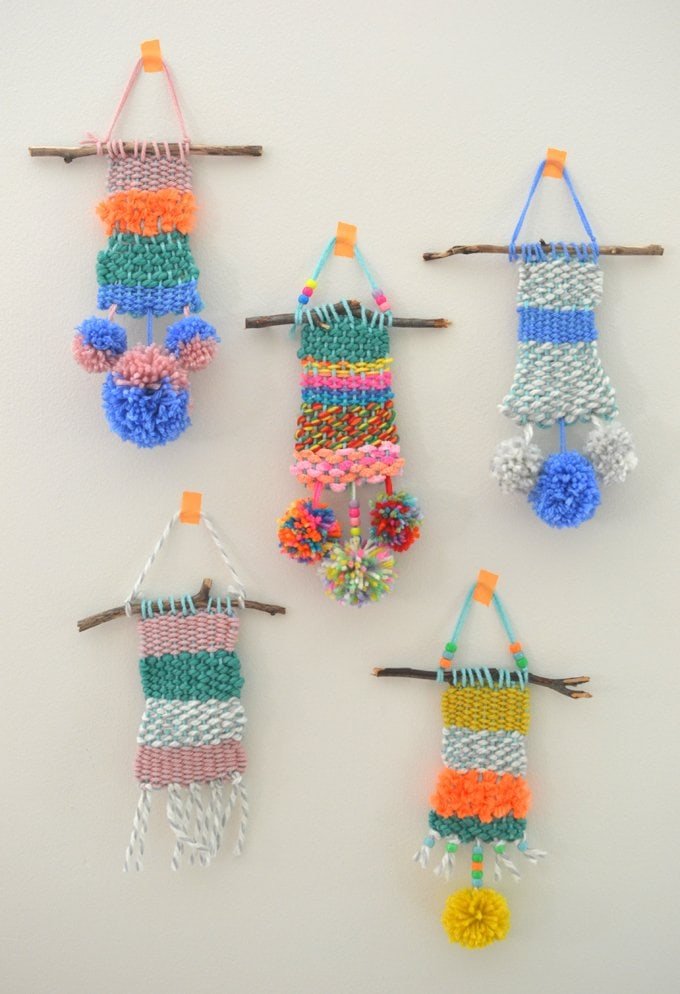
29. Create Stunning Woven Wall Décor
You can transform your plain walls into stunning displays with woven wall décor. This DIY project not only enhances your room but also lets you express your creativity.
Start by gathering your materials: yarn in various colors, a dowel rod, and some scissors. Cut the yarn into different lengths, depending on the desired design. You can try a simple knot technique to attach the yarn to the dowel, or experiment with more complex patterns like fibers or fringe for added texture.
For a whimsical touch, consider adding elements like beads or dried flowers. This way, your wall hanging won’t just be a craft—it’ll be a personal masterpiece that reflects your style!
30. Create Unique Custom Pillow Cases Easily
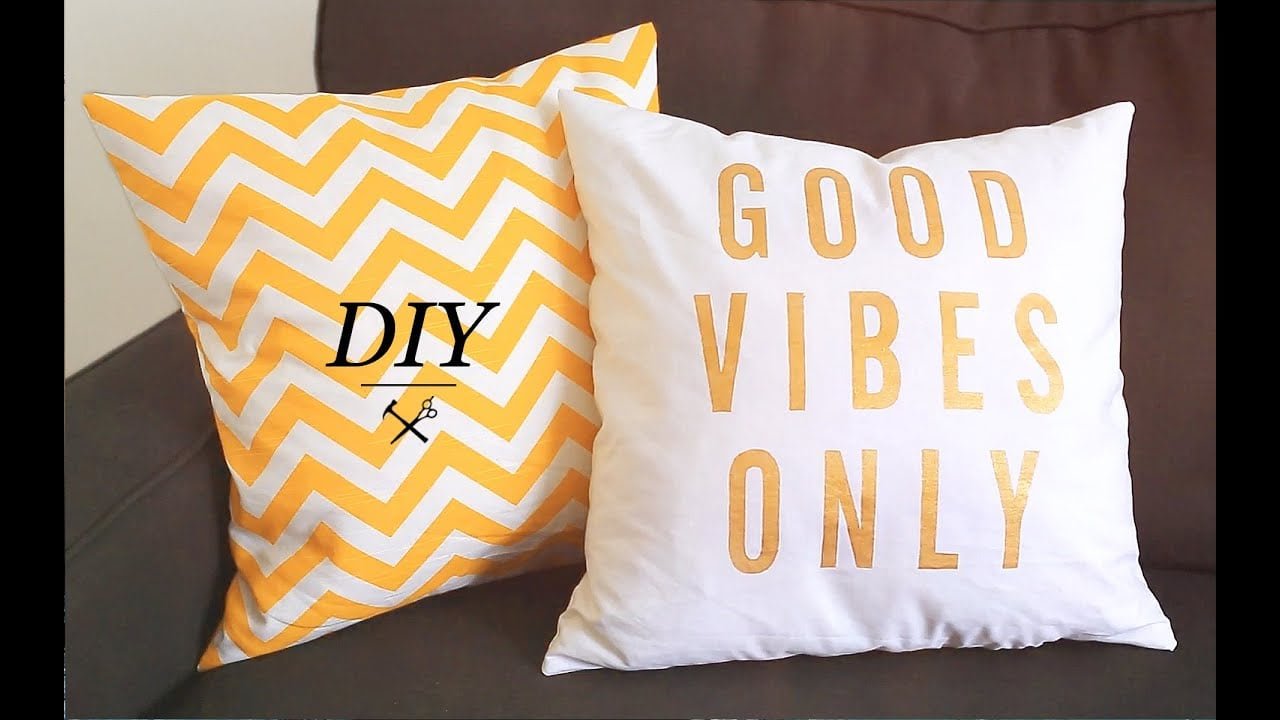
You can transform your room’s décor effortlessly by creating unique custom pillowcases. It’s an exciting way to express your personality and style. Choose fabrics that suit your theme—floral for a fresh vibe, or maybe something bold and graphic for a trendy edge.
Start with these simple steps:
- Measure your existing pillows to get the right dimensions.
- Select fabric that resonates with your aesthetic. Consider tie-dye, patterned prints, or even solid colors.
- Use fabric markers or paint to add your own designs and quotes.
With just a few supplies, your custom pillowcases will become the statement pieces in your room!
31. Create Your Own Calming Water Candle
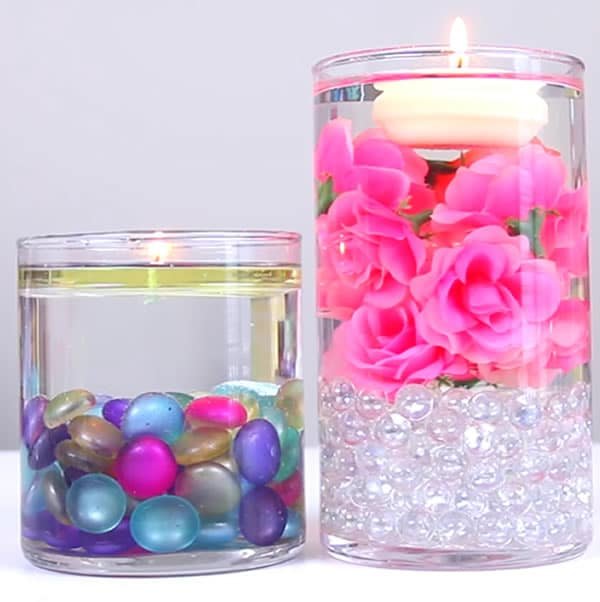
You can create your own calming water candle with just a few simple materials. This project is not only fun but also a great way to add a personal touch to your space without breaking the bank!
Start by gathering these supplies:
- Glass candle holders (check your local dollar store)
- Glass gems (to decorate)
- Birthday candles
- Cooking oil
- Utility knife
- An old plastic lid (to use as a base)
First, fill the glass candle holder with water and add a splash of cooking oil on top. The oil will float, creating a beautiful layer on the water. Next, trim the birthday candle down to size and secure it with the plastic lid at the bottom of the holder. Add the glass gems around it for an artistic touch. Light the candle for a calming ambiance! Enjoy your new creation!
32. Create a Chic Fishnet Mason Jar Decor
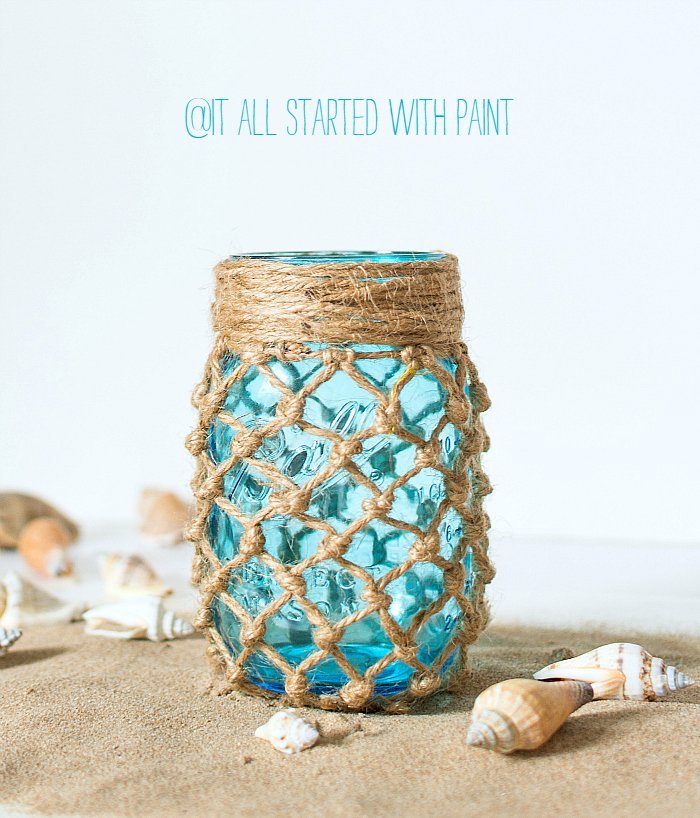
Wrap a fishnet of twine around a mason jar for a chic, bohemian vibe that enhances your décor. Begin by securing one end of the twine at the base of the jar. Weave the twine in a crisscross pattern, creating small diamond-shaped openings as you ascend. This technique adds a unique texture to your jar while allowing for creativity.
To elevate the aesthetic, fill the bottom of the jar with sand or seashells for a beach-inspired look. This can be perfect for holding candles or displaying fresh flowers. Alternatively, keep it simple and use your decorated jar as a stylish storage solution for trinkets or craft supplies. Grab some Ball mason jars in bulk to get started on this fun DIY project!
33. Vibrant Pompom Garlands for Room Decor
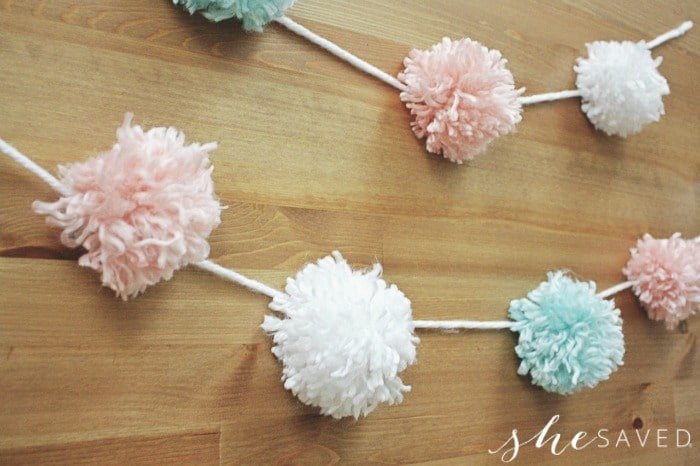
Transform your space with vibrant pompom garlands that add a whimsical touch to any room! These charming decorations are incredibly easy to make and require just a pair of scissors and your favorite yarn colors.
Choose bright and playful hues, or go for a more muted palette to match your decor. Once you have your yarn, simply create pompoms and string them together to form eye-catching garlands. Display them on walls, across windows, or even draped over furniture for an instant decor upgrade!
Don’t forget to experiment with different sizes and patterns for added flair. With a pack of 40 assorted yarn colors, you’ll have endless possibilities to create a fun and personalized ambiance in your room!
34. Create Stunning DIY Resin Keychains
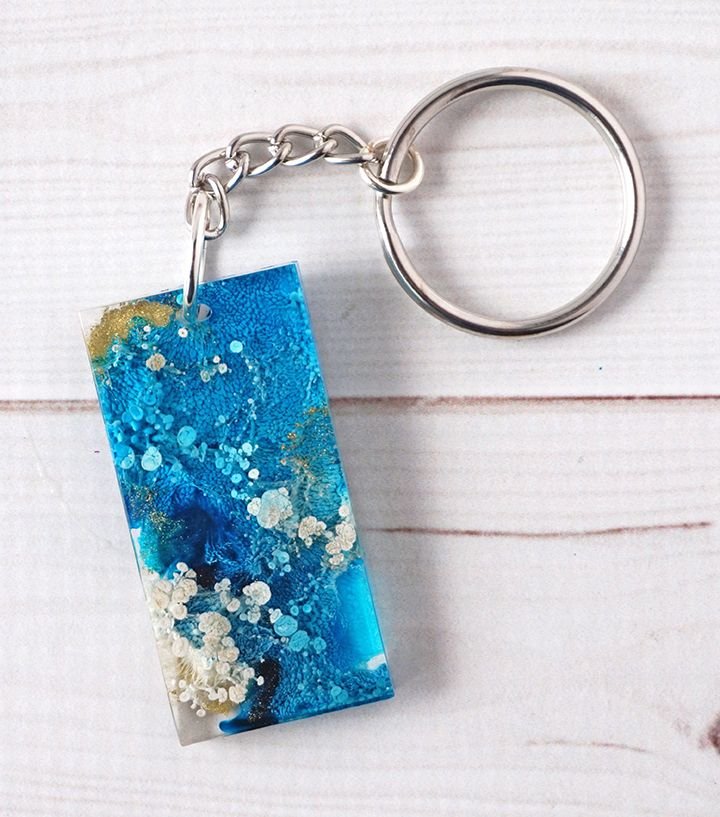
Create stunning DIY resin keychains that will not only brighten your accessories but also keep you creatively engaged! This fun project is a fantastic way to escape from screens and express your style.
Start by gathering your materials:
- Clear casting epoxy
- Molds (silicone works best)
- Chains and pliers for attaching keyrings
- Mold release spray and conditioner
- Disposable gloves to keep things tidy
Once you’re ready, mix the epoxy according to the package instructions, pour it into the molds, and add fun elements like glitter, small charms, or colored pigments for a personal touch. After curing, simply pop them out, attach the chains, and your unique keychains are ready to shine!
35. Create a Trendy Ombre Knitted Scarf
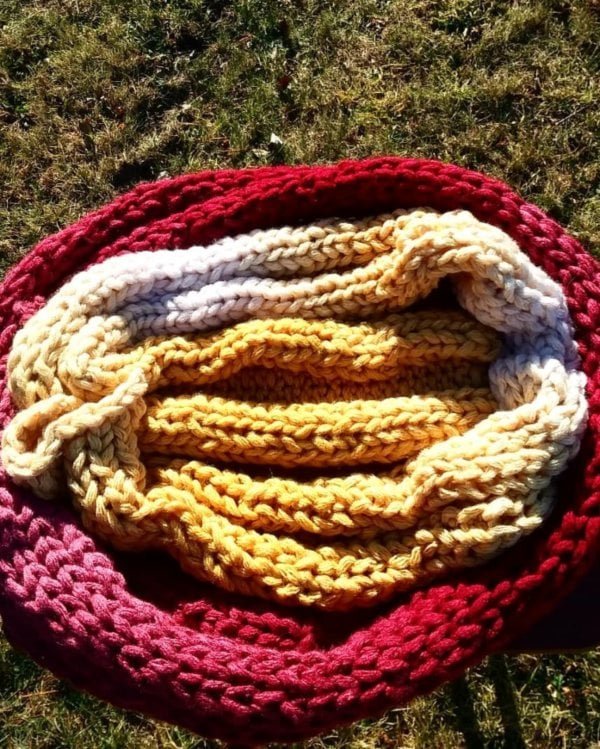
You can easily impress your friends with a trendy ombre knitted scarf that showcases your knitting talent. Start by selecting three gradient yarn colors that blend beautifully; think light to dark shades of your favorite hue.
Begin knitting with your lightest color, continuing until you’ve reached the desired length, typically about 60 inches. Then transition to the medium shade for a few inches, before finishing with the darkest color to create that exquisite ombre effect.
For a polished look, consider using a simple garter stitch. This not only ensures your scarf is cozy but also emphasizes the color transition beautifully. Enjoy wearing your unique scarf, or gift it to someone special!
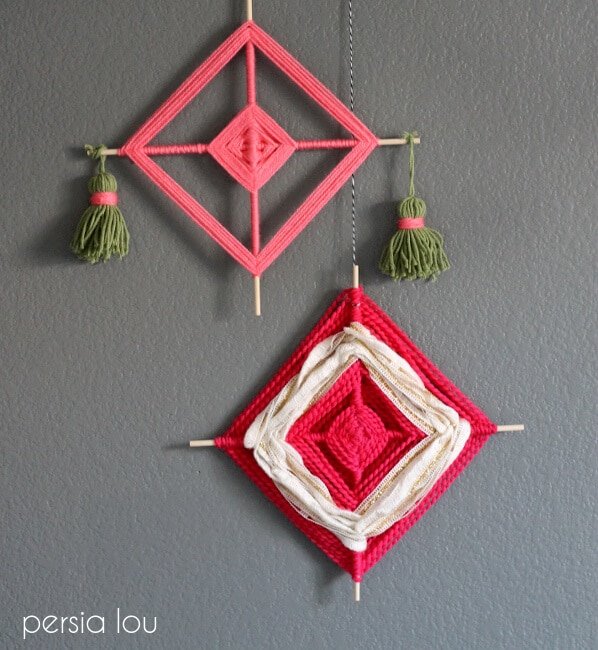
36. Create Enchanting Pastel Dream Catchers Together
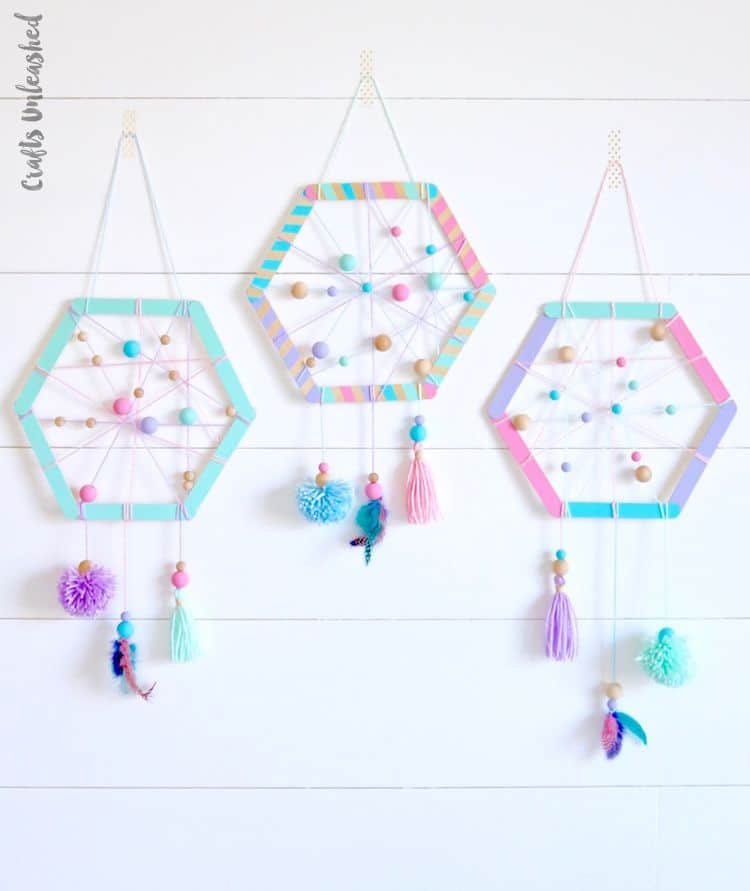
You can create enchanting pastel dream catchers together that not only add charm to your space but also provide a delightful bonding experience. Gather some supplies like a metal or wooden hoop, pastel yarn, feathers, and beads.
Start by wrapping the hoop with the yarn, choosing colors like soft pink, lavender, and mint green. Next, weave string vertically across the hoop to resemble a web, leaving gaps for those good dreams to filter through.
Finish it off by decorating with feathers and beads for a whimsical touch. Hang your creation above your bed, and watch as it transforms your room into a dreamy sanctuary!
37. Stylish DIY Laundry Basket Ideas
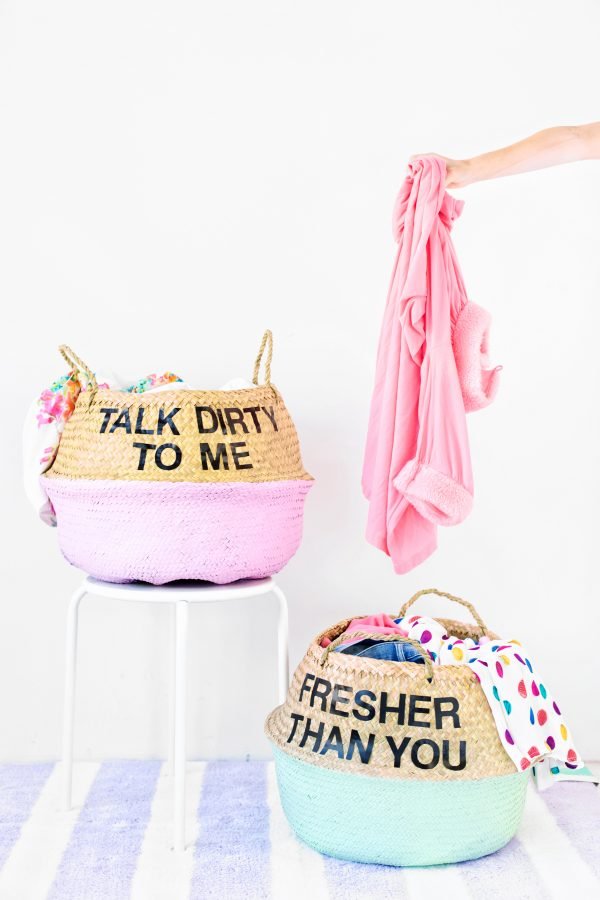
You can transform your ordinary laundry basket into a stylish piece that reflects your personality! Here’s a fun way to do it with just a few supplies.
Start with a simple wicker or fabric laundry basket. For a personalized touch, grab large adhesive letters from your local craft store. Message ideas include quotes like "Laundry Day? What Laundry Day!" or simply your name. Use a foam brush to apply a layer of matte Mod Podge over the letters to seal them securely.
If you want to go a step further, use craft paint to create patterns or colors that match your room decor. Think bold stripes, polka dots, or even a cool ombre effect. This way, doing laundry becomes a stylish statement rather than a chore!
38. Customizable Zipper Pouch DIY Instructions
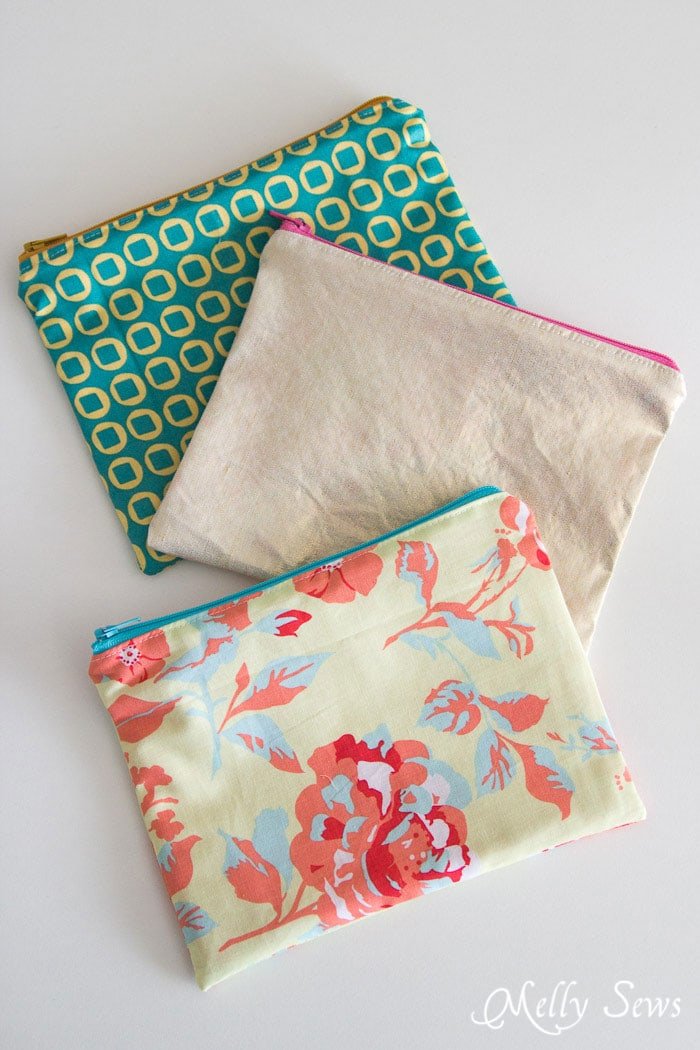
You can easily create your own customizable zipper pouch with just a few materials and steps! This DIY project lets your personality shine through, as you can choose fabrics, colors, and patterns that represent your style.
Materials you’ll need:
- Fabric: Pick two different patterns for variety.
- Zipper: Select a length that suits your pouch size.
- Sewing kit: This includes thread, pins, and scissors.
- Iron: For crisp seams.
To get started, cut two identical fabric pieces. Make sure they’re the right size for your intended use. Then, place the zipper between the two fabric pieces and pin it down. Sew along the edges, and voilà! Turn your pouch inside out to reveal your masterpiece.
Feel free to add embellishments like patches or embroidery for that personal touch. Your customizable zipper pouch is not just practical but also a unique expression of your creativity!
39. DIY EOS-Inspired Lip Balm Tutorial
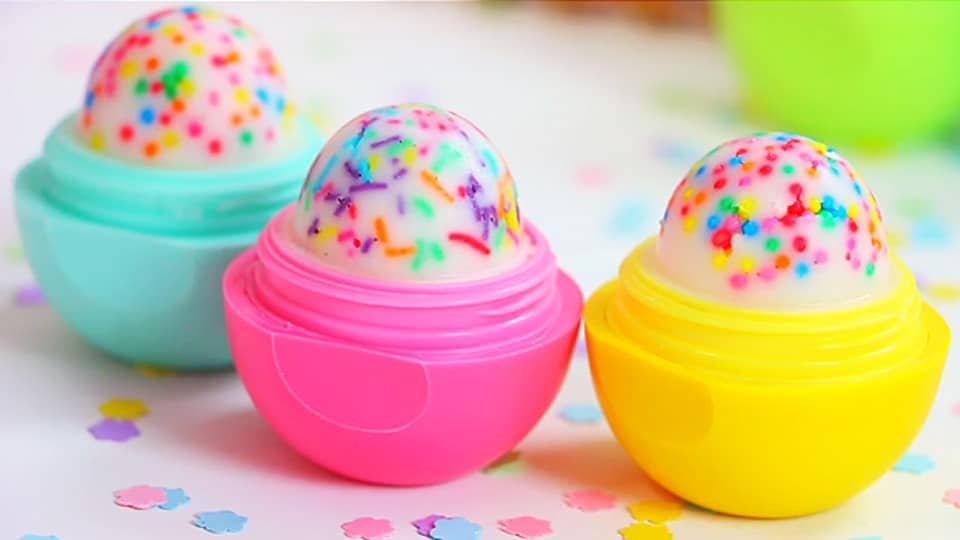
You can create your very own EOS-inspired lip balm at home with just a few simple ingredients! This fun DIY project allows you to customize flavors and colors, making it perfect for gifts or personal use.
Here’s what you’ll need:
- Beeswax pellets
- Coconut oil
- Essential oils (like peppermint or vanilla)
- Food coloring (optional)
Start by melting equal parts of beeswax and coconut oil in a double boiler. Once melted, add your essential oils and a few drops of food coloring if desired. Stir well, then carefully pour the mixture into small containers. Let it cool and solidify before using. It’s a simple way to enjoy natural, customized lip care!
40. Easy Homemade Lip Balm Recipe Guide
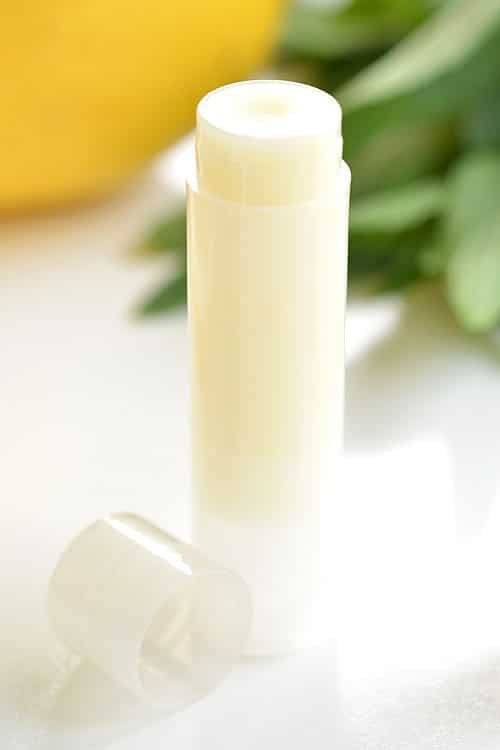
Creating your own homemade lip balm is not only fun but also a rewarding way to ensure you know exactly what you’re putting on your lips. Here’s a simple guide to get you started!
Ingredients you’ll need:
- 2 tablespoons coconut oil: Moisturizes and nourishes.
- 1 tablespoon beeswax beads: Adds firmness and helps to seal in moisture.
- Essential oils: For a personalized scent—try peppermint for a refreshing twist or lavender for relaxation.
- Lip balm tubes or small containers: Easy to carry and use.
Instructions:
- Melt the coconut oil and beeswax together in a double boiler until smooth.
- Remove from heat and mix in your chosen essential oil.
- Pour the mixture into your tubes or containers and let it set for a few hours.
I love customizing mine with different scents; it’s a perfect way to express your style!